SAST Triage and Remediation
Triaging is the process of reviewing, prioritizing, and deciding how to handle each detected vulnerability. Effective triage ensures your team focuses on the most impactful issues first.
Finding Status
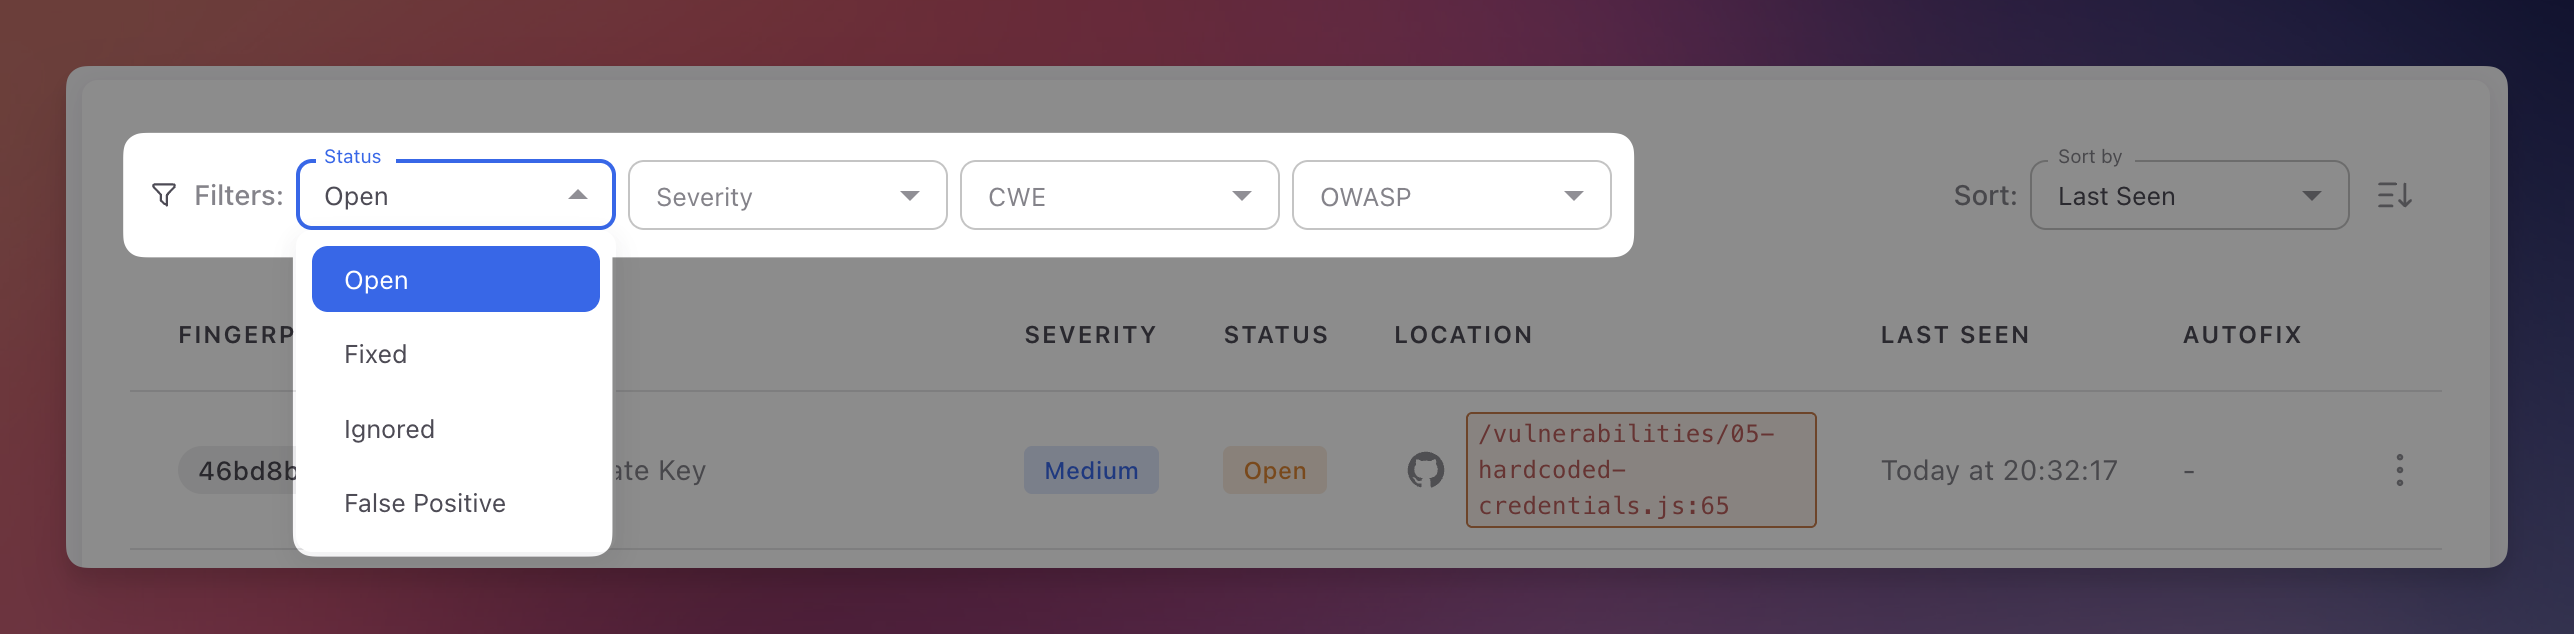
Every finding has a status that tracks its position in the remediation lifecycle:
| Status | Description | How it changes |
|---|---|---|
| Open | Detected and needs attention. All new findings start here | Set automatically on first detection |
| Fixed | No longer detected in subsequent scans | Set automatically when a scan no longer finds the vulnerability. Reopened automatically if it reappears |
| Ignored | Reviewed and intentionally not fixed (unreachable code, accepted risk, compensating control) | Set manually with a required justification |
| False Positive | Determined to be incorrect after review | Set manually. Helps improve AI detection accuracy |
 Click to expand
Reviewing a Finding
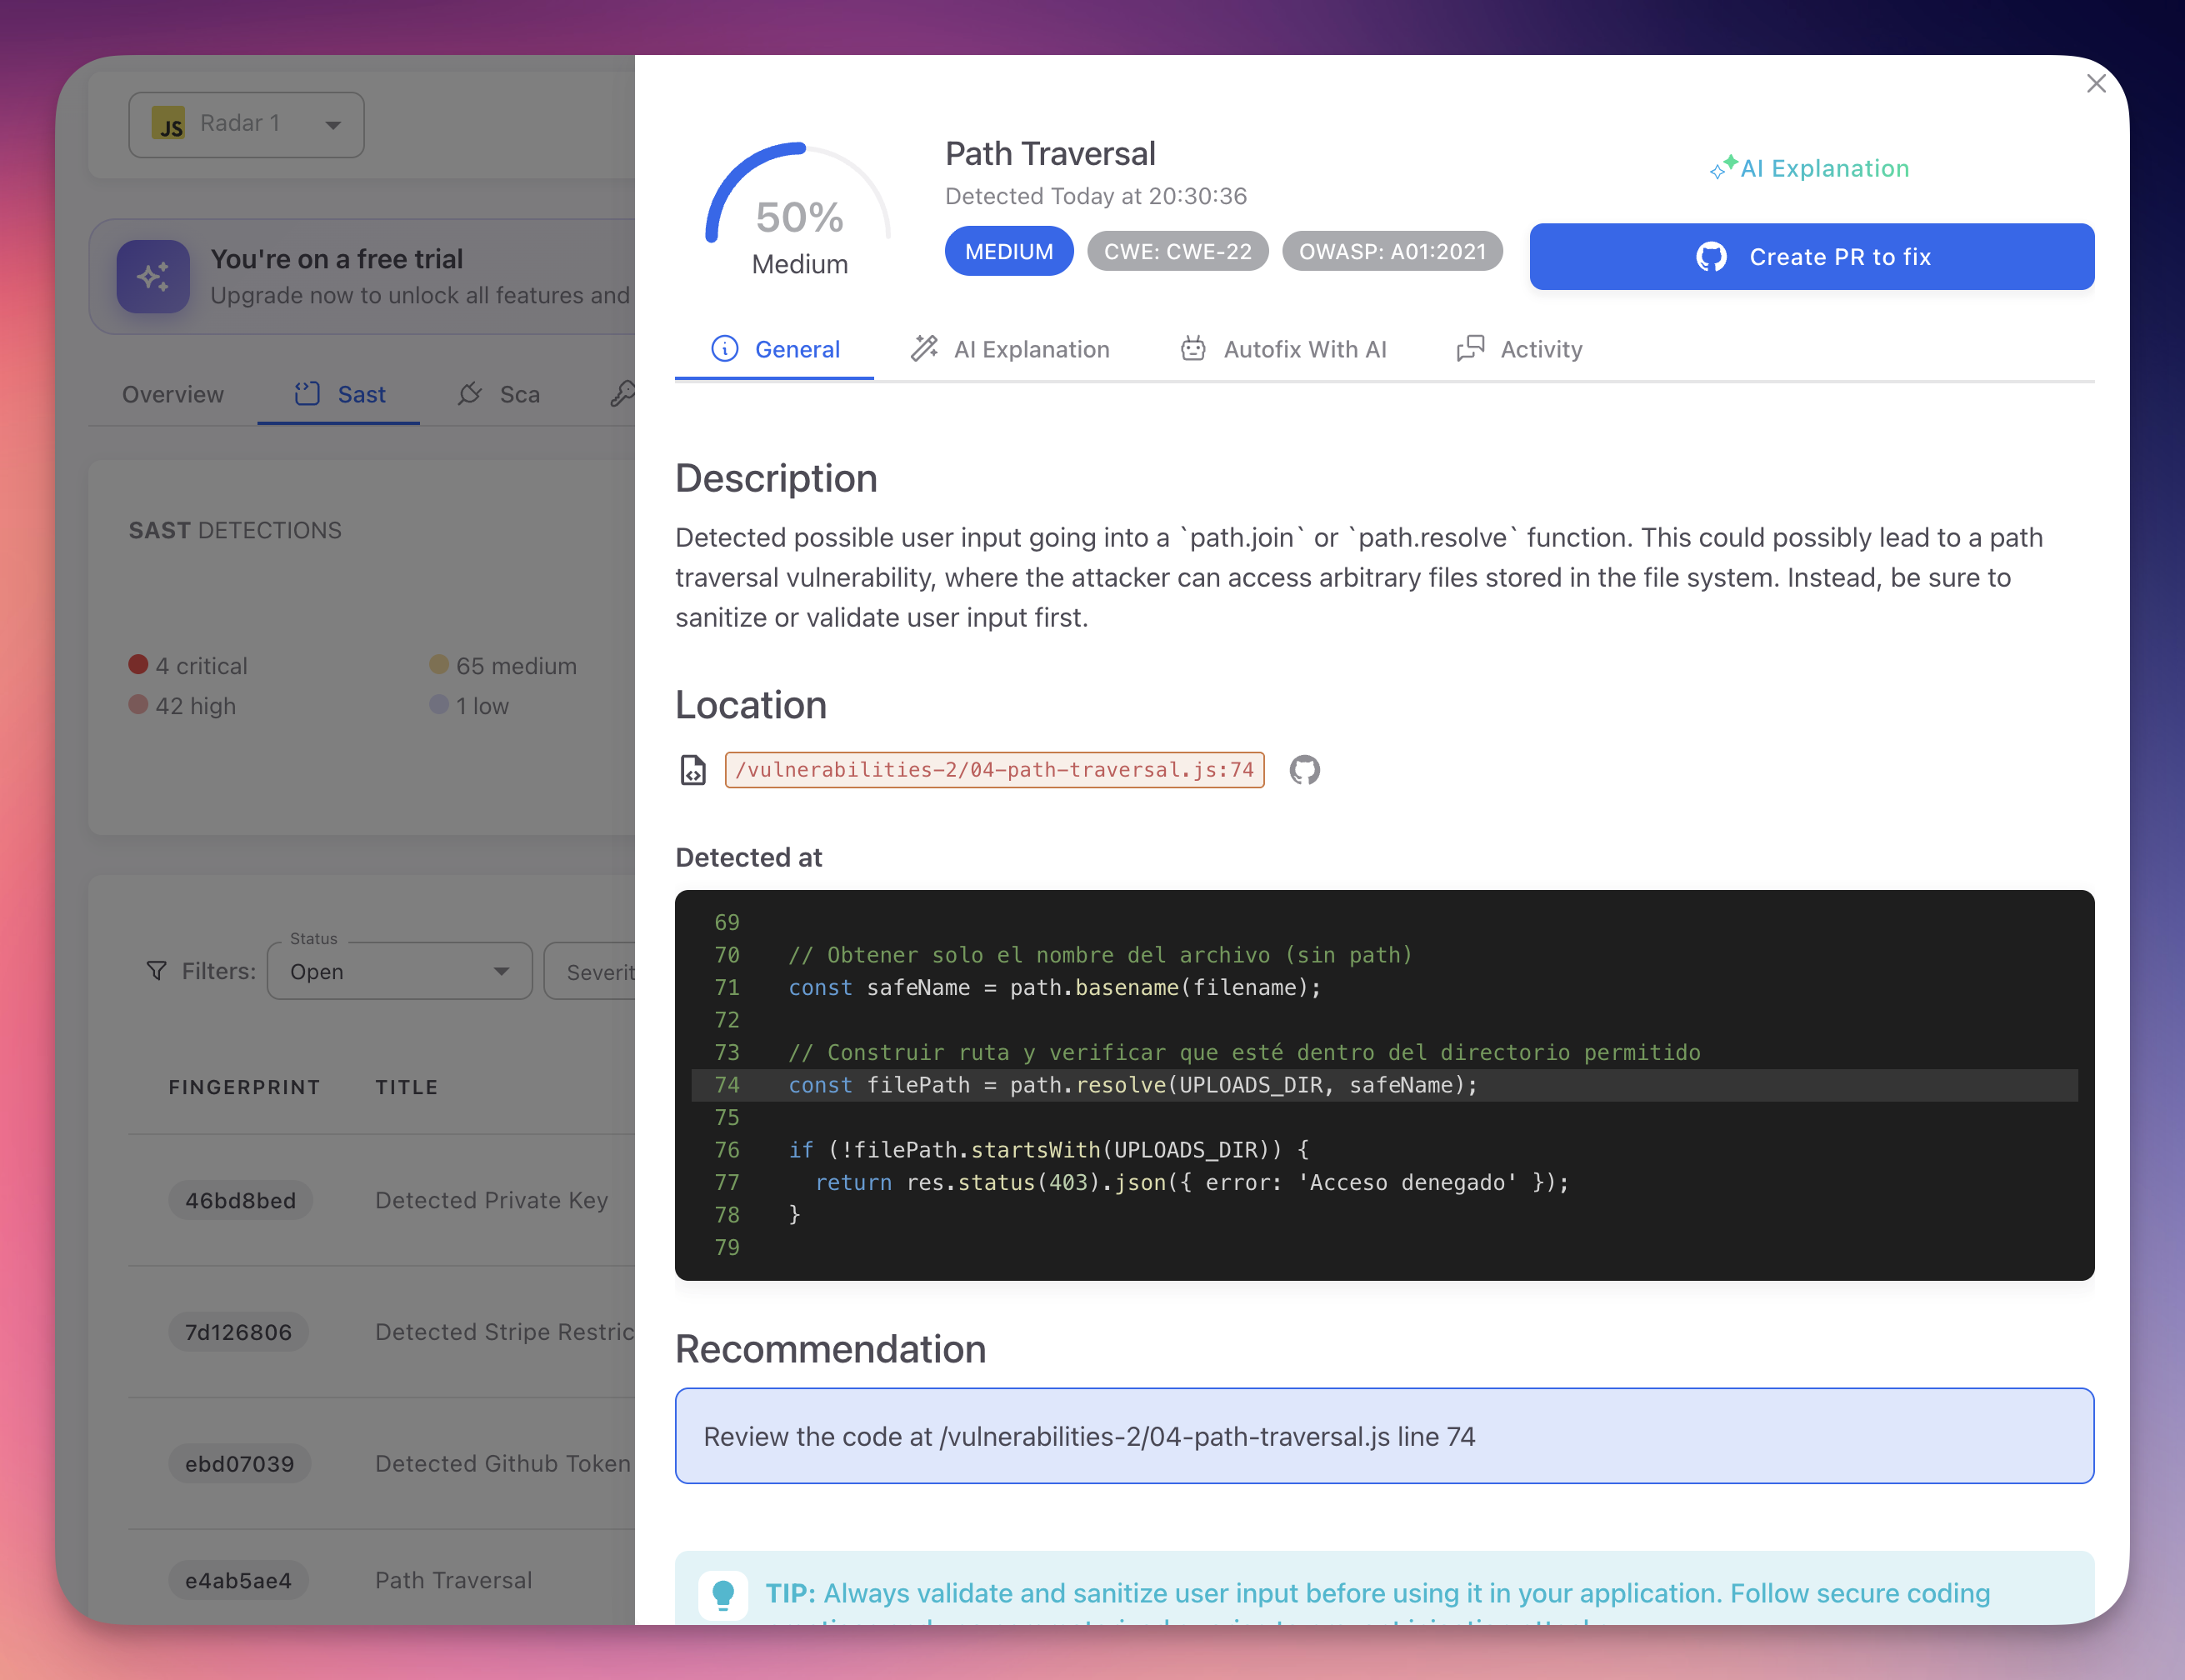
- Open the finding - Click any row in the SAST findings table
- Read the description - Understand the vulnerability type and its impact
- Examine the code - Review the snippet with the vulnerable line highlighted. Check where user input originates, what validations exist, and how it reaches the sensitive operation
- Check CWE and OWASP - Click the badges for the formal weakness definition and prevention strategies
- Read the AI Explanation - Switch to the AI Explanation tab for a contextual analysis specific to your code, including the attack scenario and tailored remediation advice
 Click to expand
Changing Status
Manual
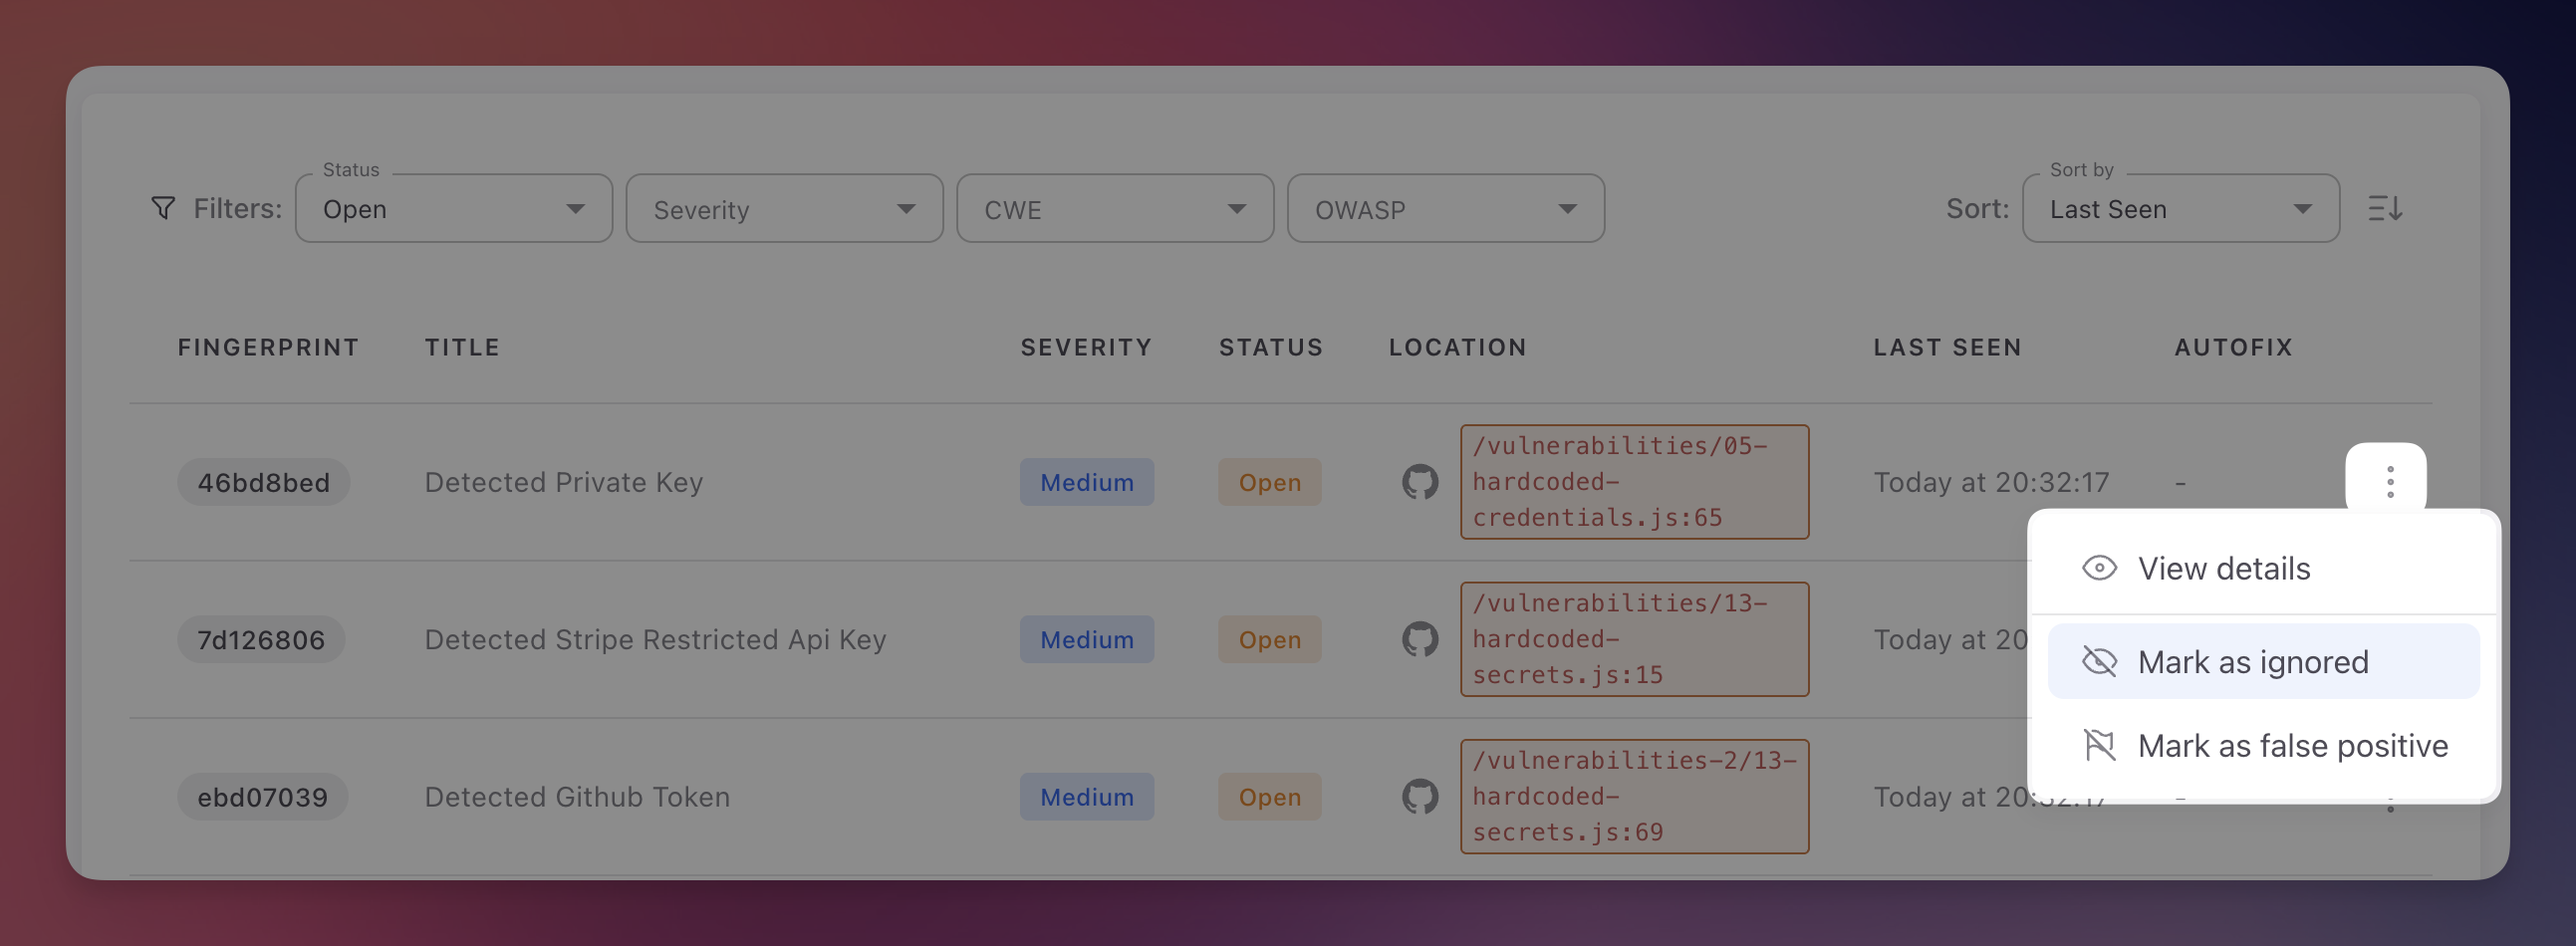
Click the three-dot menu on any finding row or in the detail panel header:
 Click to expand
- Mark as Ignored - Provide a justification for why the risk is accepted
- Mark as False Positive - Indicate the finding does not represent a real vulnerability
Automatic
- Fixed - Applied automatically when a scan no longer detects the vulnerability
- Reopened - Applied automatically if a previously Fixed finding is detected again
Bulk Actions
Select multiple findings using checkboxes to apply bulk status changes (Mark as Ignored, Mark as False Positive, Export).
Remediation Options
Option 1: Manual Fix
- Review the code snippet and remediation guidance
- Check the AI Explanation tab for framework-specific recommendations
- Implement the fix, commit, and push
- The next scan verifies the fix and marks the finding as Fixed automatically
Option 2: AutoFix Pull Request
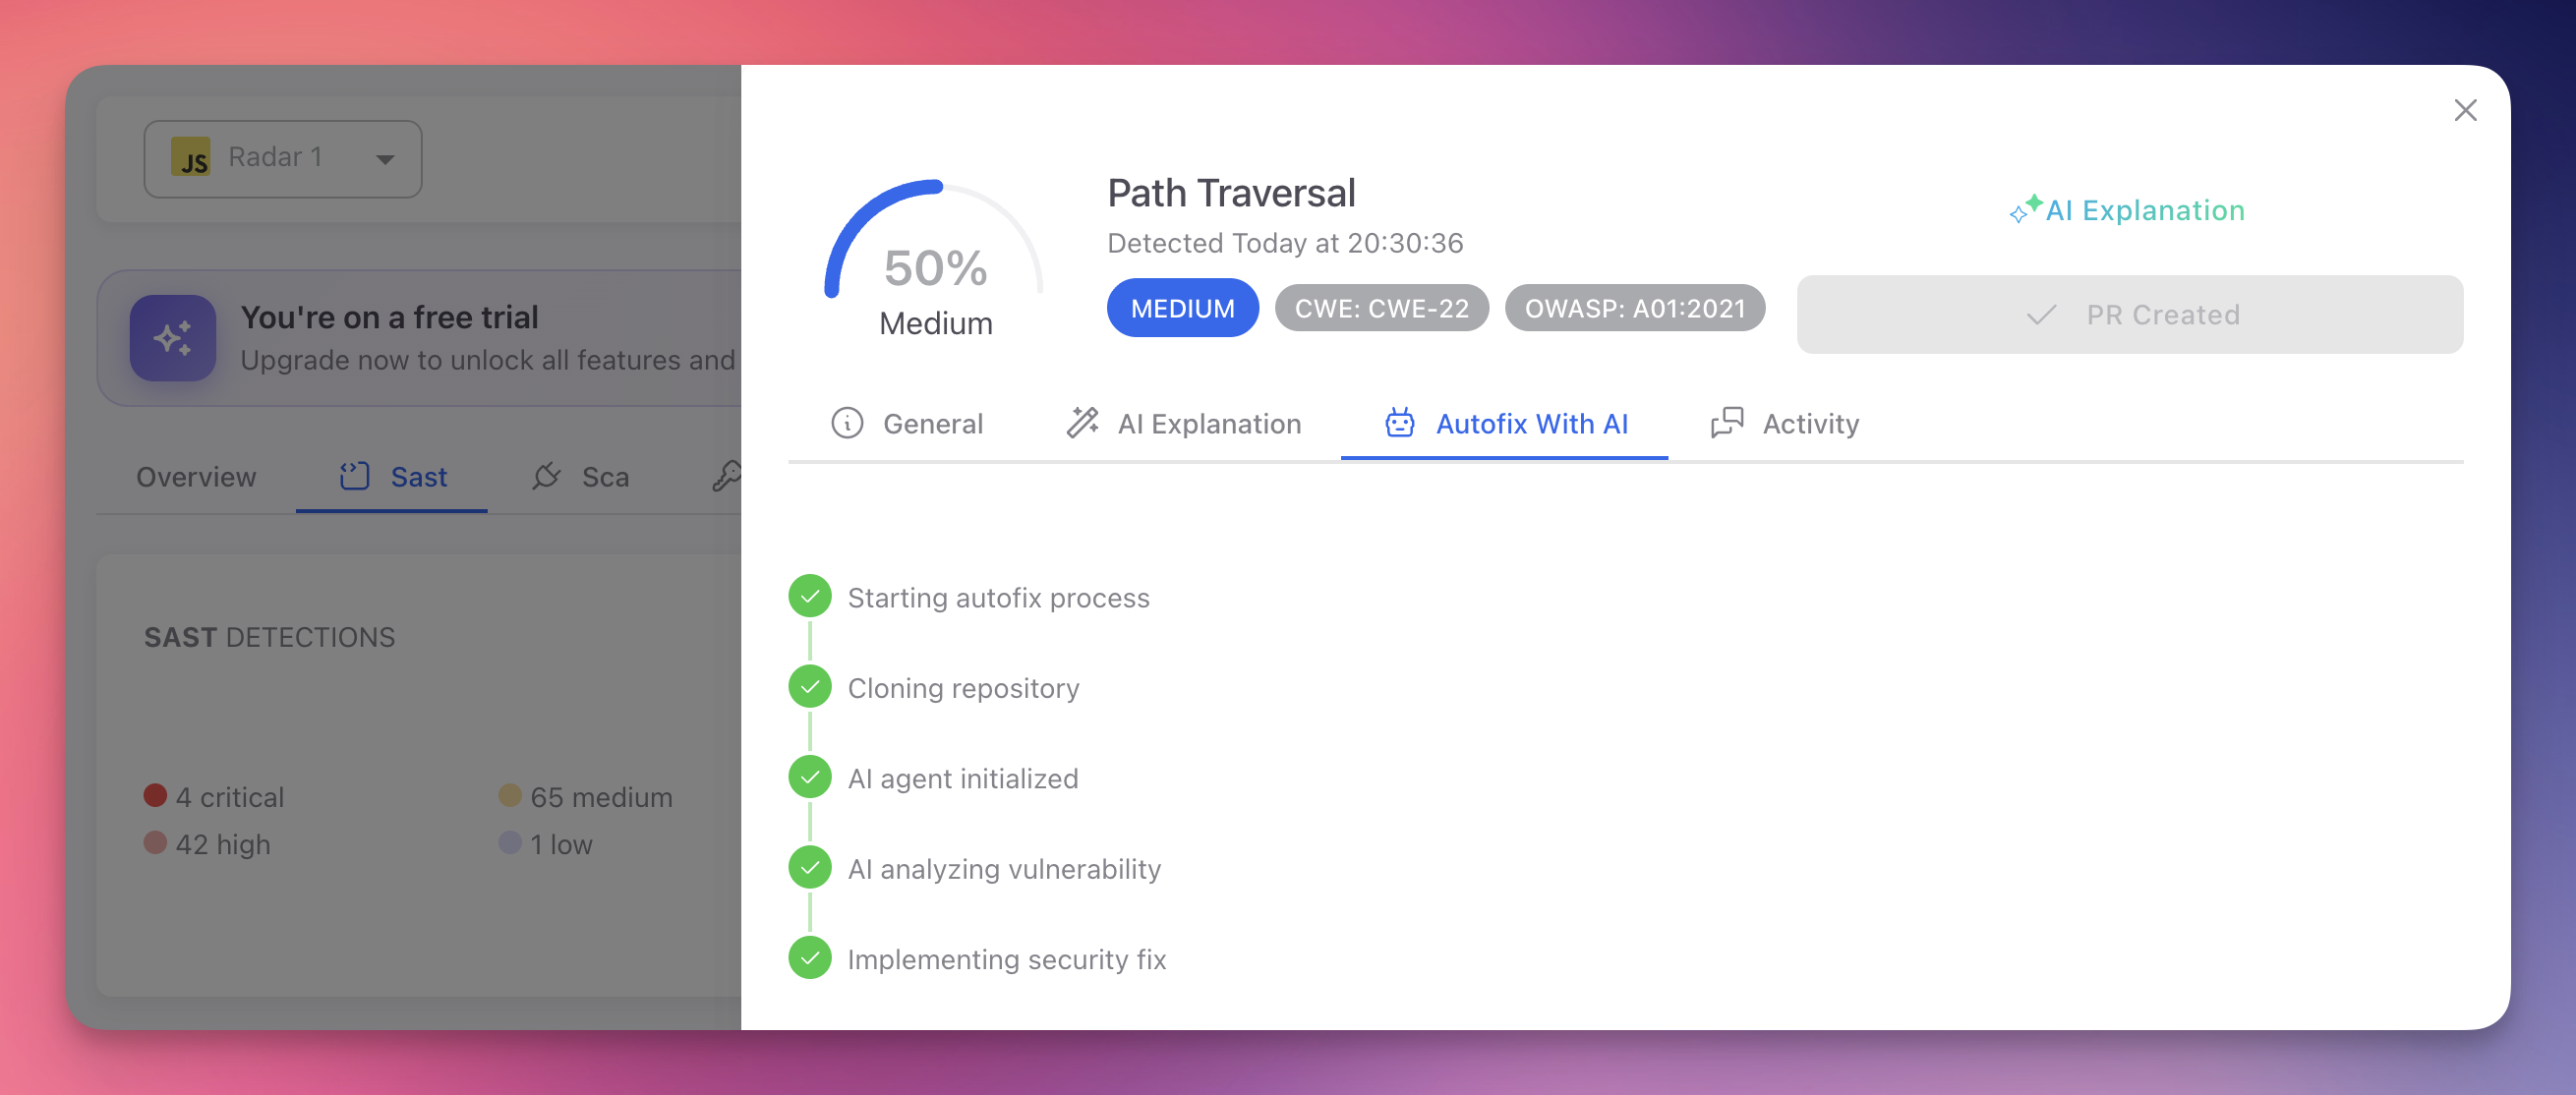
- Open the finding and switch to the Autofix With AI tab
- Radar clones the repository, initializes the AI agent, analyzes the vulnerability, and implements the fix
- Click Create PR to fix to open a pull request in your repository
 Click to expand
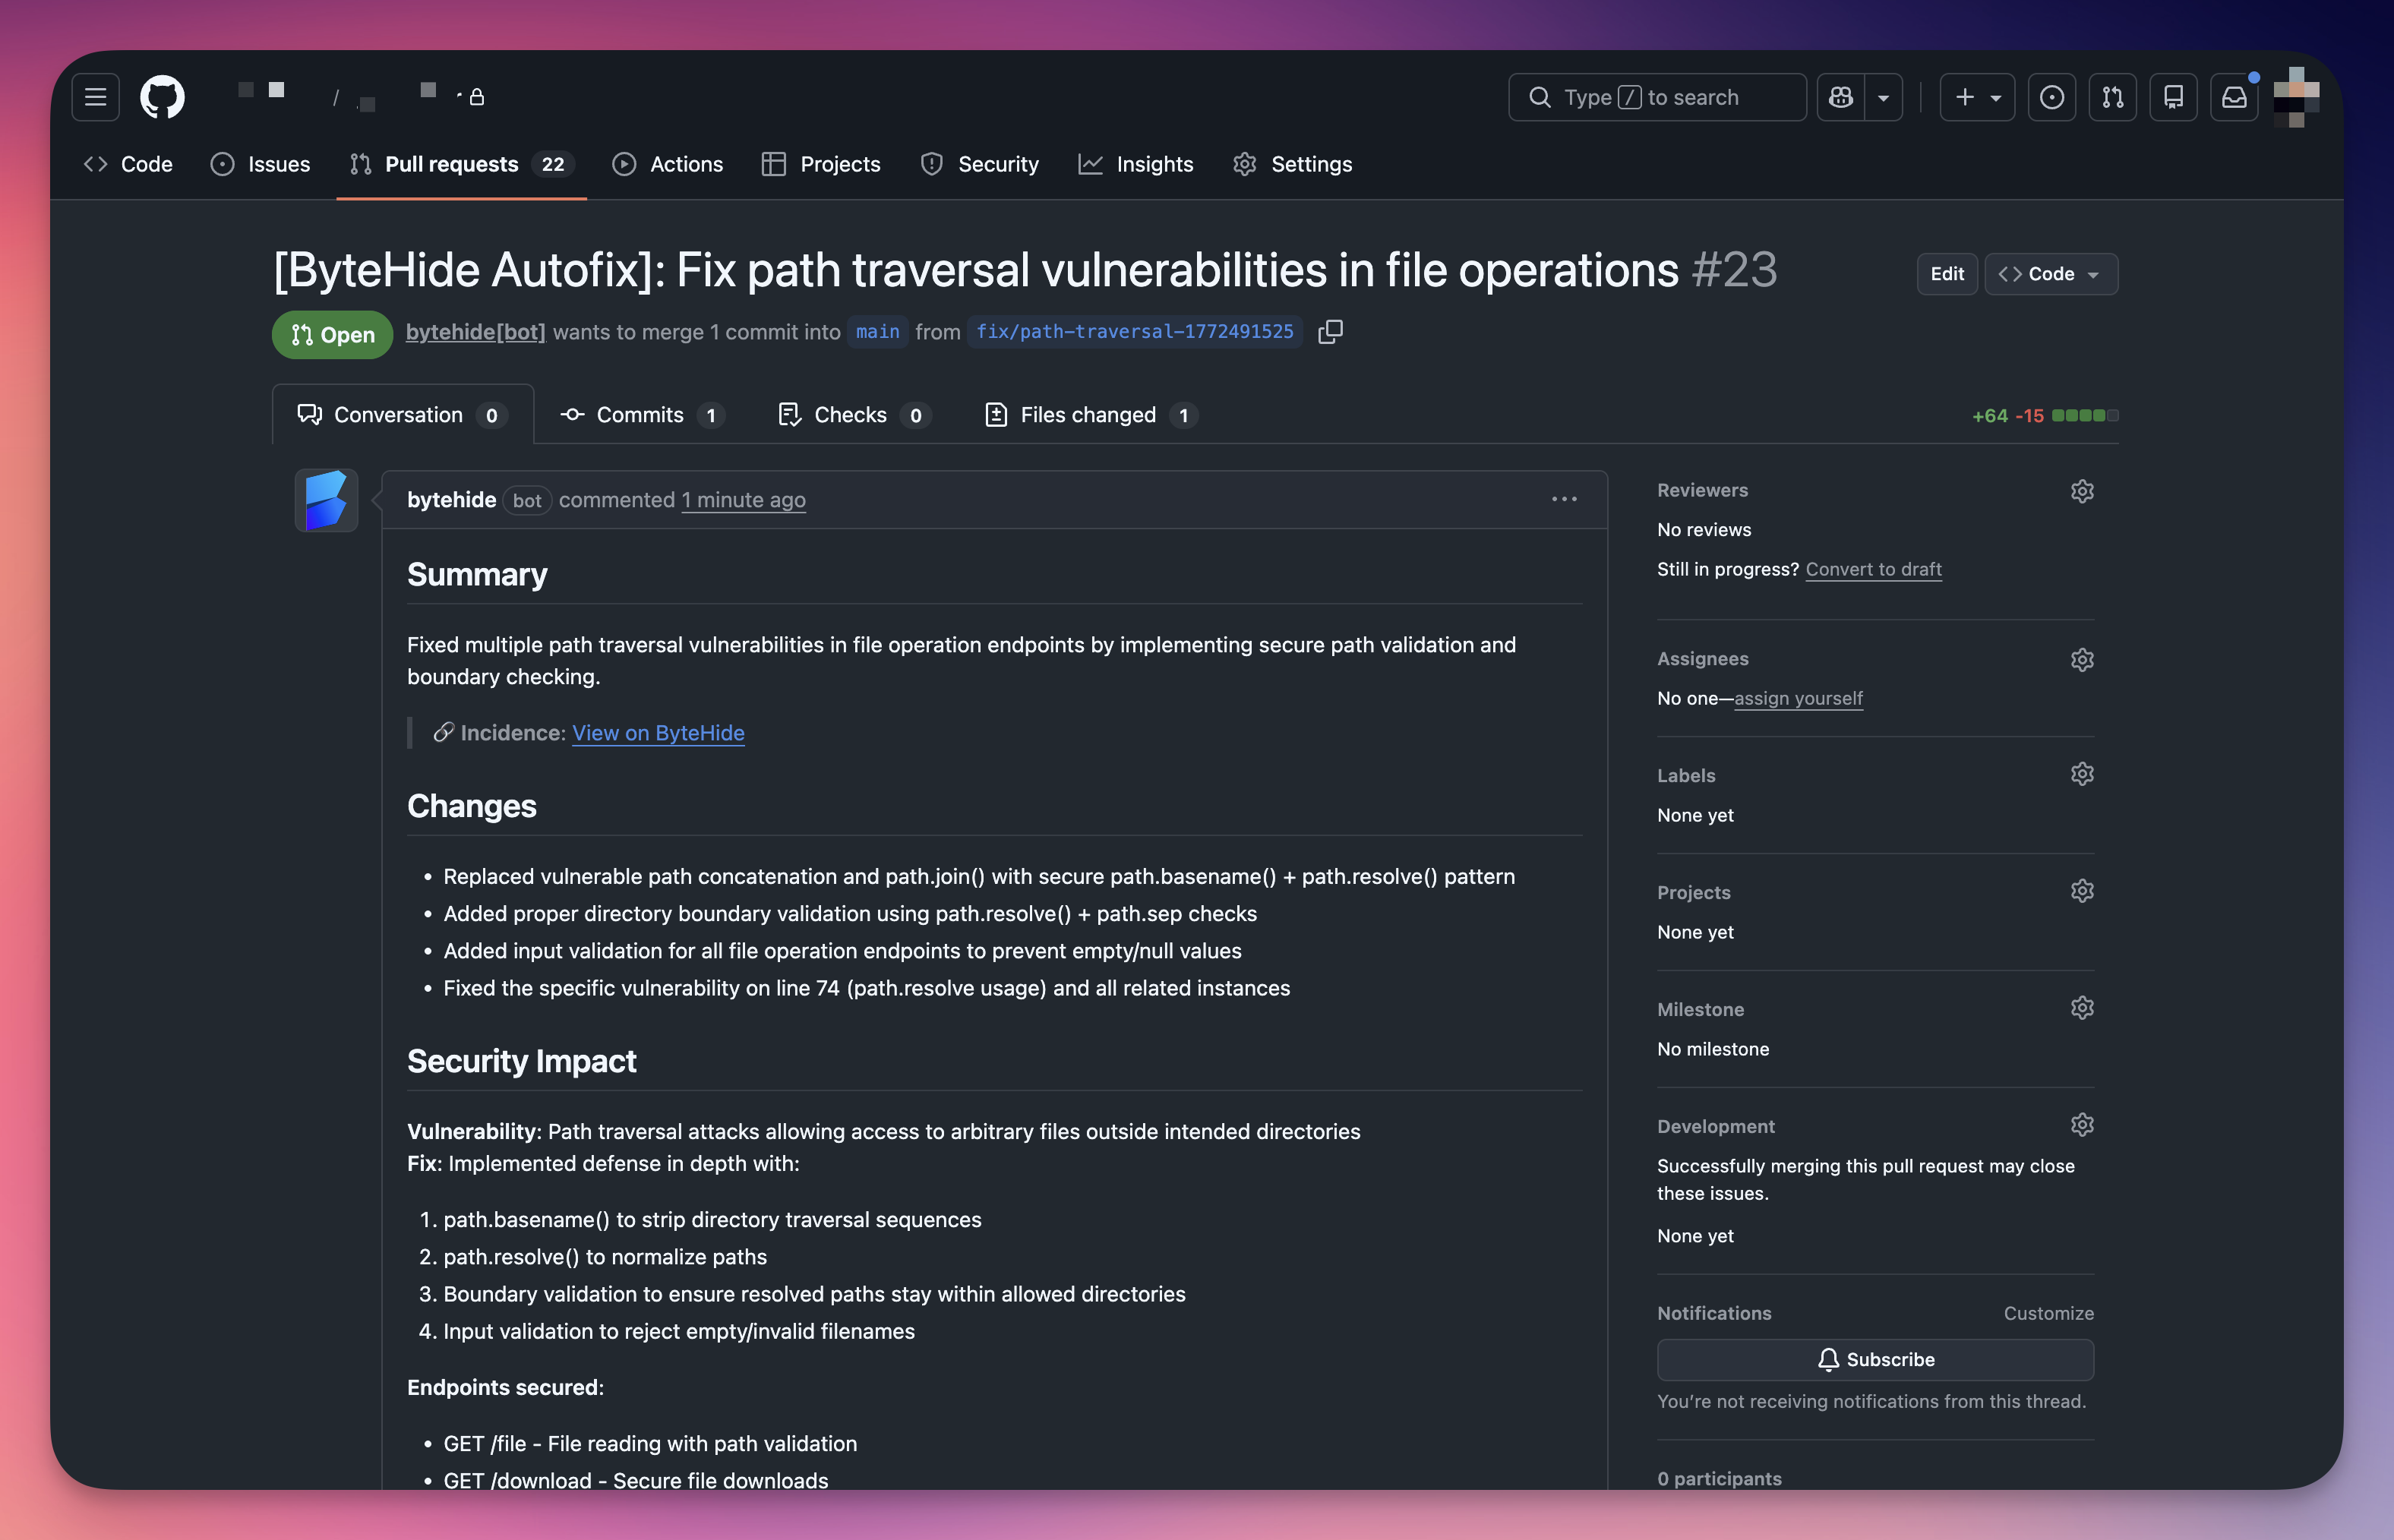
The generated PR includes a summary of changes, security impact analysis, and the specific endpoints secured:
 Click to expand
See AutoFix for details.
Always Review AutoFix PRs
While Radar's AI generates contextually aware fixes, always review the pull request before merging. Verify it does not break existing functionality and handles edge cases correctly.
Option 3: Accept the Risk
Mark the finding as Ignored with a clear justification. Document any compensating controls. Schedule periodic reviews of ignored findings to reassess.
Prioritization Strategy
| Priority | Severity | Action |
|---|---|---|
| Immediate | Critical | Fix now. Exploitable vulnerabilities leading to system compromise or data breach |
| Current sprint | High | Serious vulnerabilities requiring prompt attention |
| Backlog | Medium | Exploitable under specific conditions. Plan for regular development cycles |
| Periodic review | Low | Best practice violations. Address when working on related code |
Sprint-Based Remediation
At sprint start, filter by Critical + High severity. Assign findings based on code ownership. Include AutoFix PRs for quick wins. Track Open finding count across sprints to measure security debt reduction.
Activity and Collaboration
The Activity tab on each finding provides:
- Comments - Share analysis, ask questions, document decisions
- Status change history - Who changed what, when, and why (with justifications for Ignored/False Positive)
- Scan history - When the finding was first detected and last seen
This audit trail is valuable for compliance and helps new team members understand past decisions.
Next Steps
AutoFix
AI-generated code fixes opened as pull requests.
AI Explanation
Contextual AI analysis of vulnerabilities.
View SAST Findings
Navigate and filter the SAST findings table.