Configuration Workflow
The ByteHide Shield desktop configurator provides a streamlined workflow for protecting your Visual Studio solutions. This guide walks you through the entire process from opening your solution to applying protection.
Need the Latest Version?
Make sure you have the latest version of the Shield Desktop Configurator. Download the current release with the newest features and improvements.
Configuration Workflow Overview
The typical workflow for using the Shield desktop configurator consists of these key steps:
- Select your Visual Studio solution file
- Install the Shield integration package (if needed)
- Configure your ByteHide Shield token
- Configure general settings
- Customize protection settings
- Apply protection to your projects
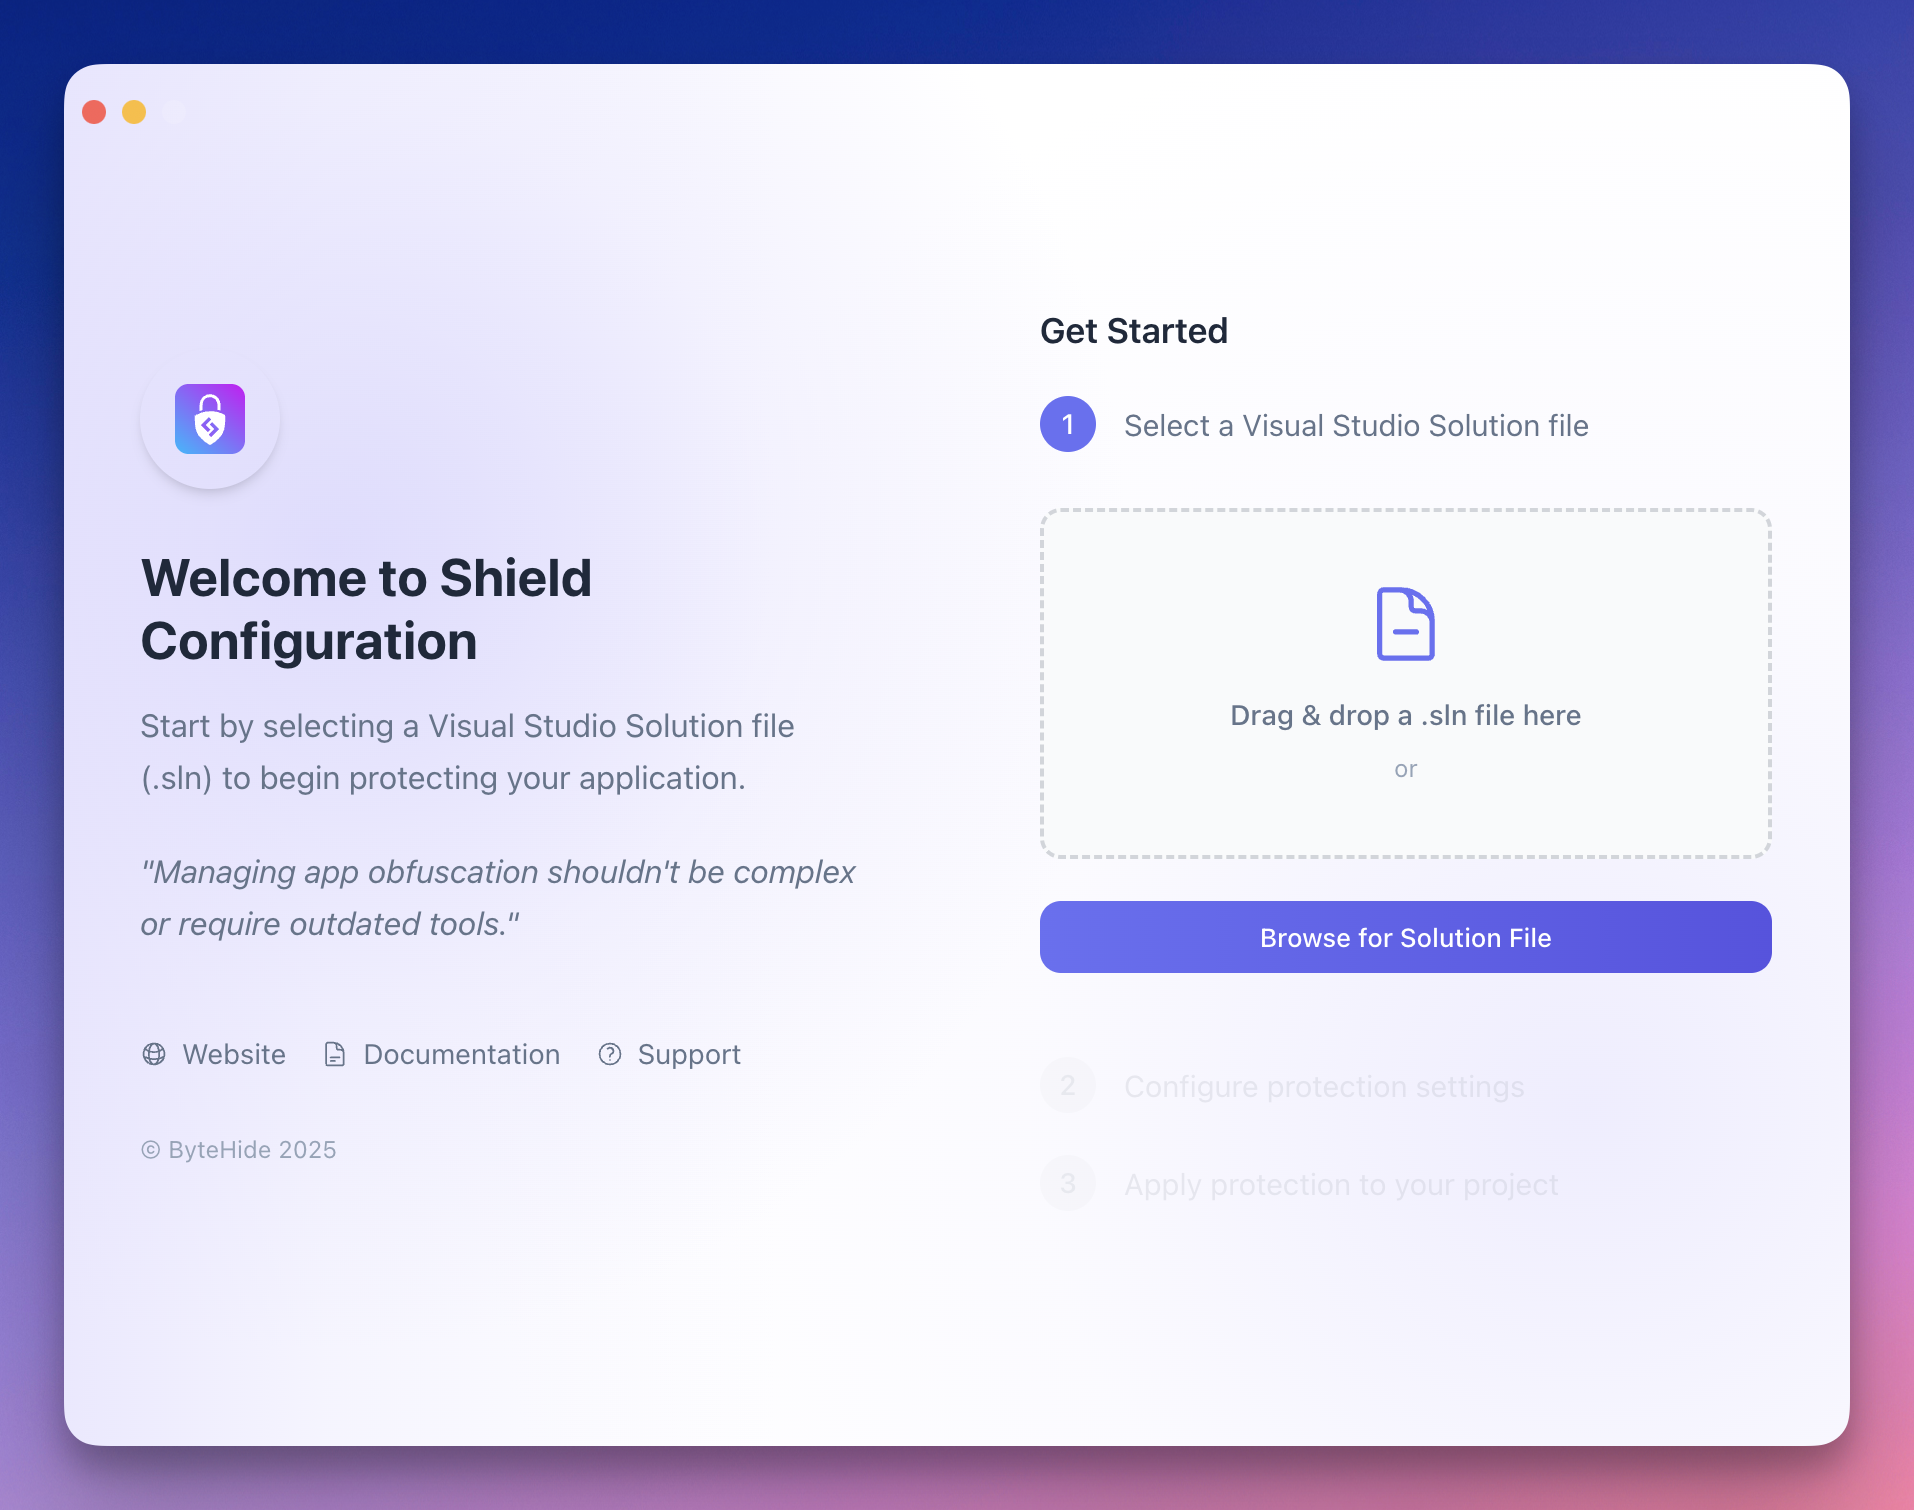
Step 1: Selecting Your Solution
When you launch the Shield configurator, you'll be prompted to select your Visual Studio solution file:
 Click to expand
- Click Browse for Solution File or drag and drop your
.slnfile into the designated area - Once selected, the configurator will analyze your solution and display all projects
 Click to expand
The configurator supports all Visual Studio solution types including .NET Framework, .NET Core, and .NET 5+.
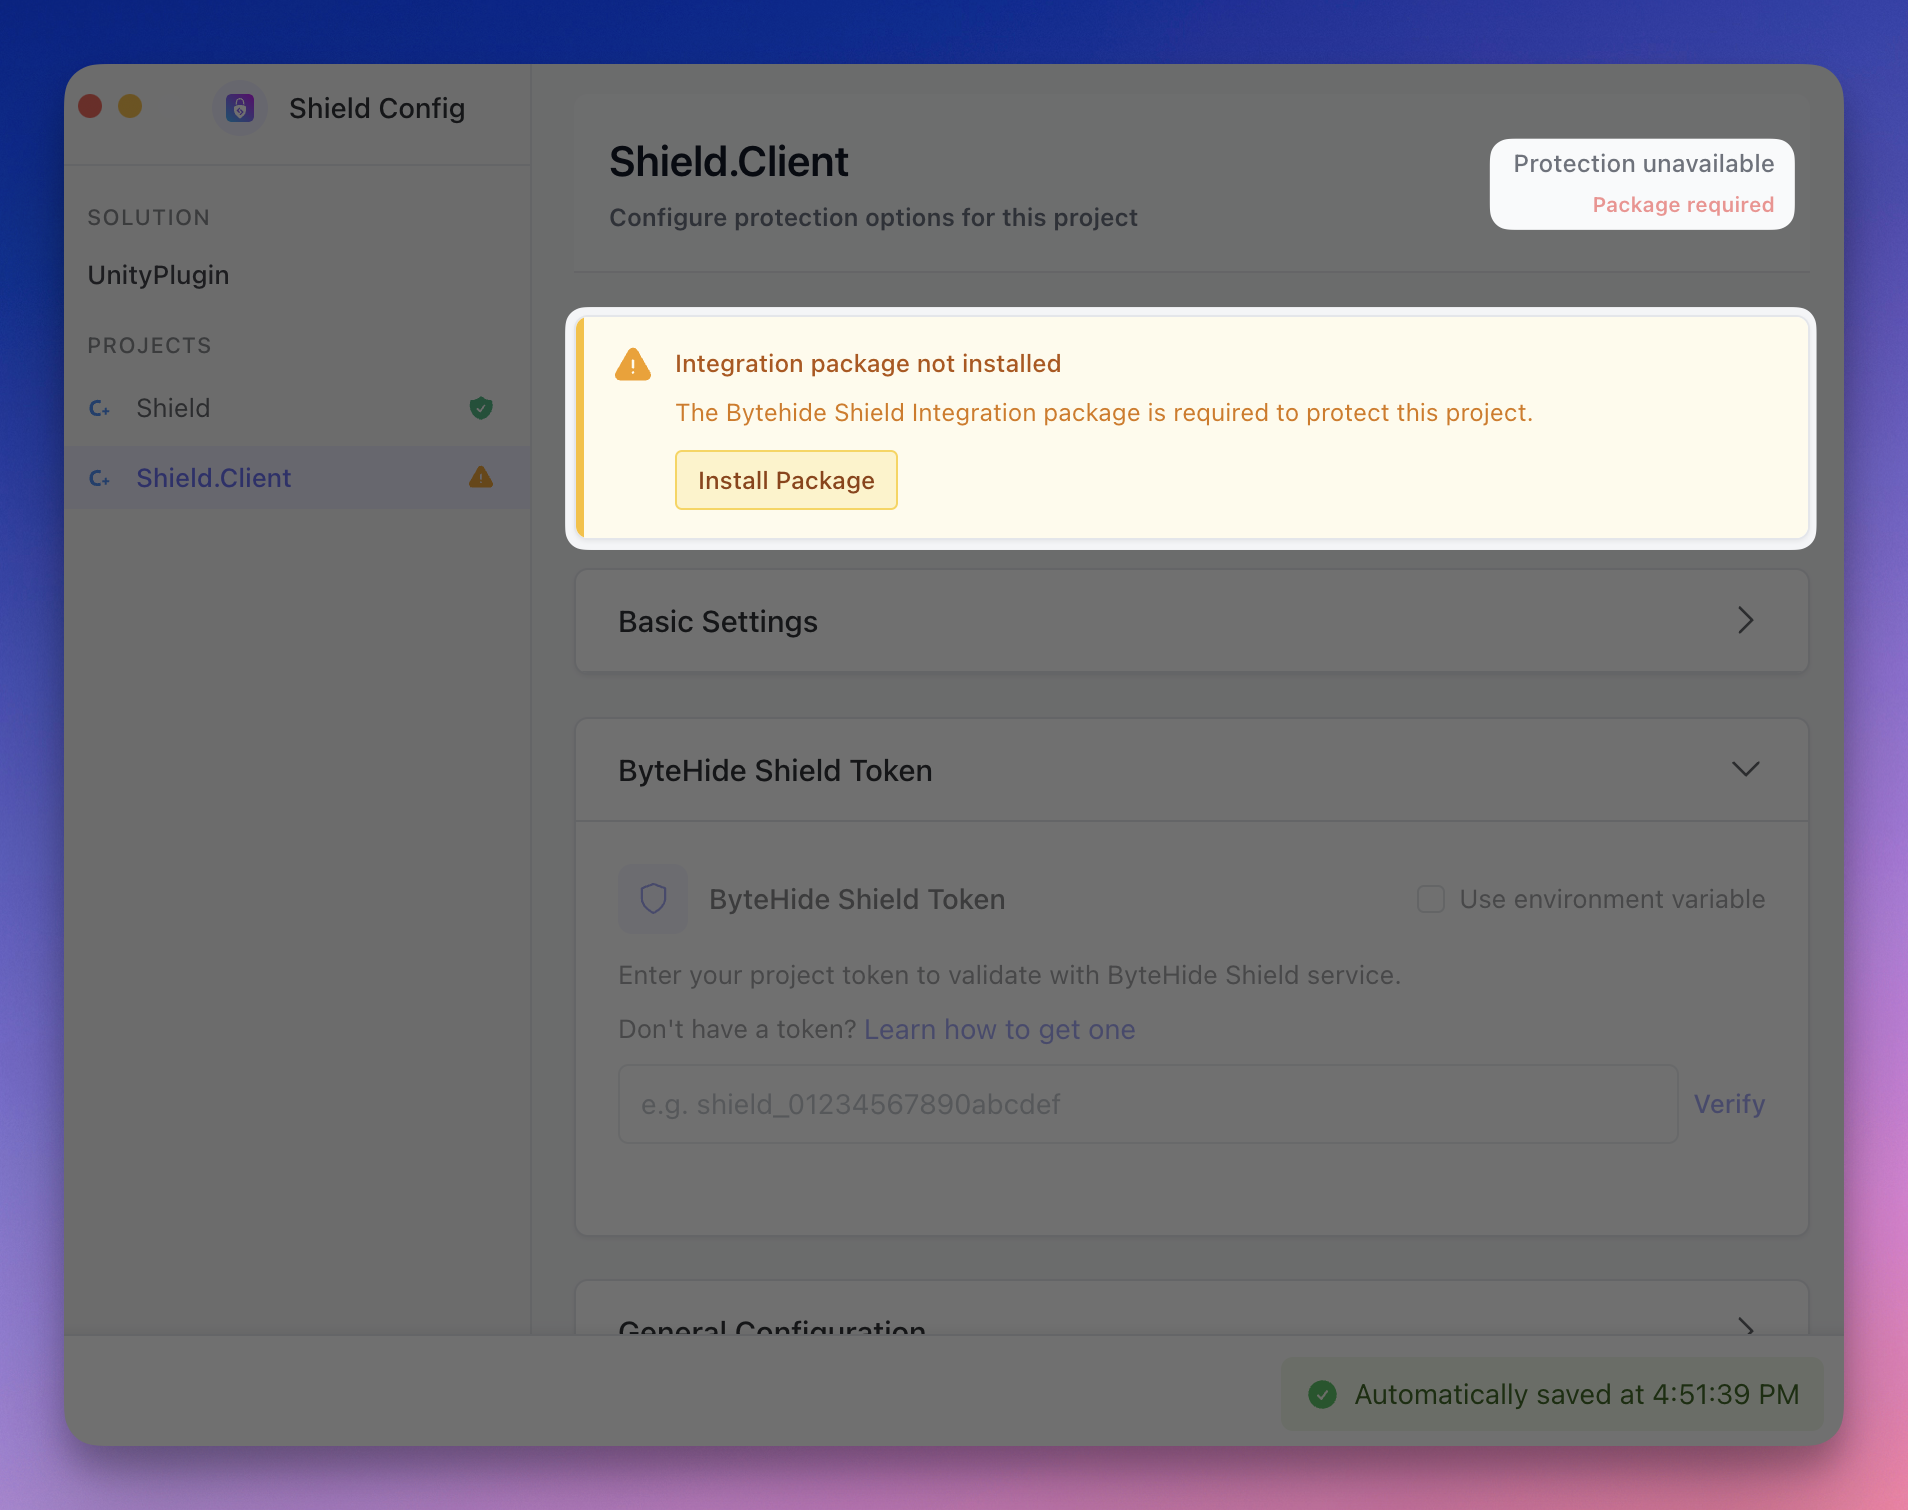
Step 2: Installing the Shield Integration Package
If the Shield integration package is not already installed in your projects, you'll see a notification:
- Look for the "Integration package not installed" message
- Click Install Package to add the ByteHide Shield package to your project
- The configurator will handle the NuGet package installation automatically
 Click to expand
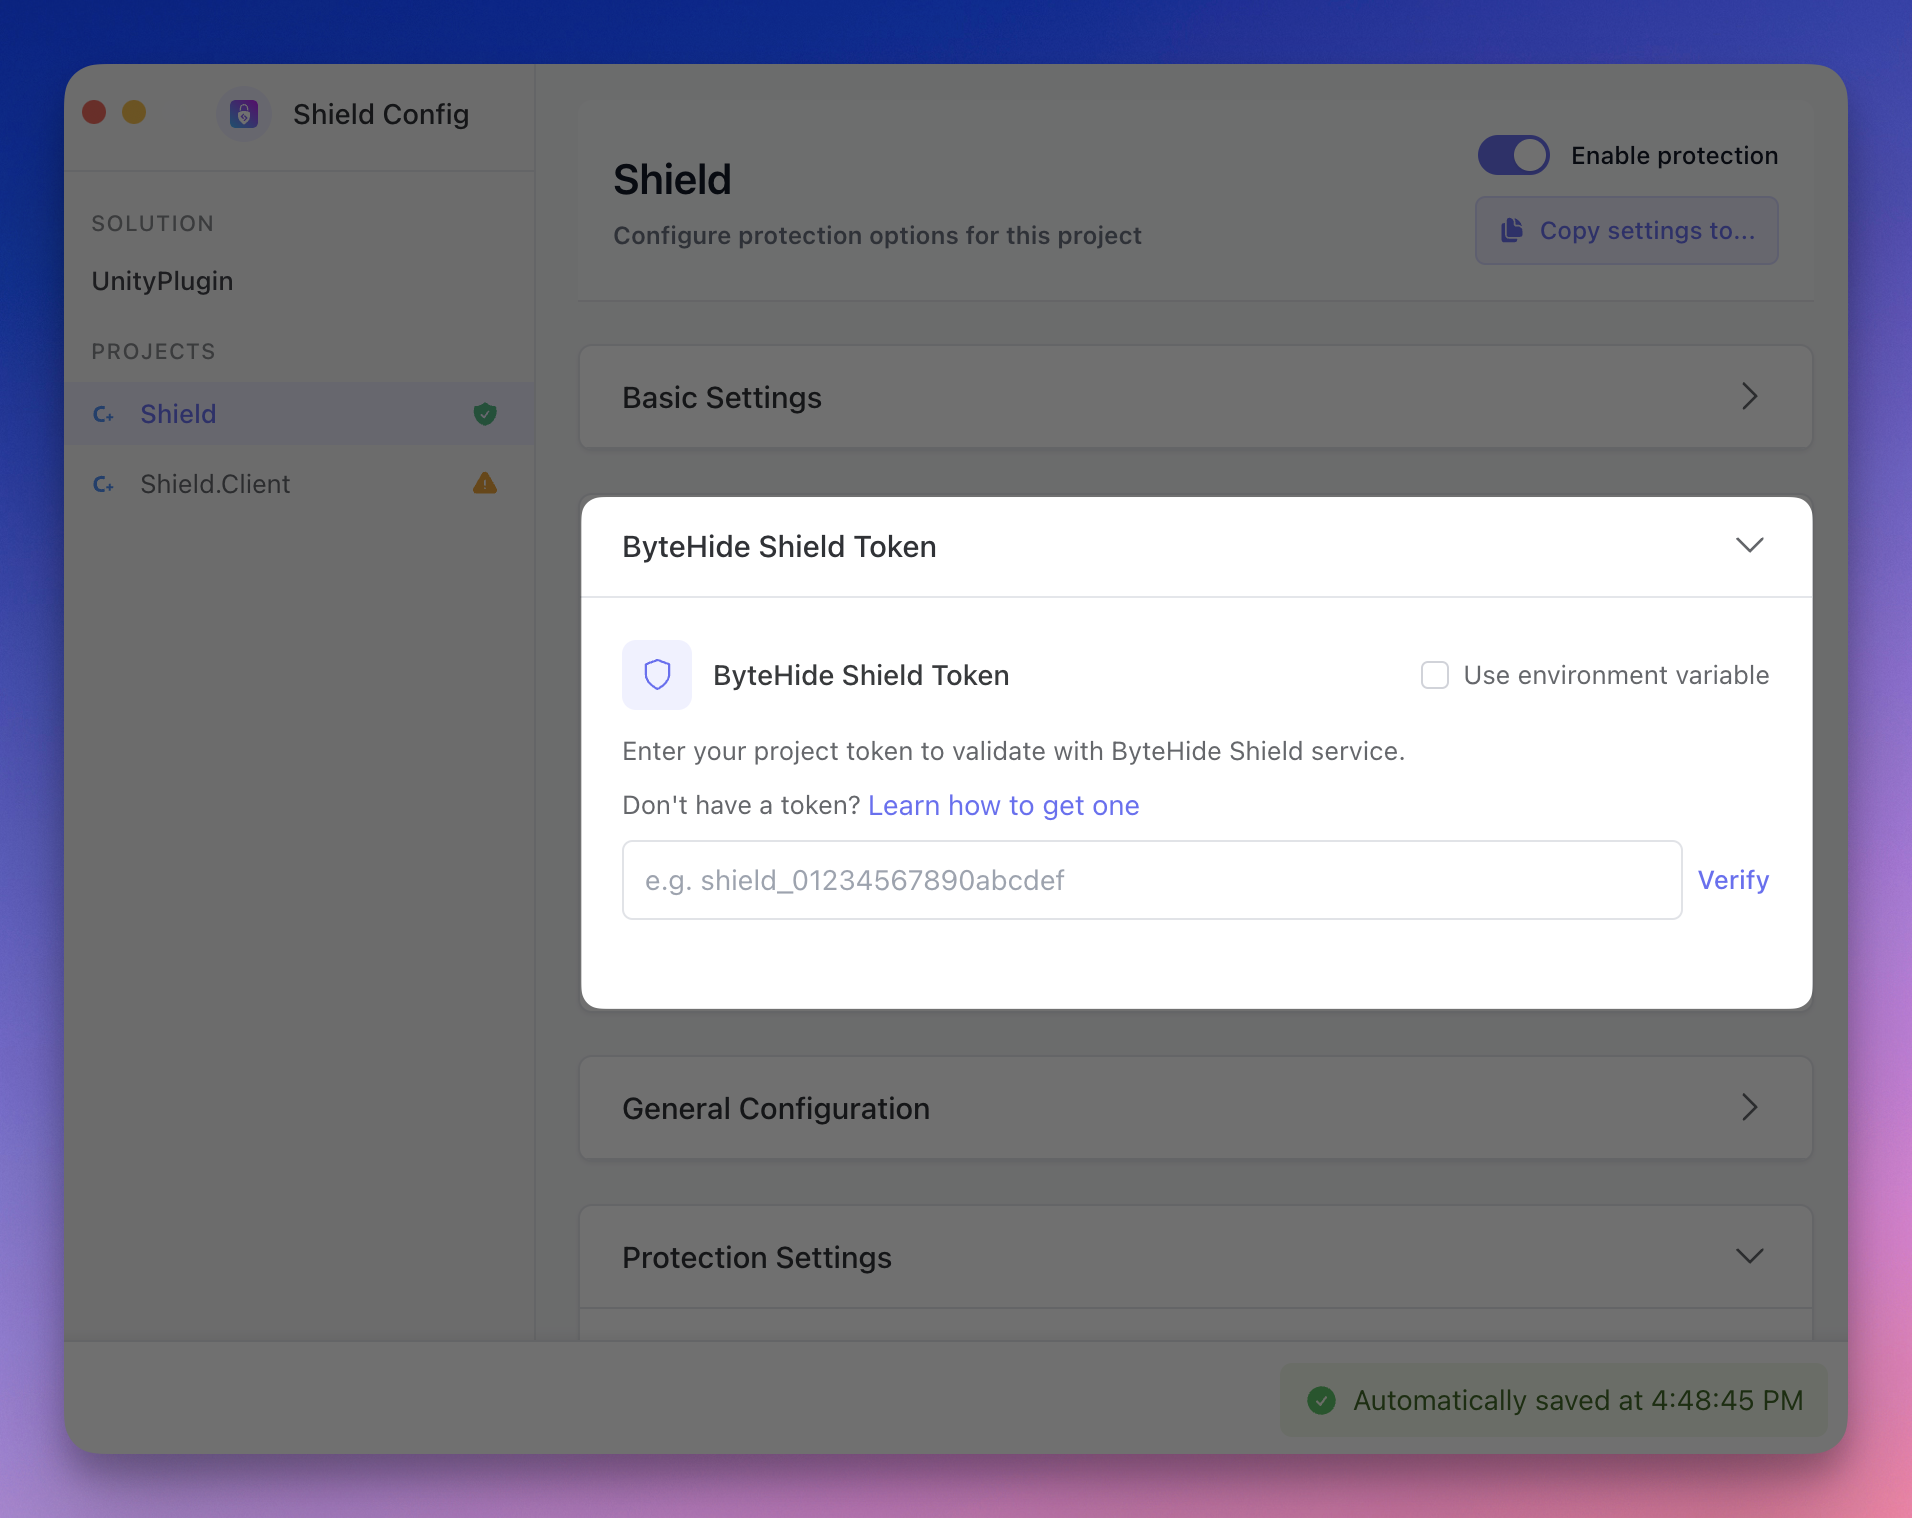
Step 3: Configuring Your Token
After selecting your solution, you'll need to configure your ByteHide Shield token:
- Navigate to the ByteHide Shield Token section
- Enter your project token in the provided field
- Click Verify to validate your token
- Optionally, enable the "Use environment variable" option if you prefer to store your token as an environment variable
 Click to expand
If you don't have a project token yet, see Get Project Token for detailed instructions on obtaining one.
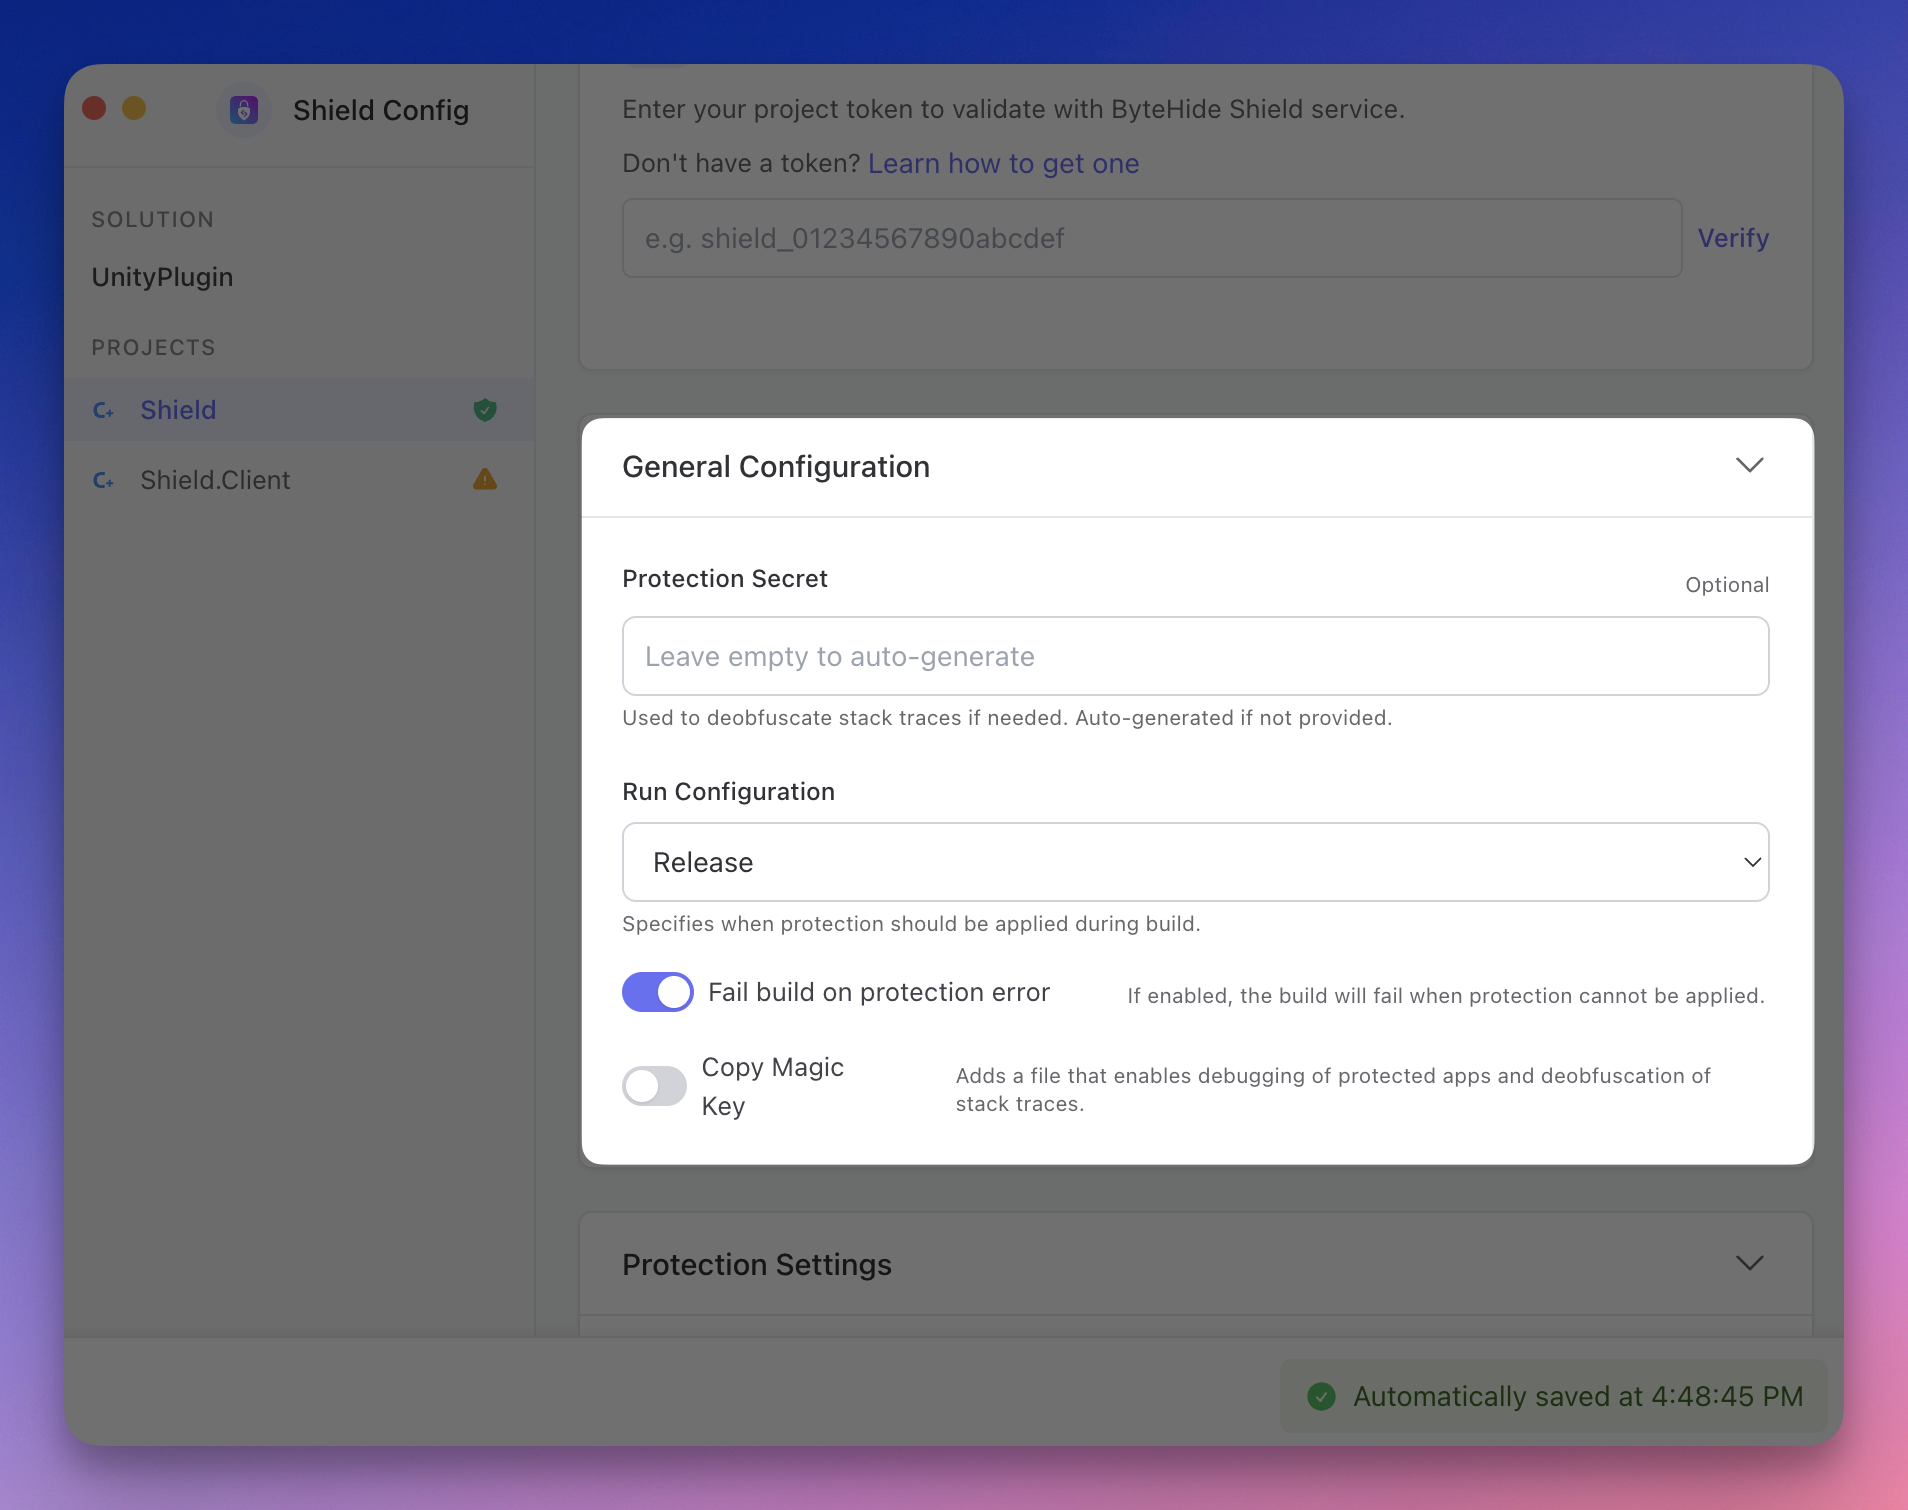
Step 4: Configuring General Settings
Configure the general settings for your solution:
- Expand the General Configuration section
- Set your Protection Secret (or leave empty to auto-generate)
- Configure the Run Configuration to specify when protection should be applied (e.g., Release mode only)
- Toggle options like Fail build on protection error
- Enable Copy Magic Key if you need the magic file for debugging
 Click to expand
The Protection Secret is used for debugging protected applications and decoding obfuscated stack traces. If you don't specify one, a random value will be generated.
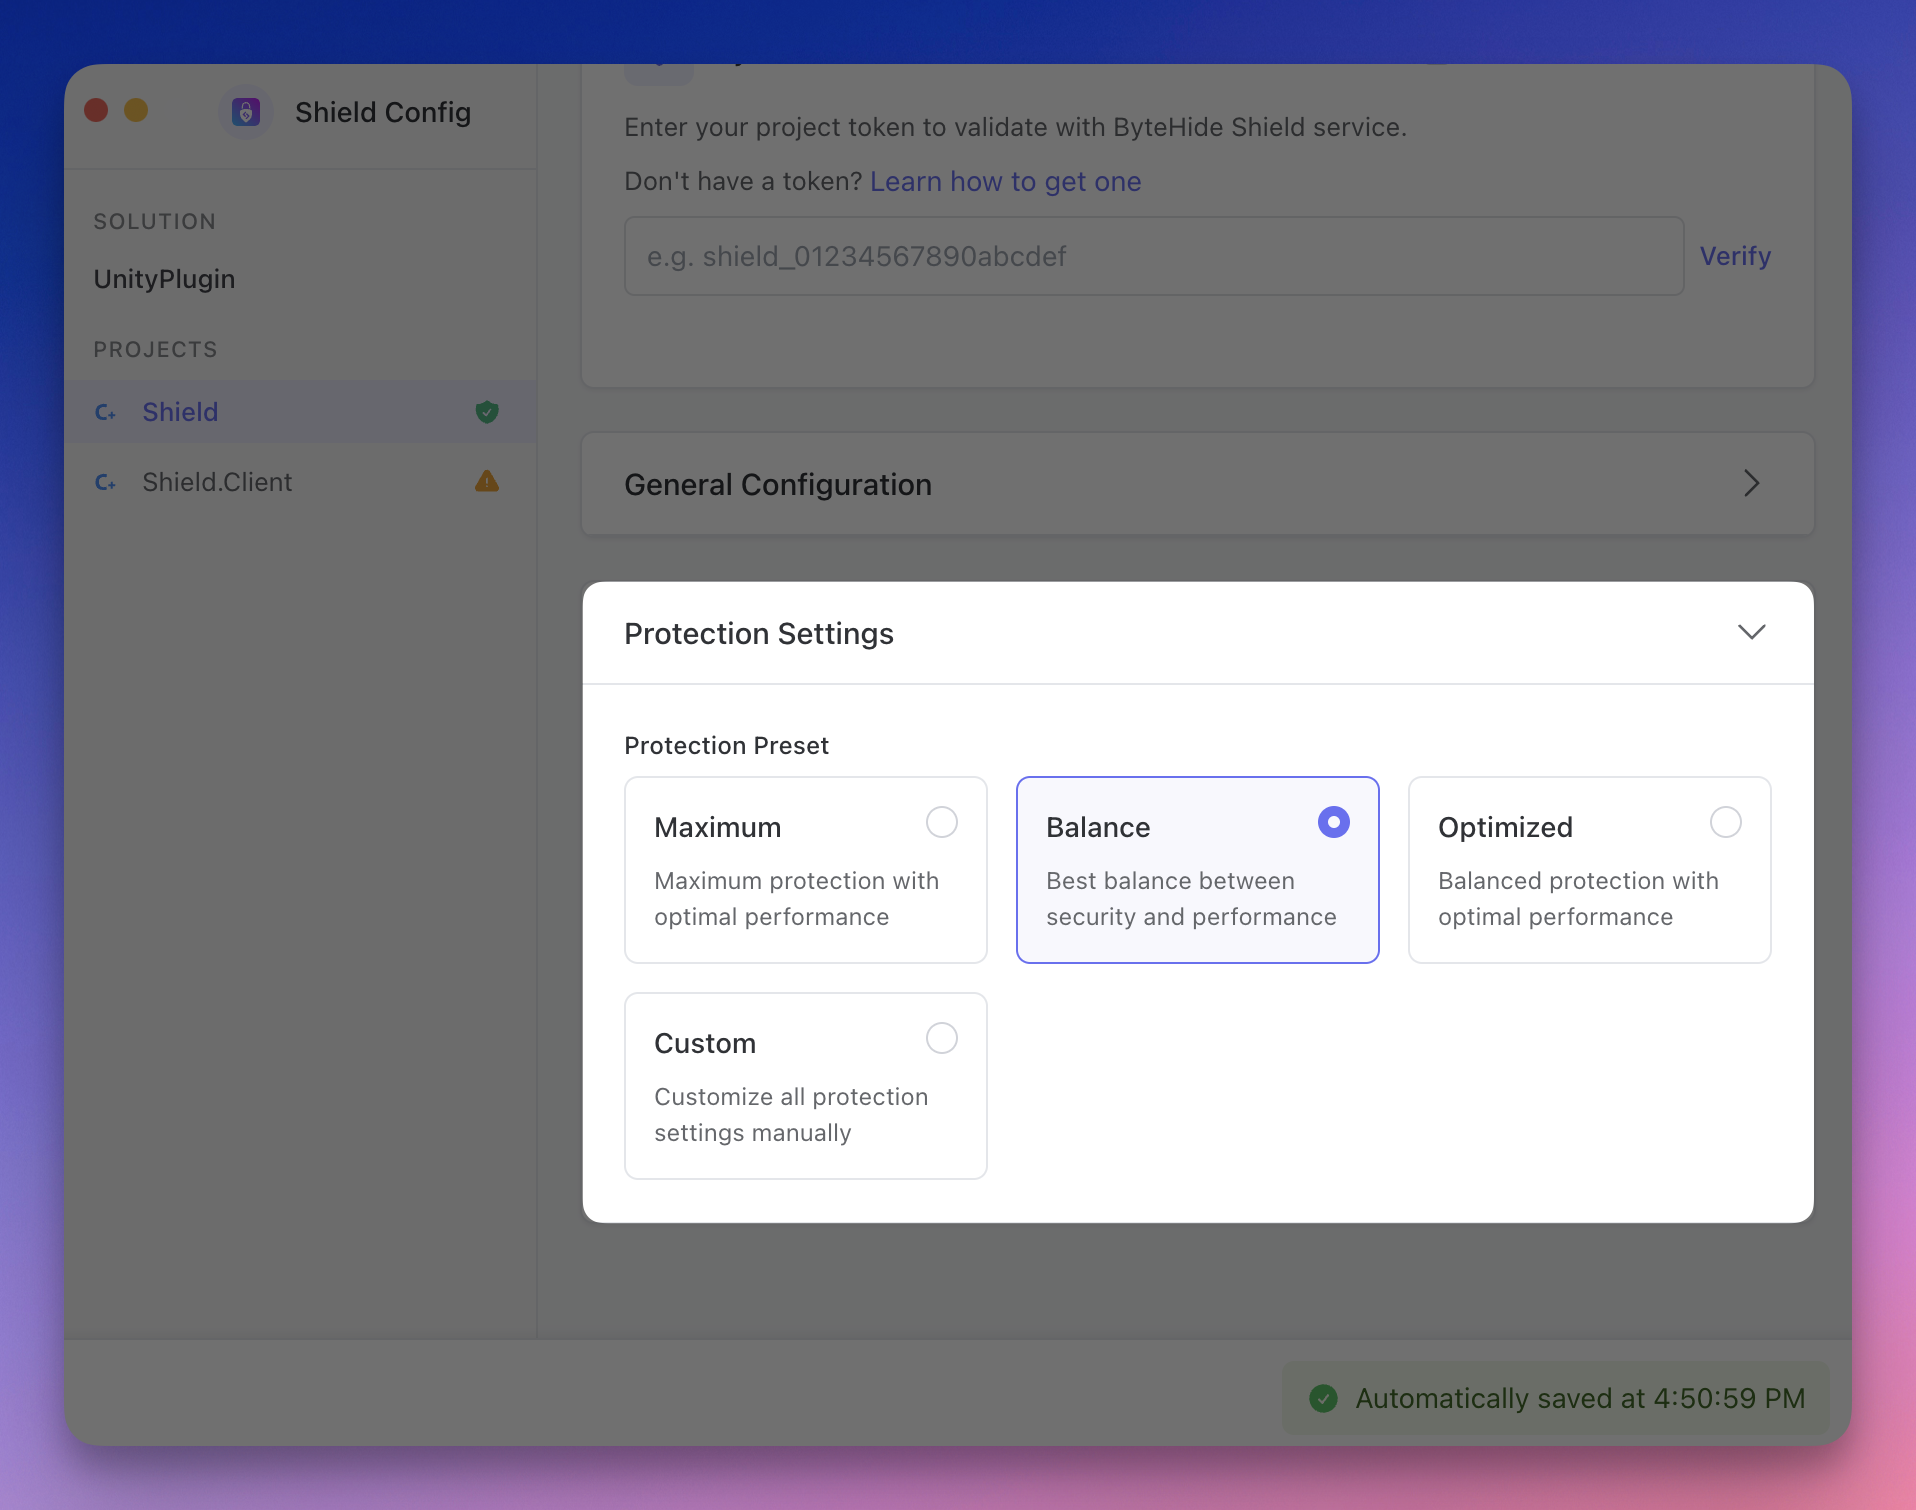
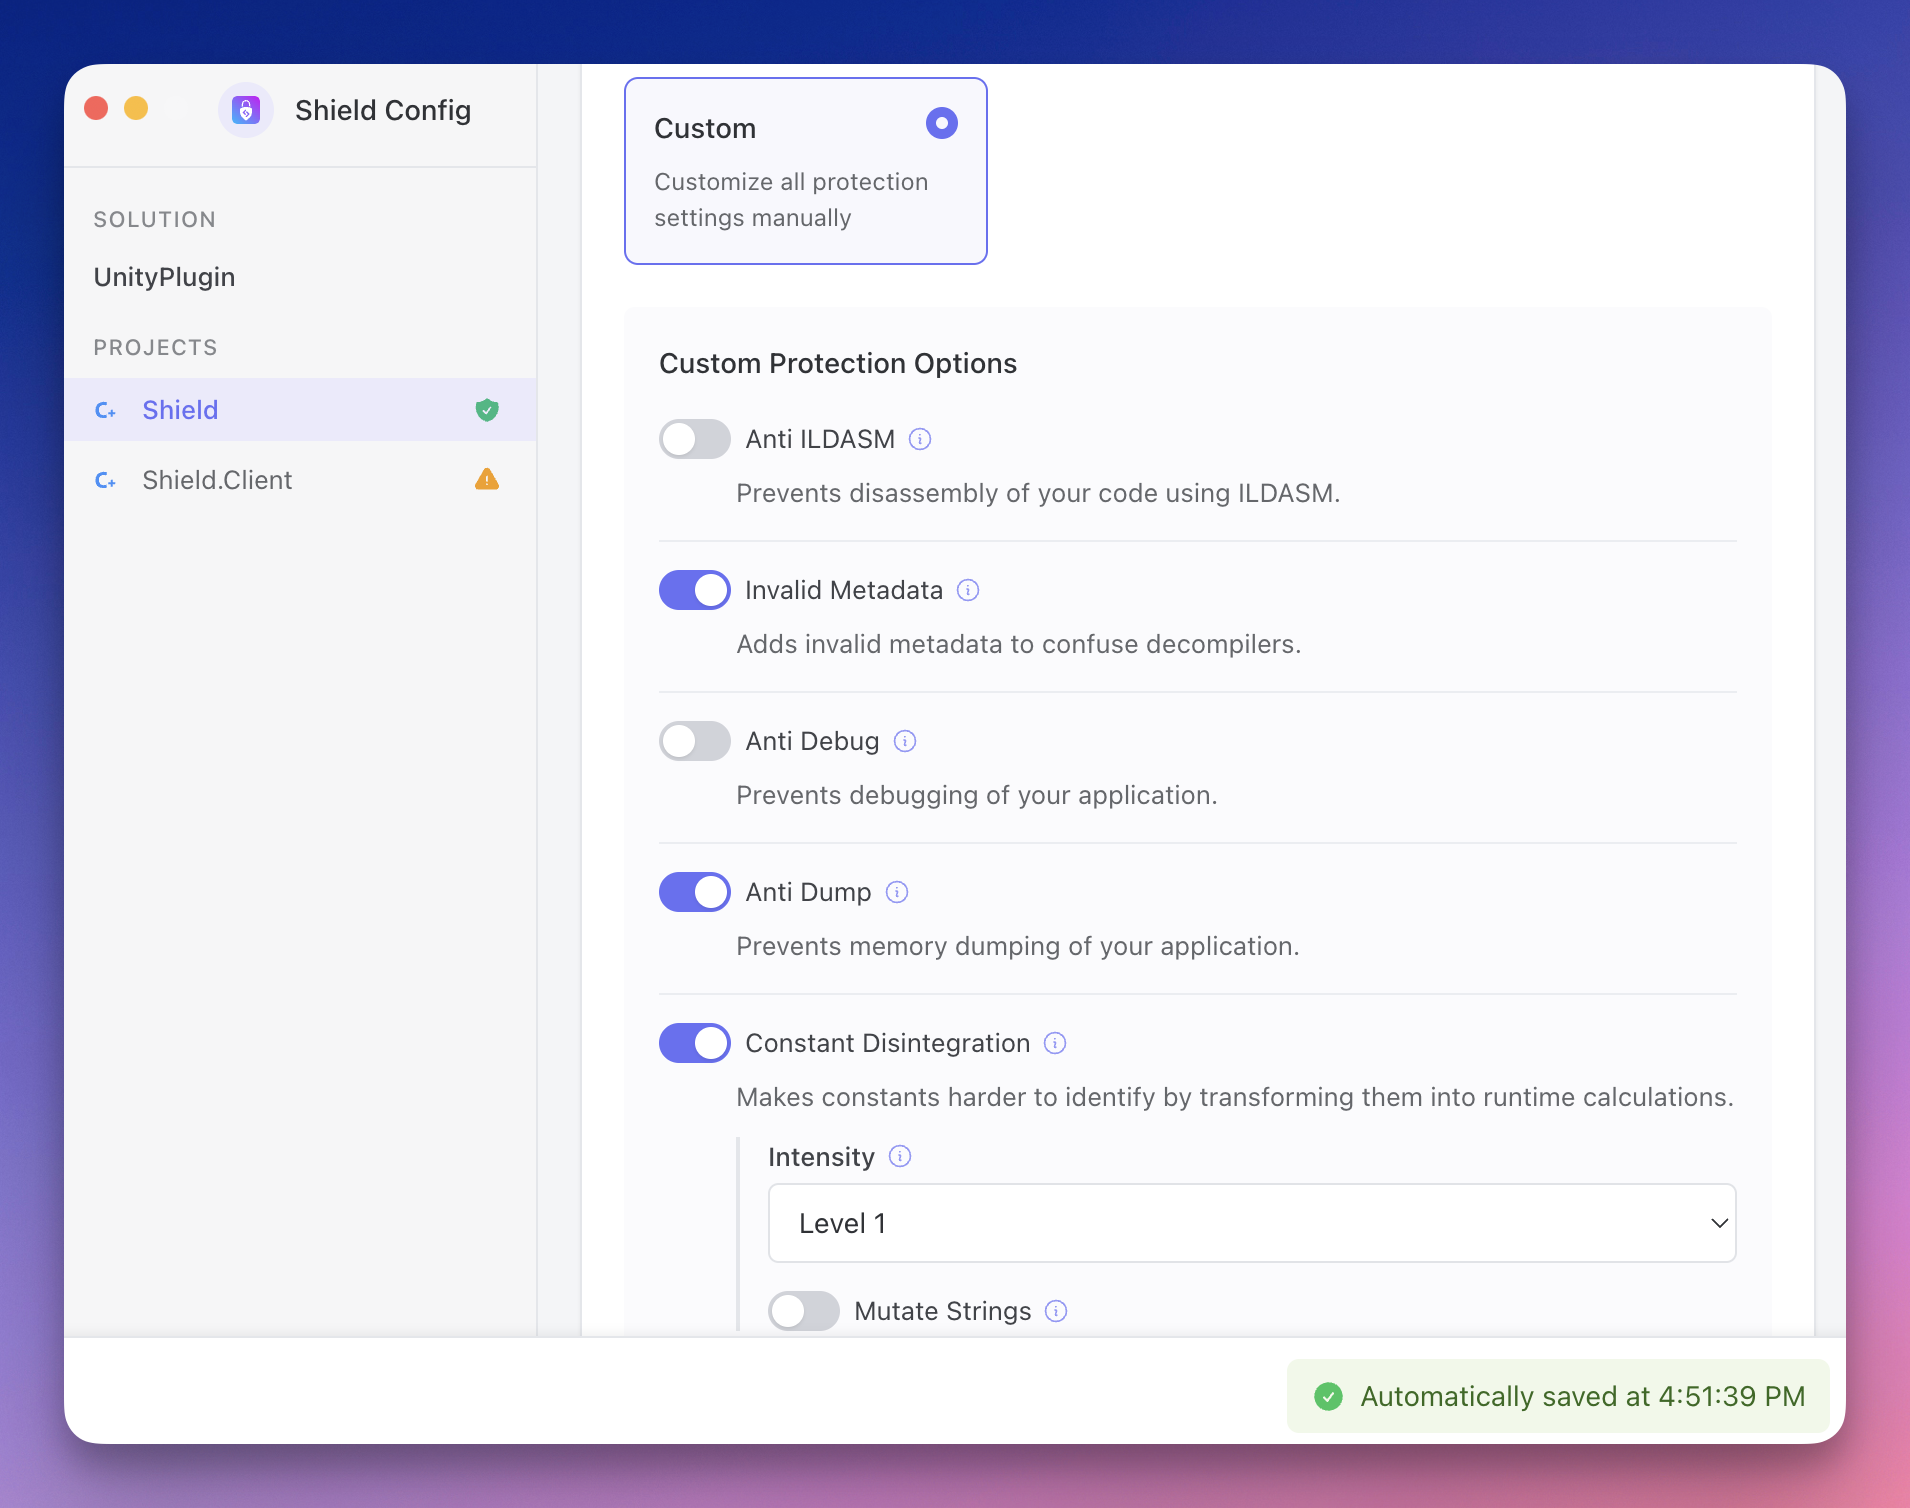
Step 5: Customizing Protection Settings
Customize the protection settings for your solution:
- Expand the Protection Settings section
- Select a protection preset (Maximum, Balance, Optimized) or choose Custom
- For custom protection, toggle individual protections on/off
- Configure specific parameters for each enabled protection
 Click to expand
 Click to expand
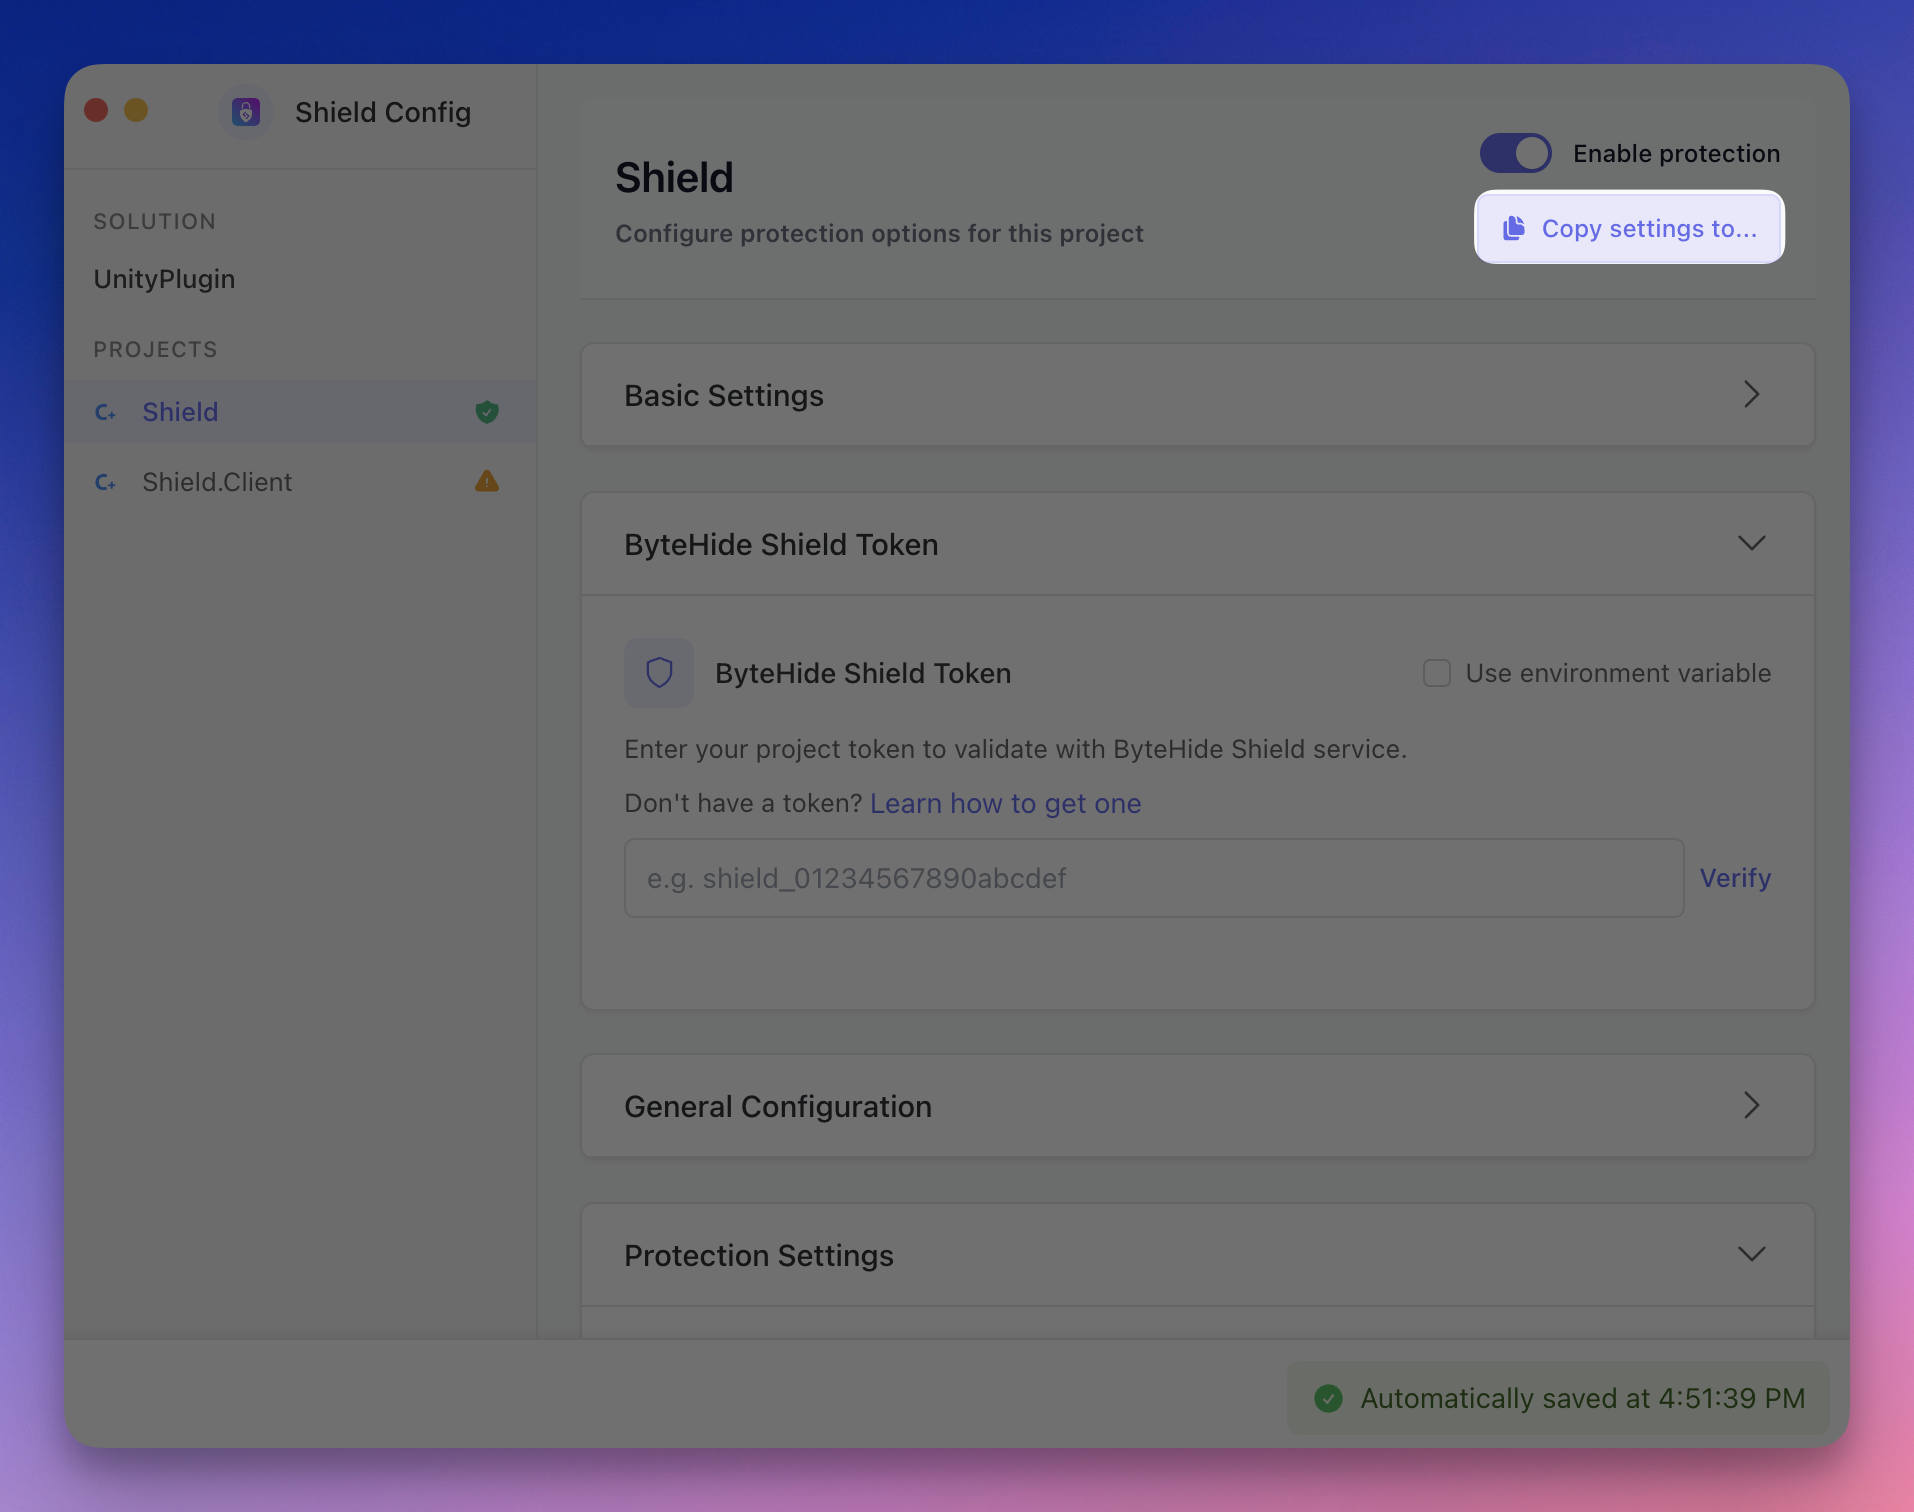
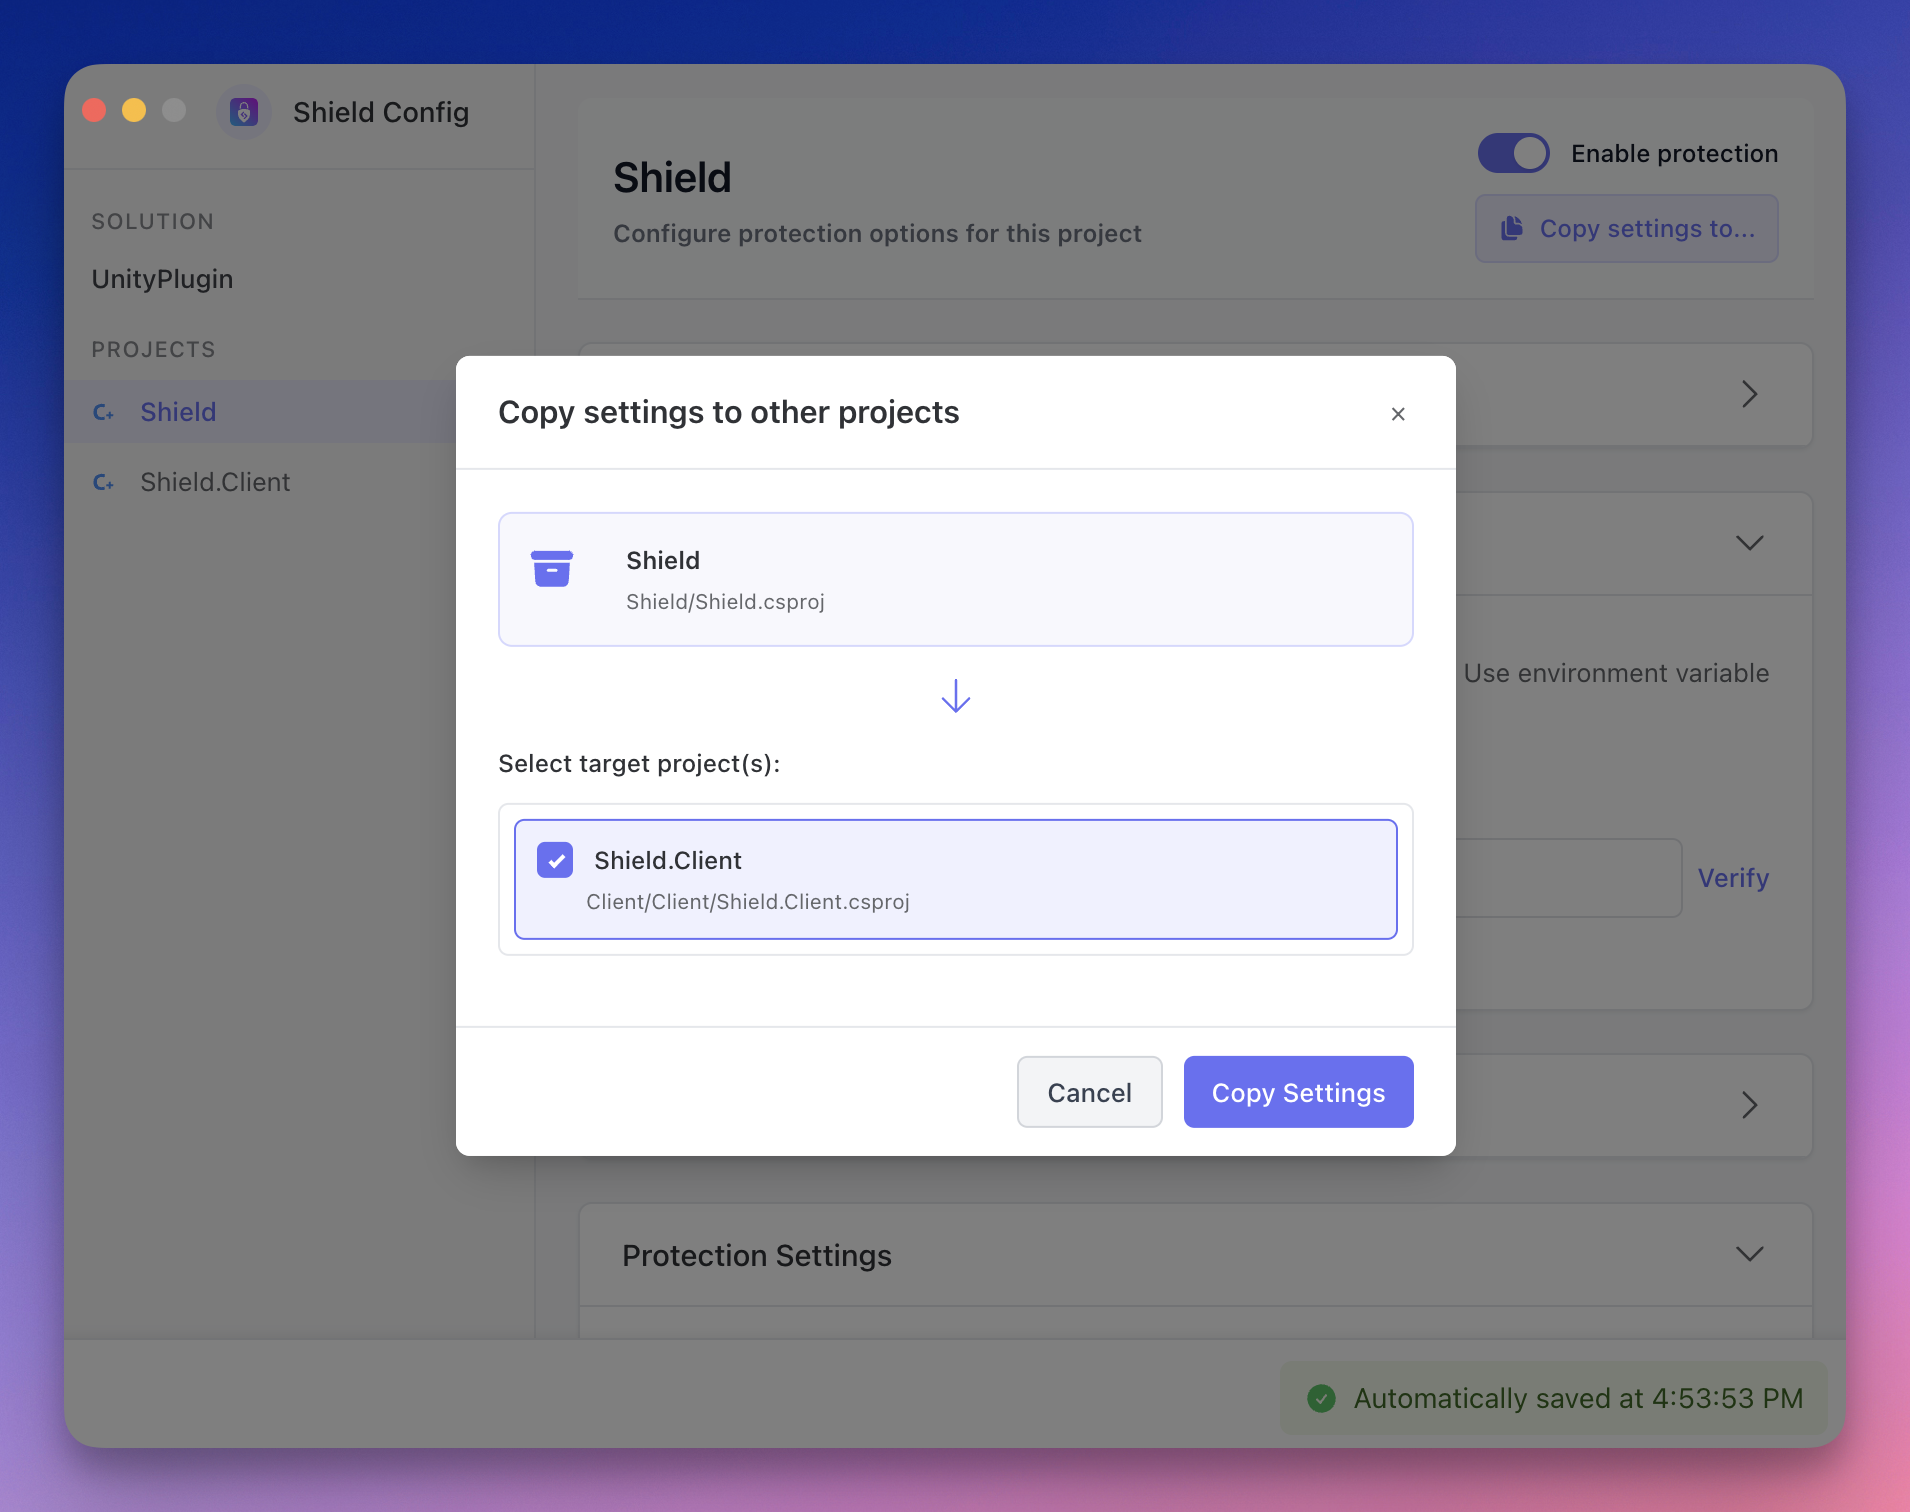
Step 6: Copying Settings Between Projects
If you have multiple projects and want to use the same settings:
 Click to expand
- Click Copy settings to...
- Select the source project with your configured settings
- Select the target project(s) to receive these settings
- Click Copy Settings to apply
 Click to expand
Saving Configuration
The configurator automatically saves your settings. Look for the "Automatically saved" indicator at the bottom of the screen to confirm your changes have been preserved.
Next Steps
After configuring your protection settings, you can:
- Build your solution within Visual Studio to apply the protection
- Test your protected application
- Fine-tune protection settings as needed
Protection Settings
Learn more about available protection options
Advanced Features
Discover advanced configuration options