Setup & Connection
Connect ByteHide to your AI coding agent in minutes. The MCP server uses a streamable HTTP transport with OAuth authentication — no API keys to manage manually.
Connection URL
All MCP clients connect to the same endpoint:
https://mcp.bytehide.com/mcphttps://mcp.bytehide.com/mcpTransport type: Streamable HTTP (POST requests only).
Claude Desktop & Claude.ai
The easiest way to connect. You can add ByteHide as a custom connector directly from the Claude interface.
- Open Claude Desktop or go to claude.ai
- Navigate to Settings > MCP Servers (or the Connectors panel)
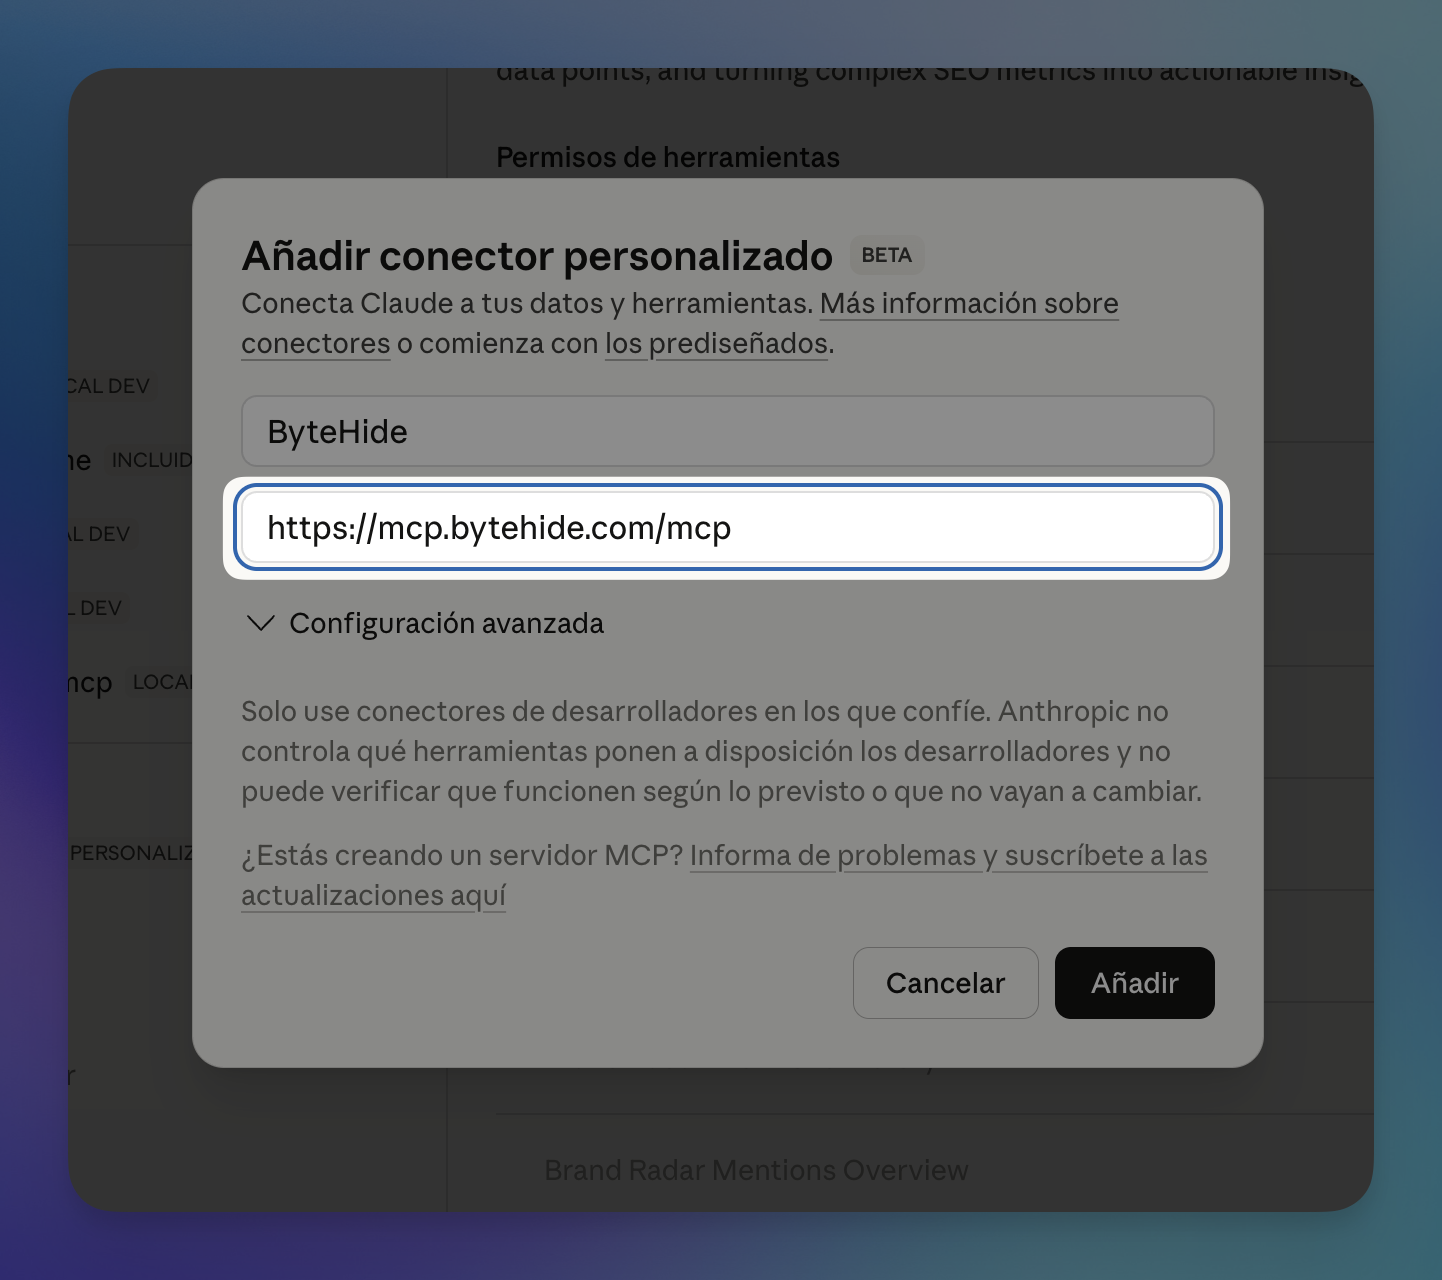
- Click Add custom connector (or the
+button) - Enter ByteHide as the name and
https://mcp.bytehide.com/mcpas the URL - Click Add
 Click to expand
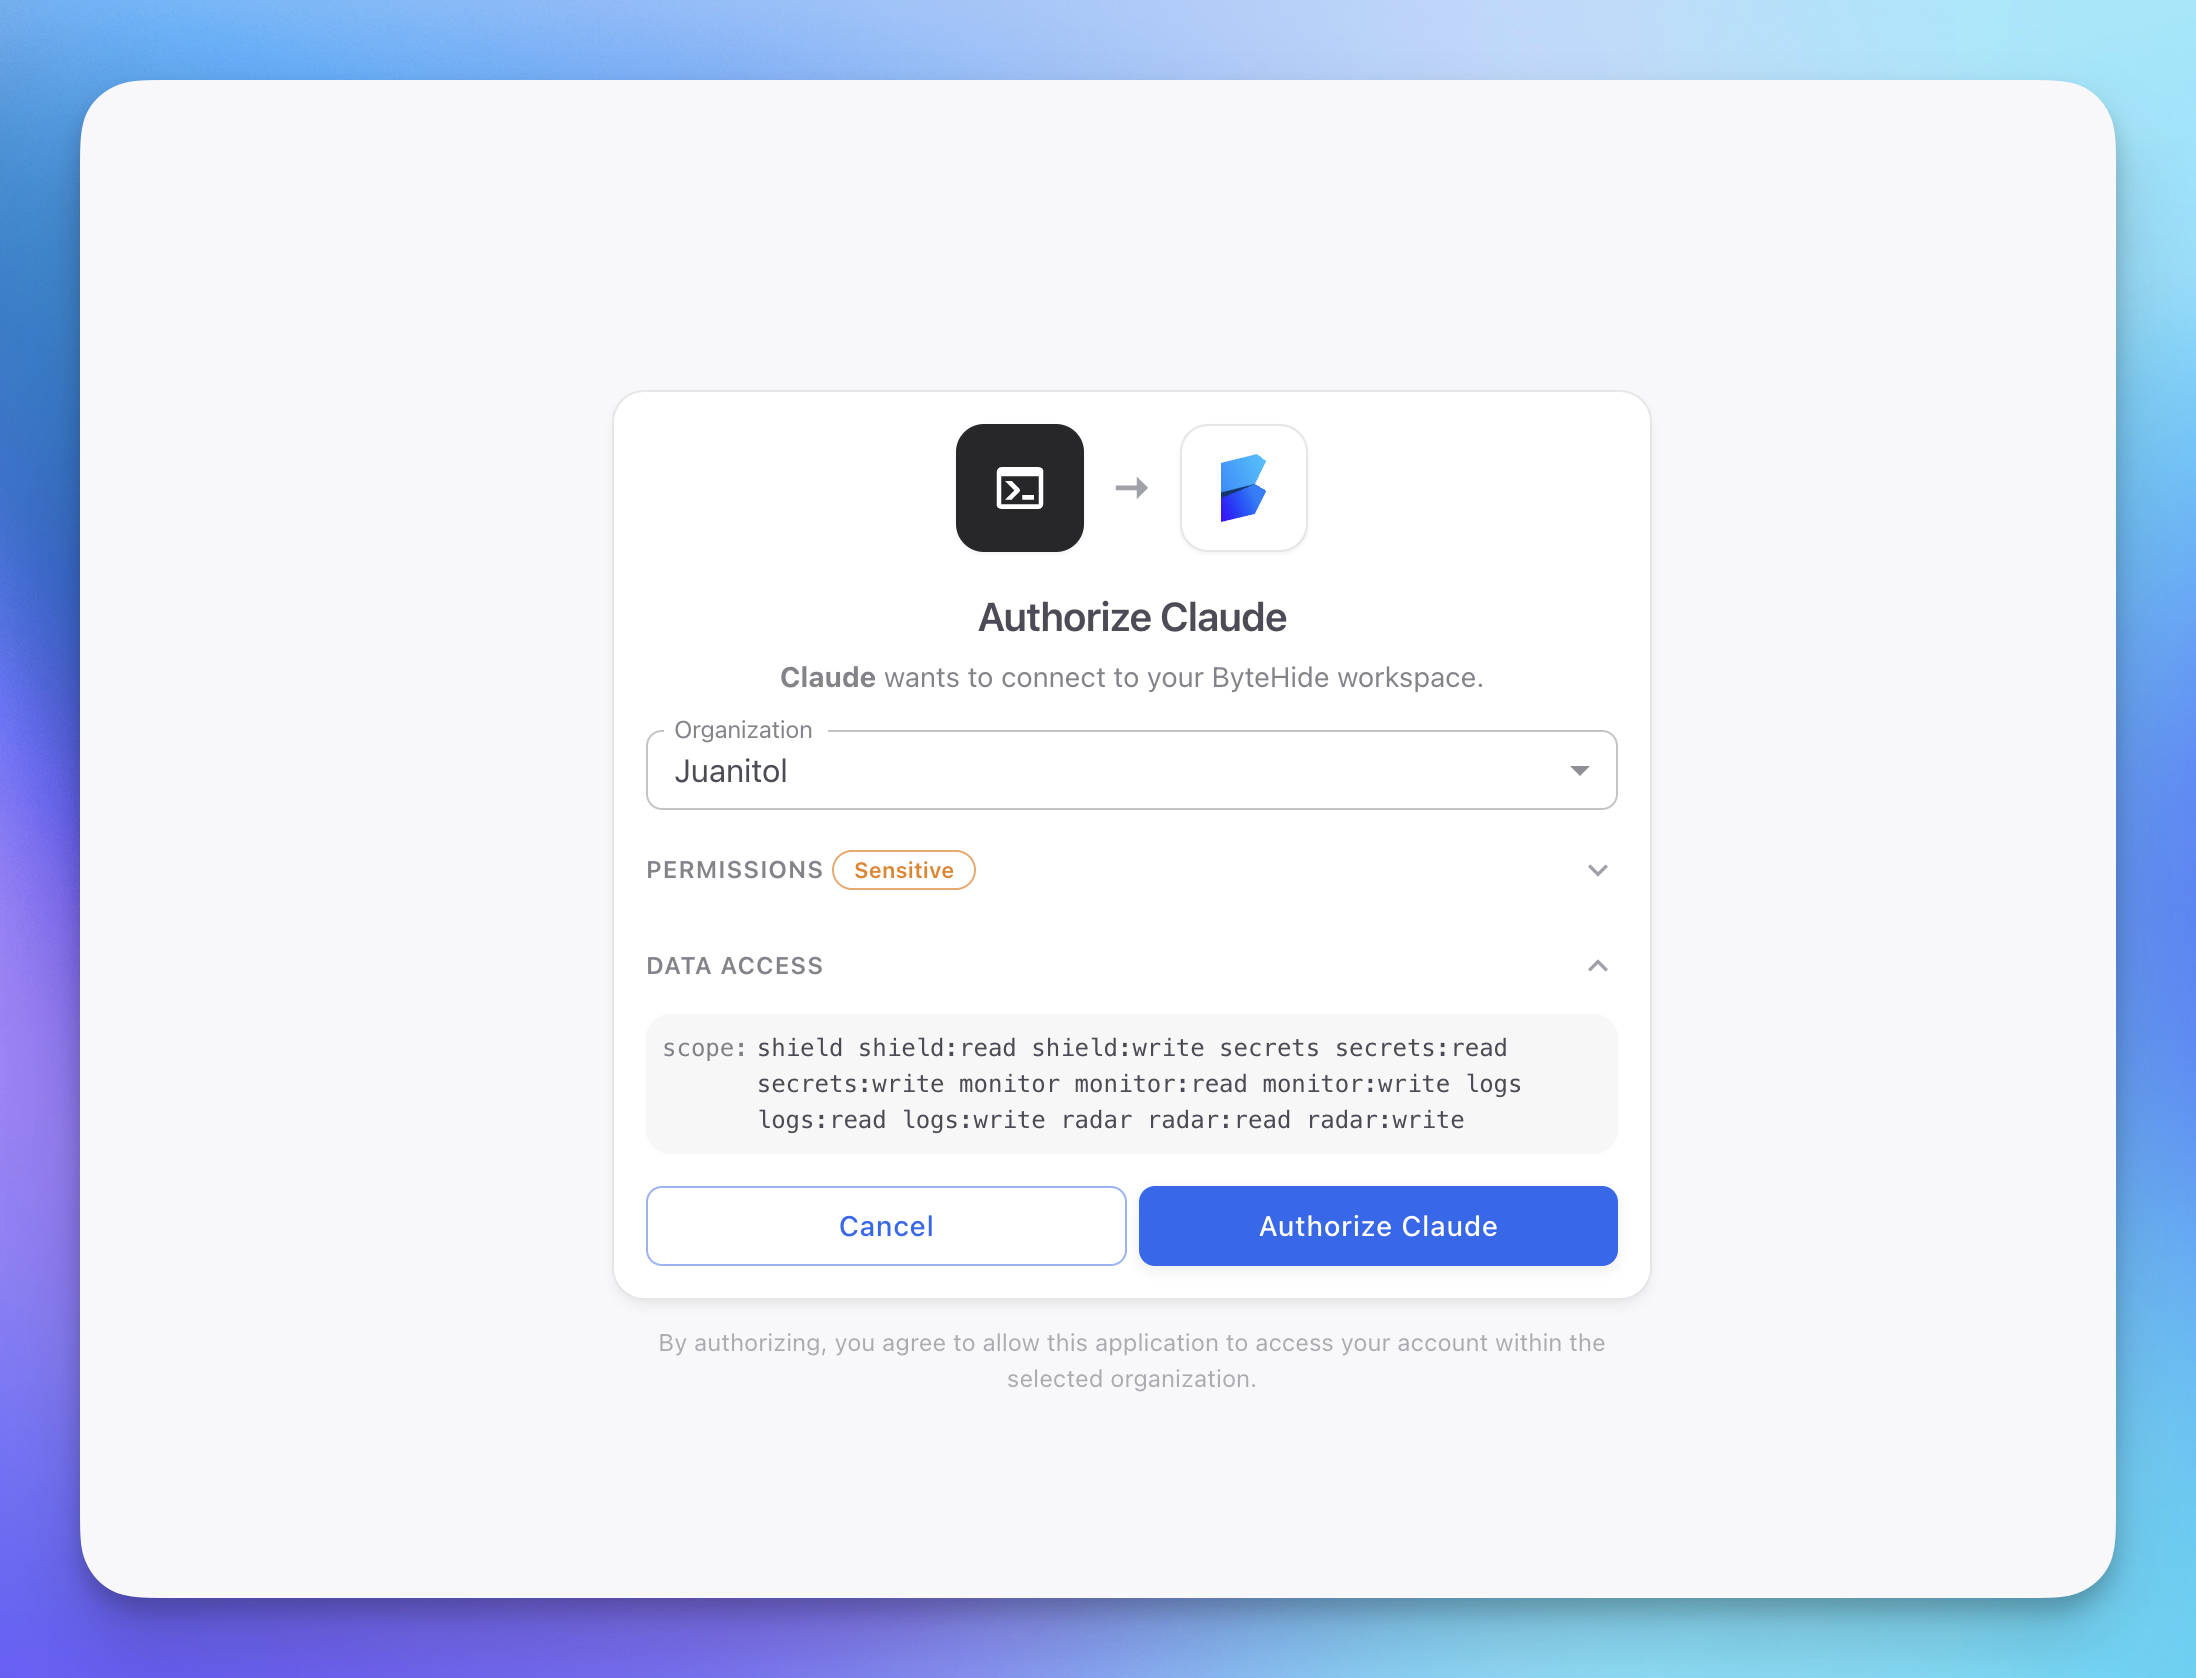
A browser window will open to authenticate — log in with your ByteHide account and authorize the connection.
 Click to expand
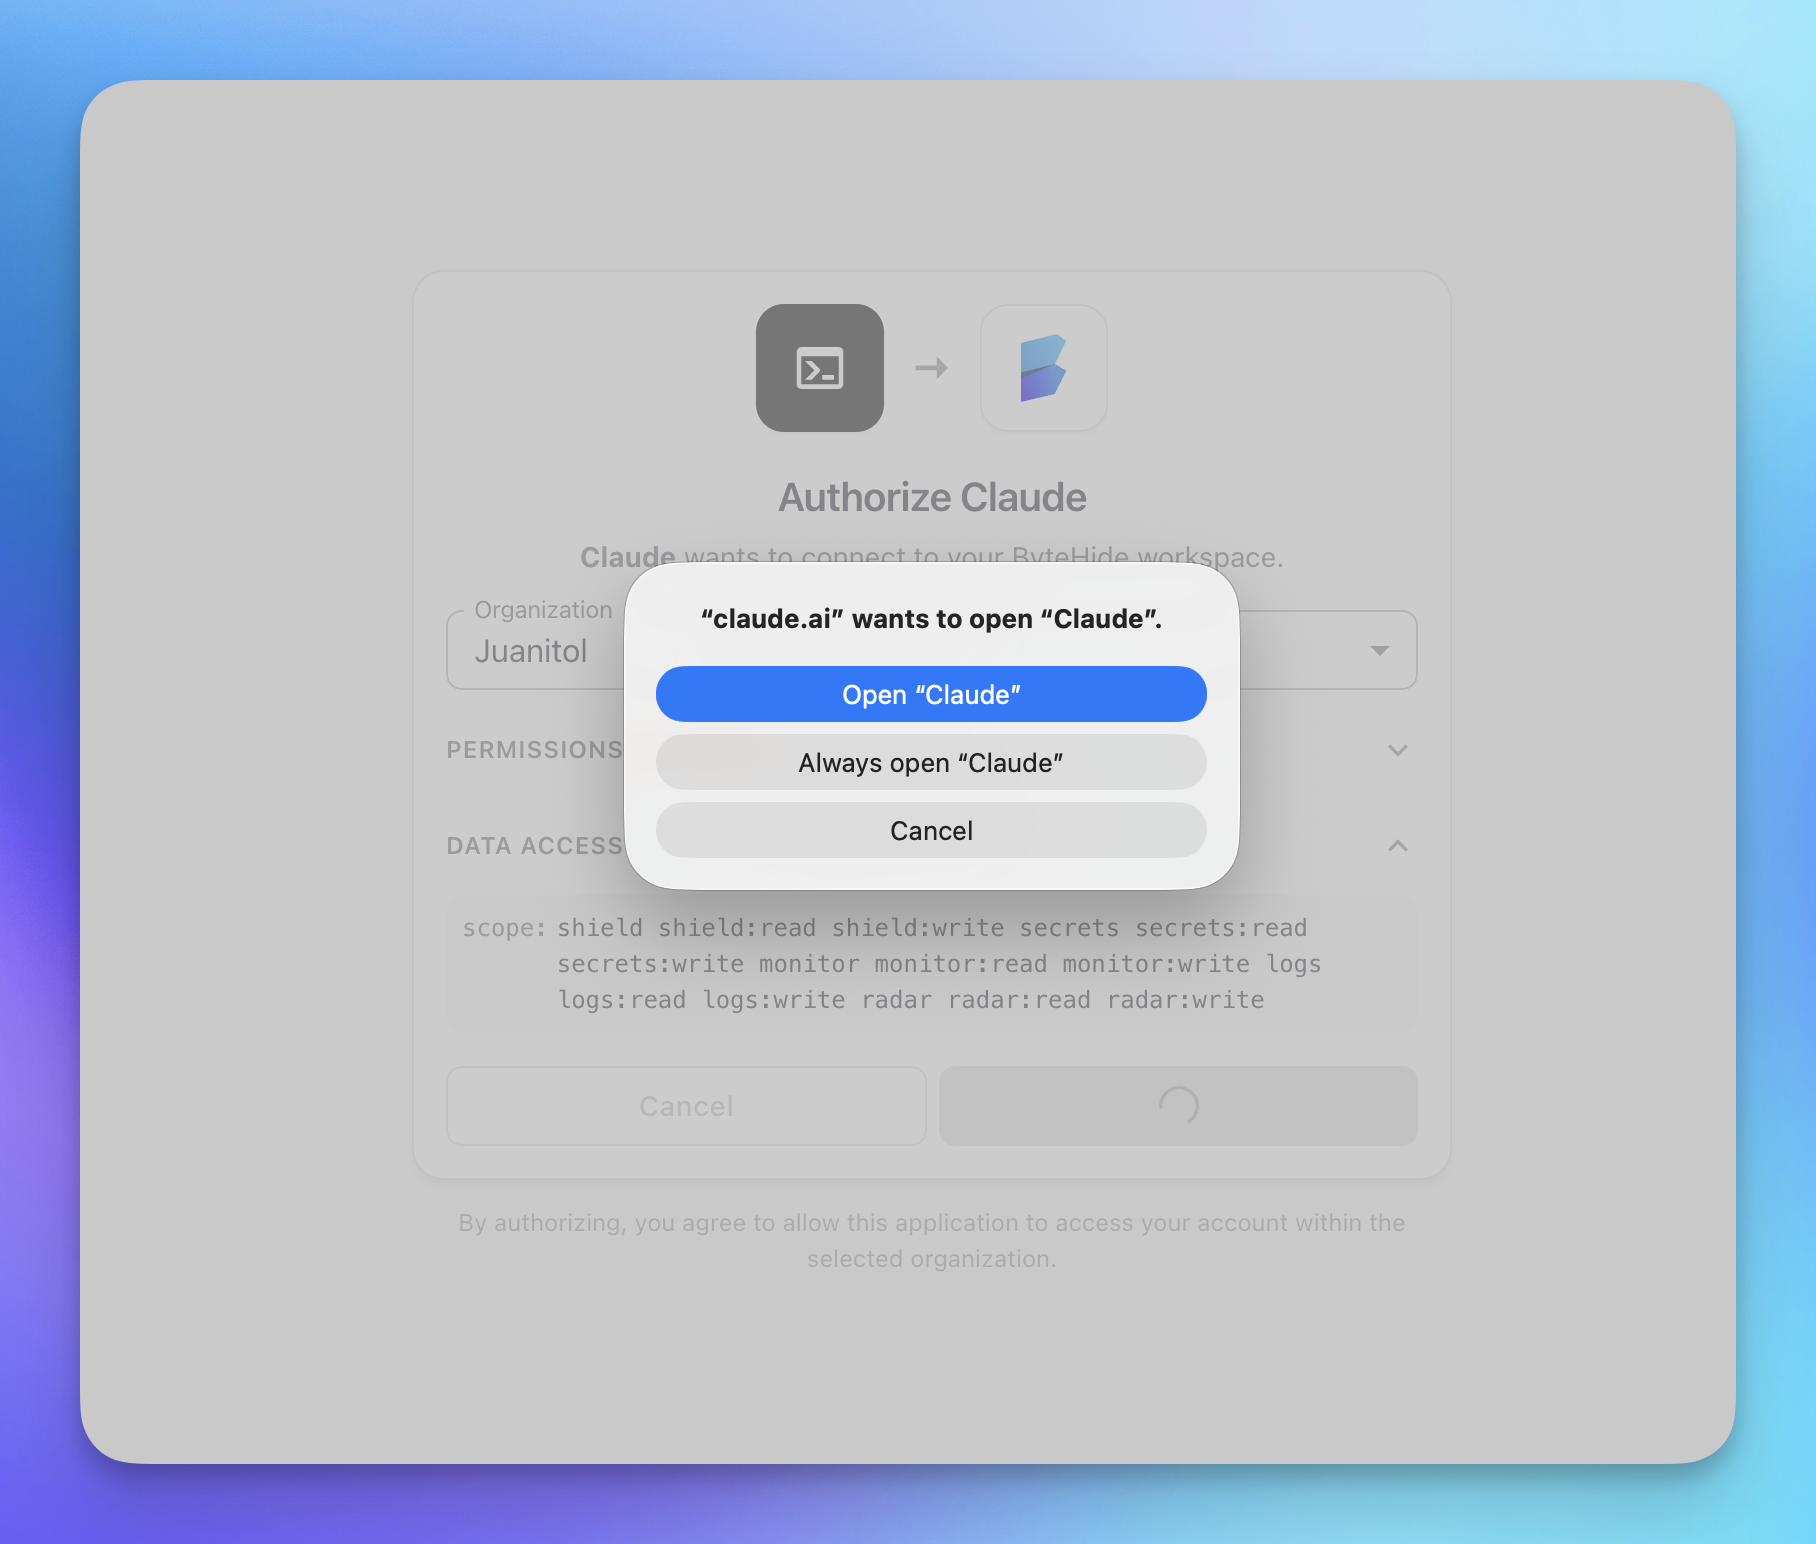
After authorizing, your browser may ask you to open the Claude app. Click Open "Claude" to return to the conversation.
 Click to expand
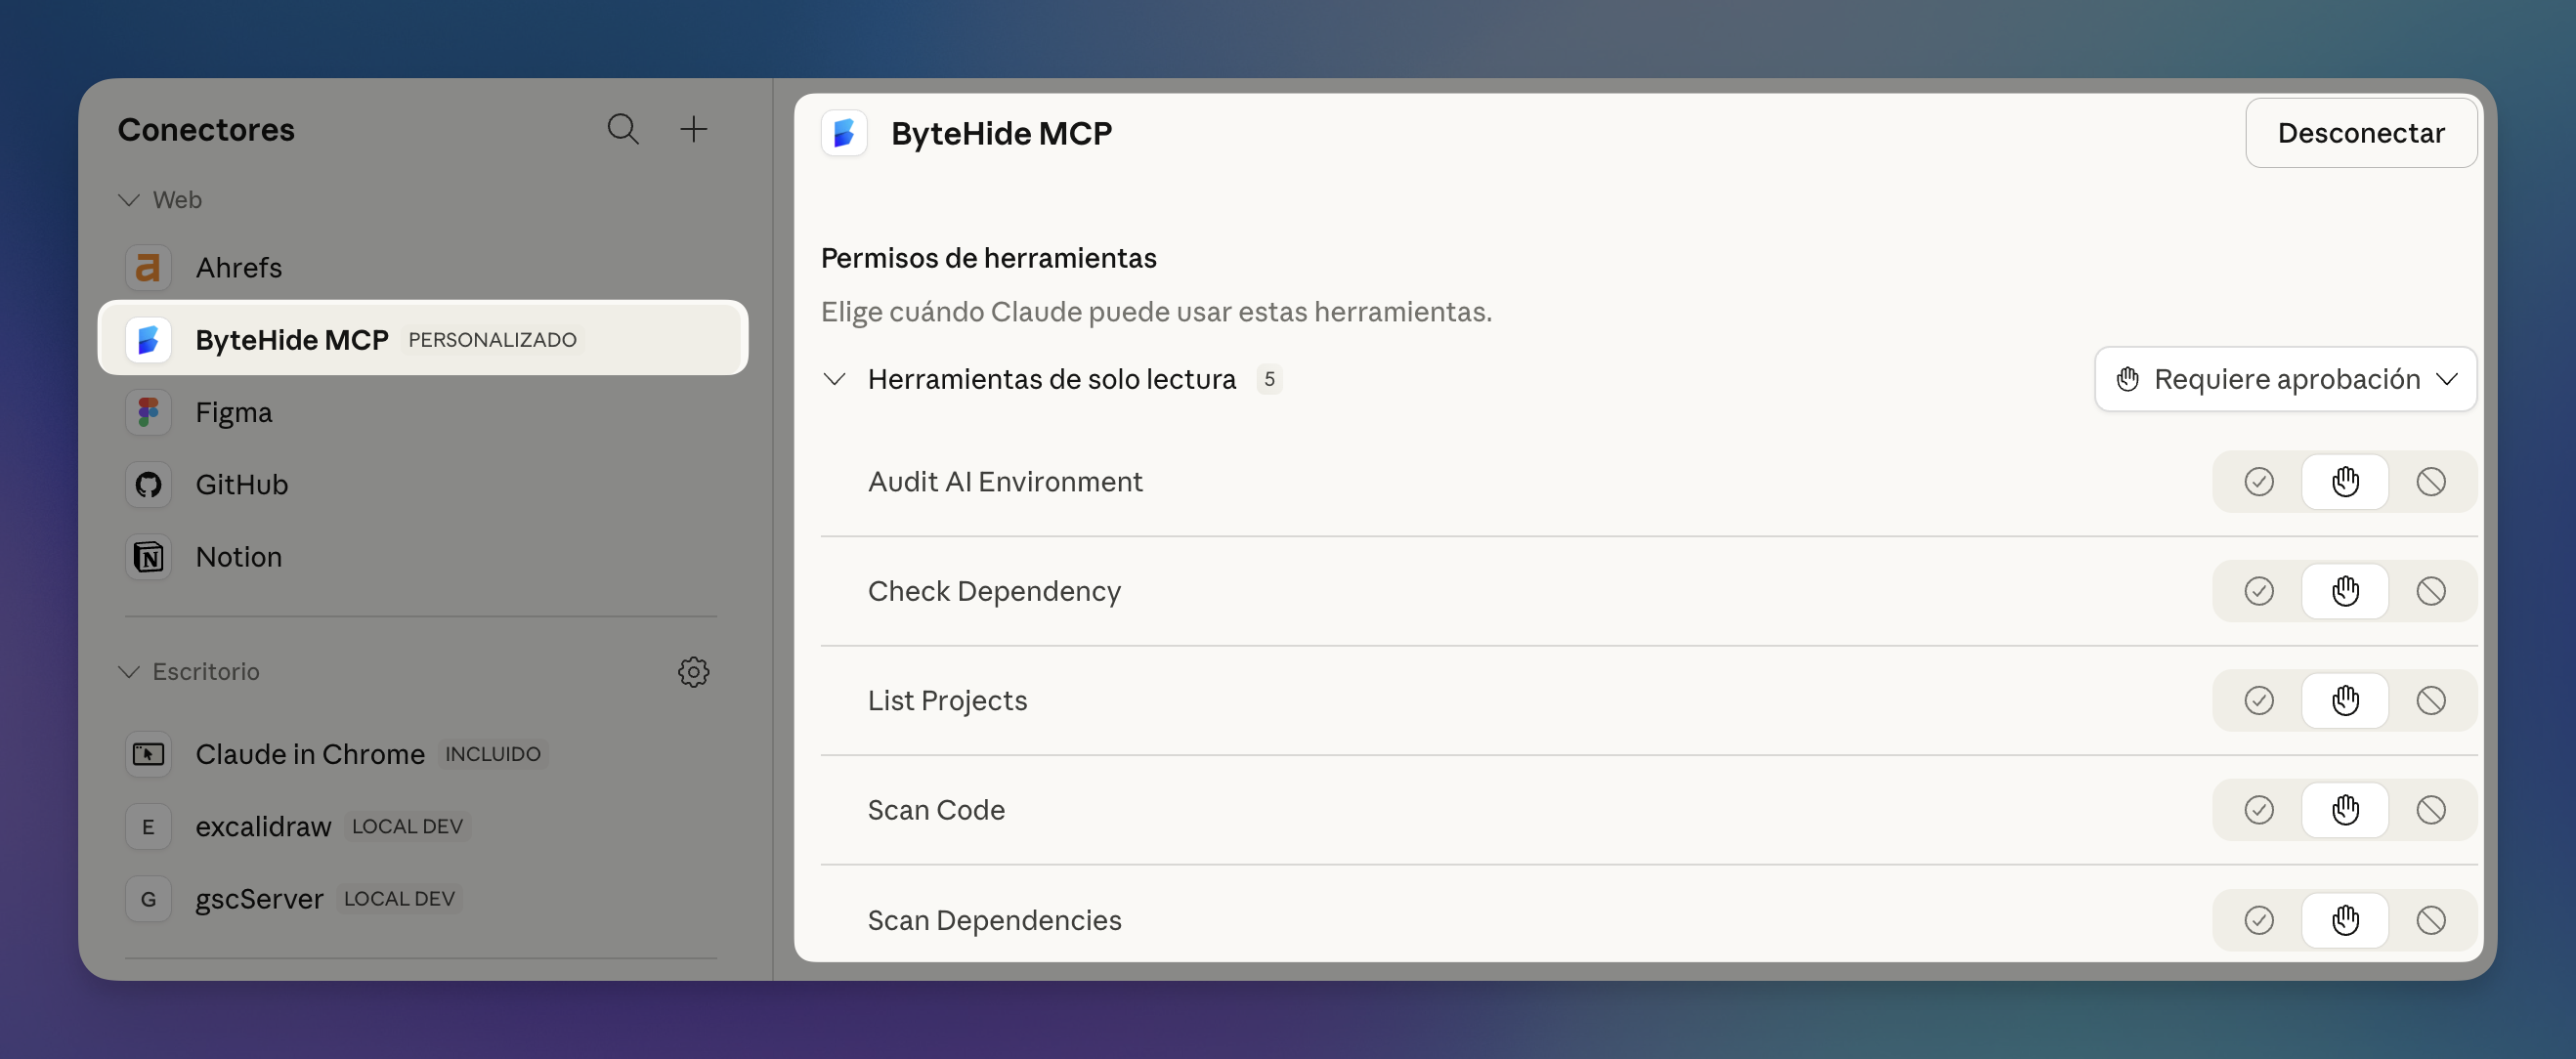
Once connected, you'll see ByteHide MCP listed in your connectors panel with all 5 tools available: Audit AI Environment, Check Dependency, List Projects, Scan Code, and Scan Dependencies.
 Click to expand
Try asking Claude: "Scan this file for security vulnerabilities" or "Is the lodash package safe to install?"
Claude Code (CLI)
Add the ByteHide MCP server with a single command:
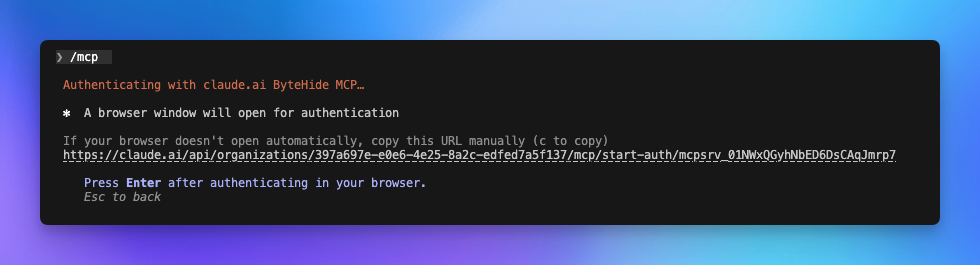
claude mcp add bytehide --transport streamable-http https://mcp.bytehide.com/mcpclaude mcp add bytehide --transport streamable-http https://mcp.bytehide.com/mcpThe next time Claude Code needs to use a ByteHide tool, it will prompt you to authenticate via your browser.
 Click to expand
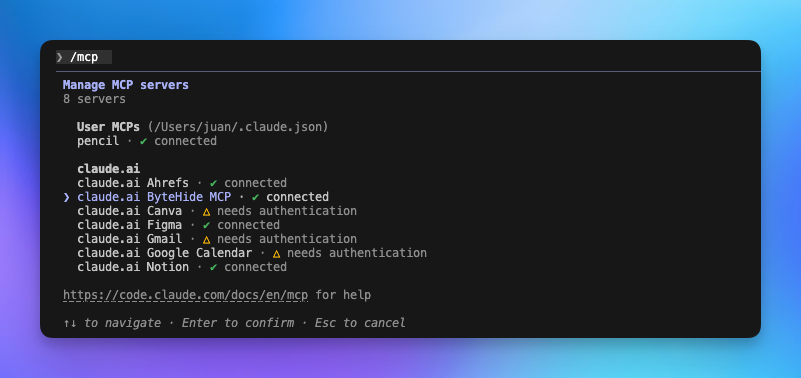
To verify the connection, use the /mcp command inside Claude Code. You should see ByteHide MCP listed as connected.
 Click to expand
You can also verify from outside Claude Code:
claude mcp listclaude mcp listCursor
Add ByteHide to your Cursor MCP configuration:
- Open Cursor and go to Settings > MCP
- Click Add new MCP server
- Use the following configuration:
{
  "mcpServers": {
    "bytehide": {
      "type": "streamable-http",
      "url": "https://mcp.bytehide.com/mcp"
    }
  }
}
{
"mcpServers": {
"bytehide": {
"type": "streamable-http",
"url": "https://mcp.bytehide.com/mcp"
}
}
}- Save and restart Cursor
- The first time a ByteHide tool is invoked, a browser window will open for authentication
VS Code (Copilot / MCP Extensions)
For VS Code with MCP support, add the server to your MCP settings file:
- Open or create
.vscode/mcp.jsonin your project root (or your global MCP configuration) - Add the ByteHide server:
{
  "mcpServers": {
    "bytehide": {
      "type": "streamable-http",
      "url": "https://mcp.bytehide.com/mcp"
    }
  }
}{
"mcpServers": {
"bytehide": {
"type": "streamable-http",
"url": "https://mcp.bytehide.com/mcp"
}
}
}- Reload the window
- Authenticate when prompted on first use
Other MCP Clients
Any client that supports the streamable-http transport can connect to ByteHide. The universal configuration is:
{
  "mcpServers": {
    "bytehide": {
      "type": "streamable-http",
      "url": "https://mcp.bytehide.com/mcp"
    }
  }
}
{
"mcpServers": {
"bytehide": {
"type": "streamable-http",
"url": "https://mcp.bytehide.com/mcp"
}
}
}If your MCP client requires specifying the transport separately, use:
| Setting | Value |
|---|---|
| Server name | bytehide |
| Transport | streamable-http |
| URL | https://mcp.bytehide.com/mcp |
| Authentication | OAuth 2.1 (handled automatically) |
Authentication
ByteHide MCP uses OAuth 2.1 with PKCE for secure authentication. You don't need to create API keys or manage tokens — the flow is handled automatically by your MCP client.
How it works
- Your AI agent sends a request to the MCP server
- The server responds with an authentication challenge
- Your MCP client opens a browser window to the ByteHide login page
- You log in with your ByteHide account and authorize the connection
- The client receives a secure token and stores it locally
- All subsequent requests are authenticated automatically
Token refresh
Access tokens are short-lived and refreshed automatically by your MCP client using a refresh token. You should not need to re-authenticate unless you revoke access or your session expires after an extended period.
Managing authorized apps
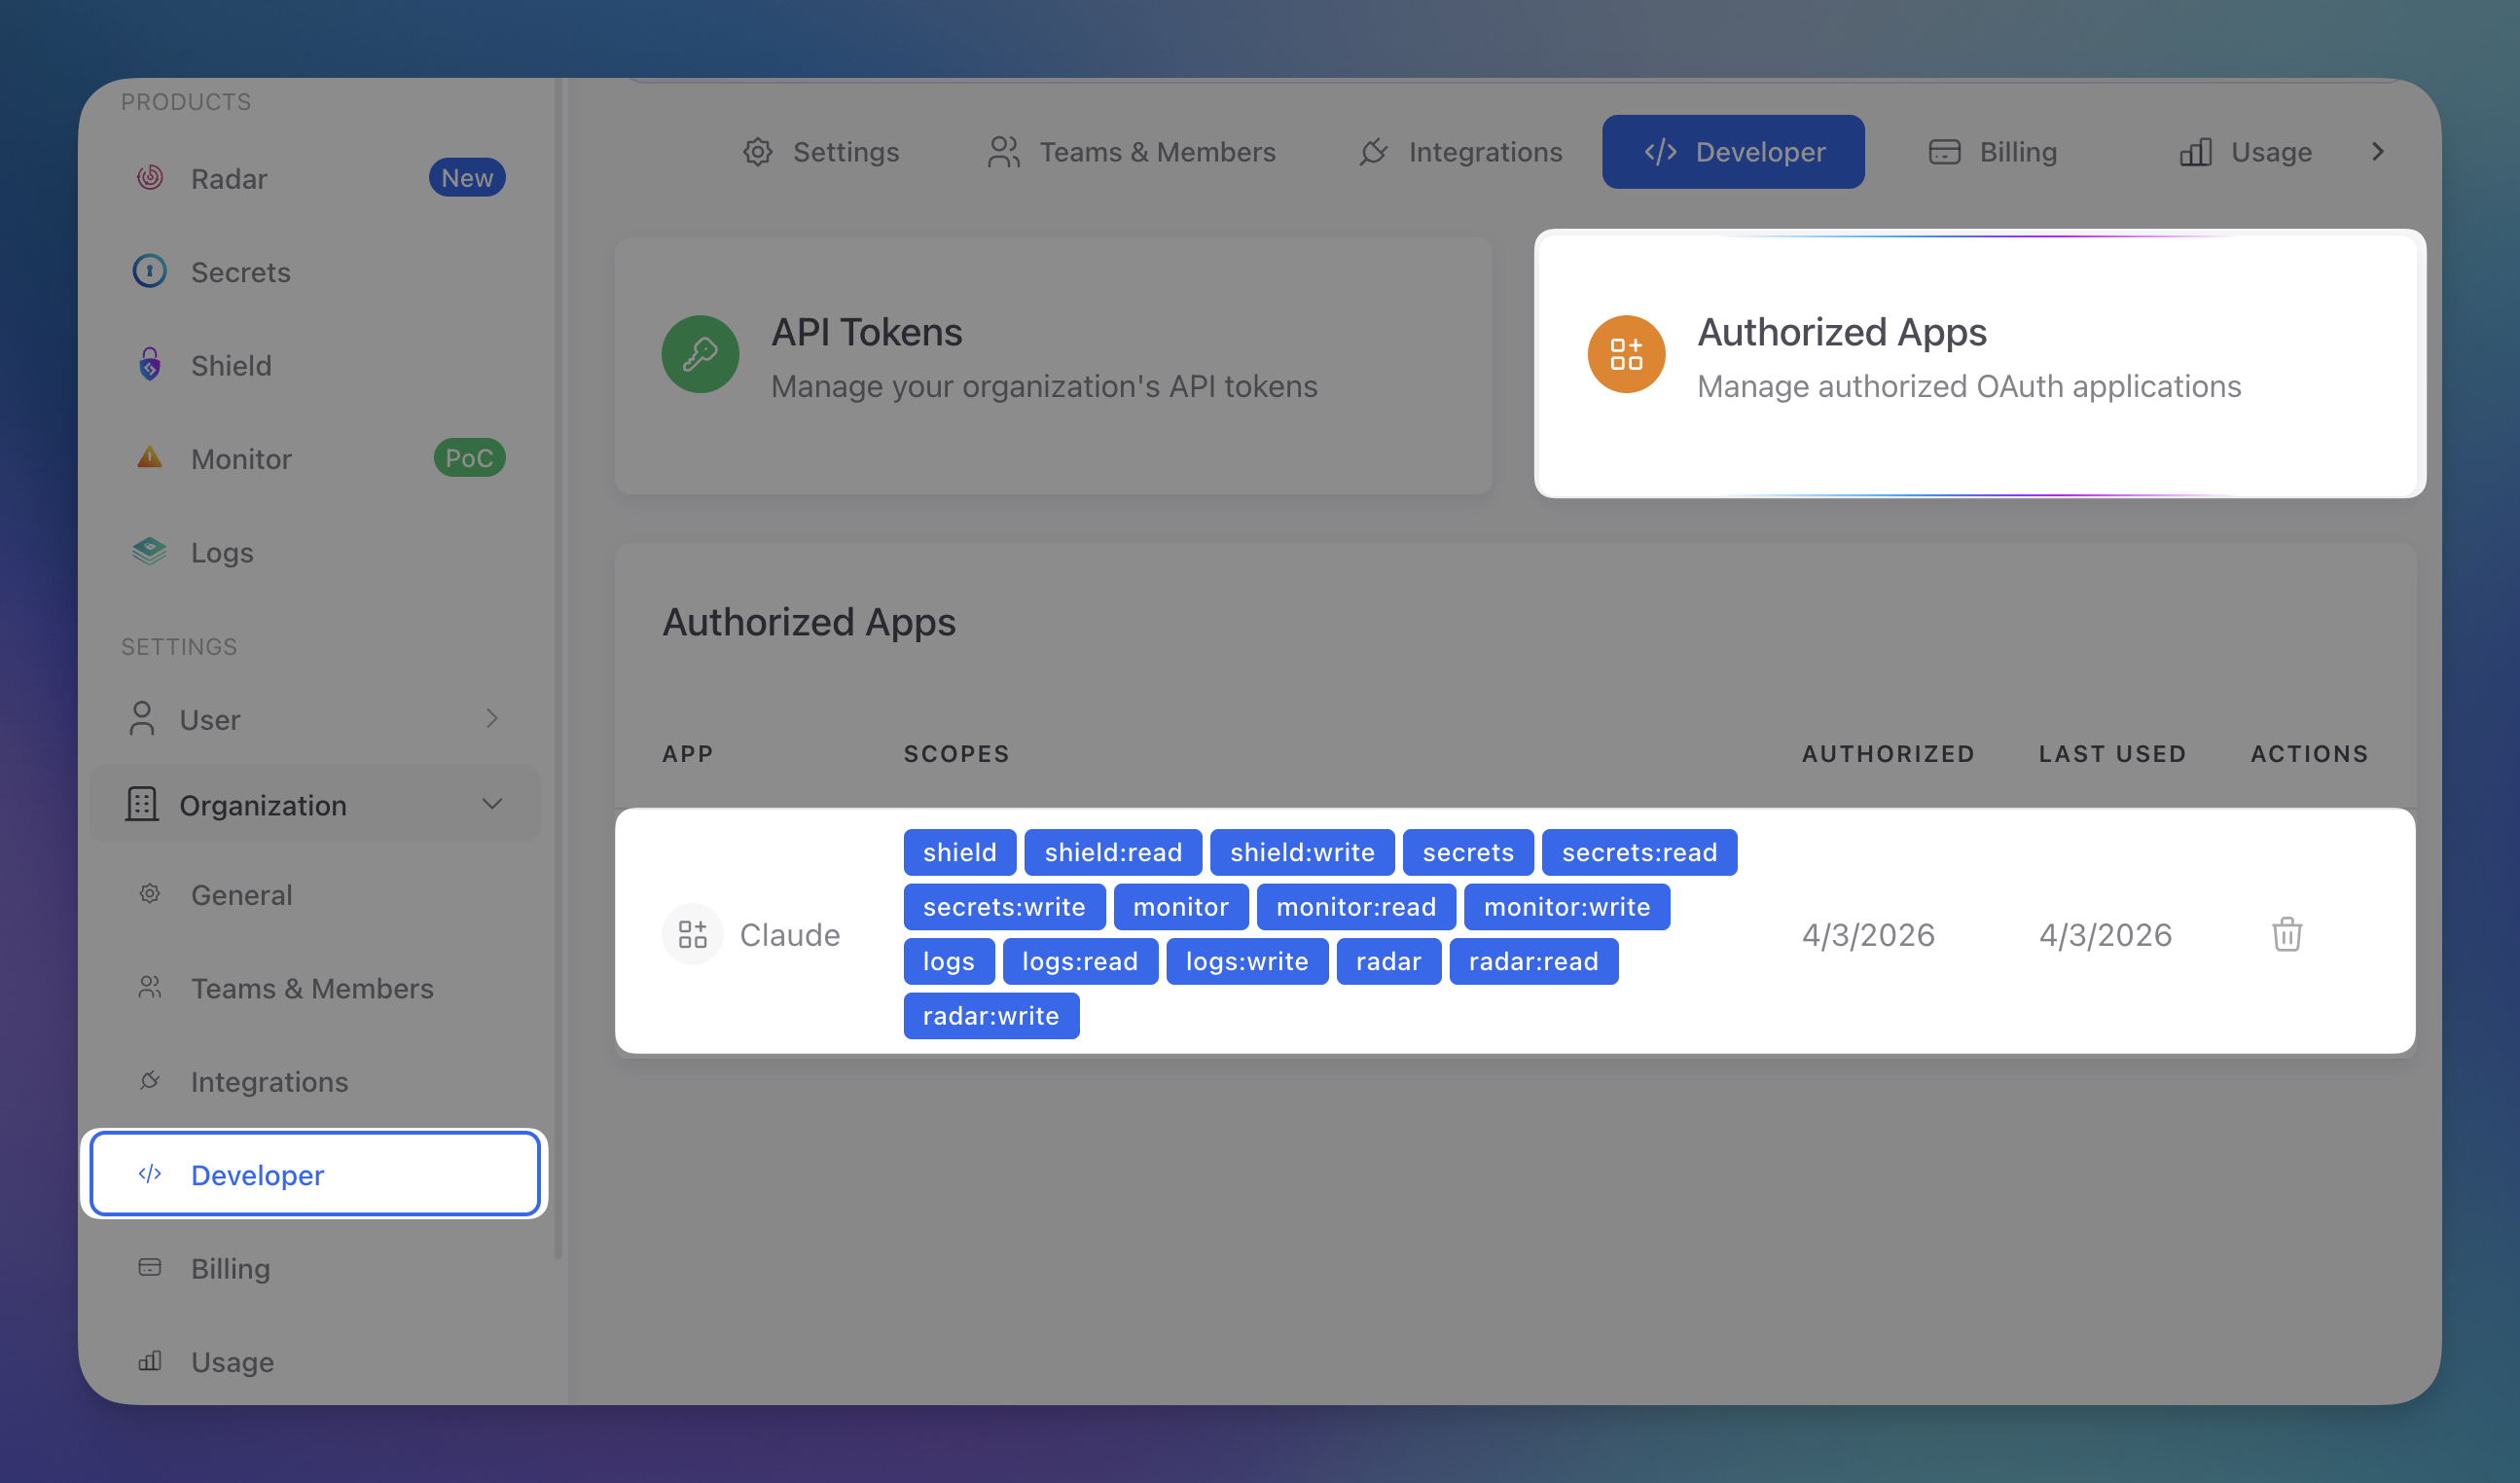
You can view and manage all authorized MCP connections from the ByteHide dashboard. Navigate to Organization > Developer > Authorized Apps to see which apps have access, their scopes, and when they were last used.
 Click to expand
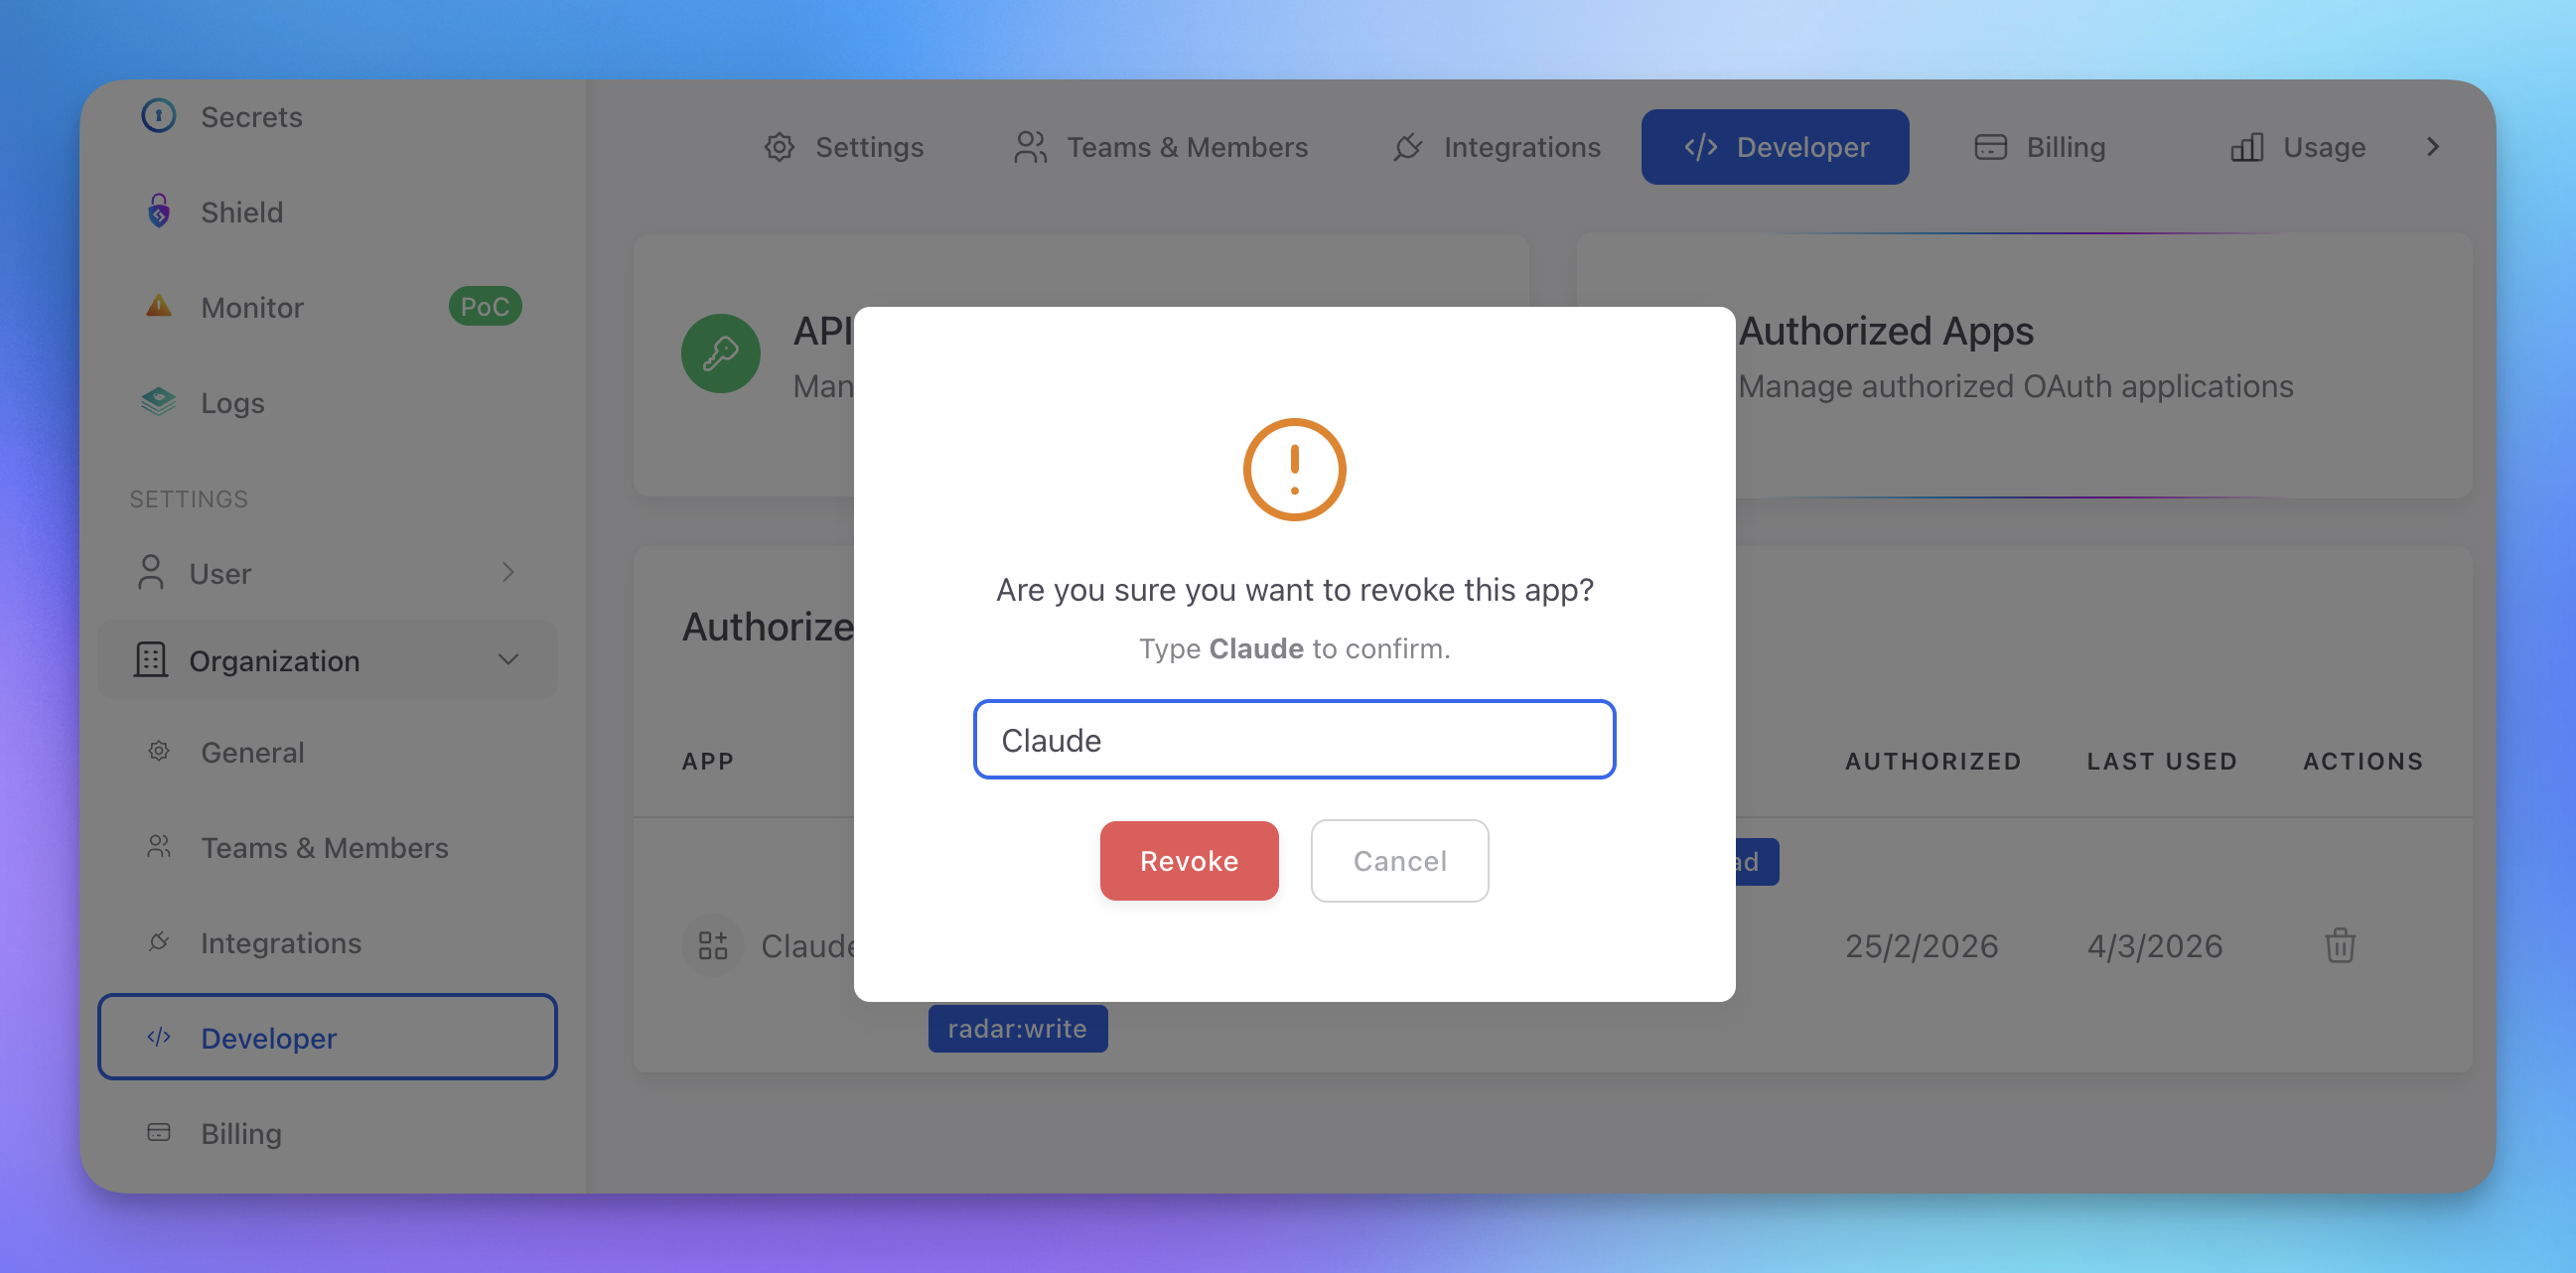
To revoke an app's access, click the delete icon and type the app name to confirm.
 Click to expand
Scopes
The OAuth token includes scopes that determine which tools you can use:
| Scope | Grants Access To |
|---|---|
radar | Full Radar access (all tools) |
radar:read | Read findings and project data |
radar:scan | Launch scans |
radar:autofix | Generate AI-powered autofixes |
shield | Full Shield access |
secrets | Full Secrets access |
monitor | Full Monitor access |
Organization Access
The MCP server uses your ByteHide organization context. All scans, findings, and projects are linked to the organization associated with your account. If you belong to multiple organizations, you can select which one to use during the authorization flow.
API Tokens (Alternative Authentication)
If your MCP client doesn't support OAuth or you need a static token (e.g., for CI/CD or local scripts), you can create an API token from the ByteHide dashboard.
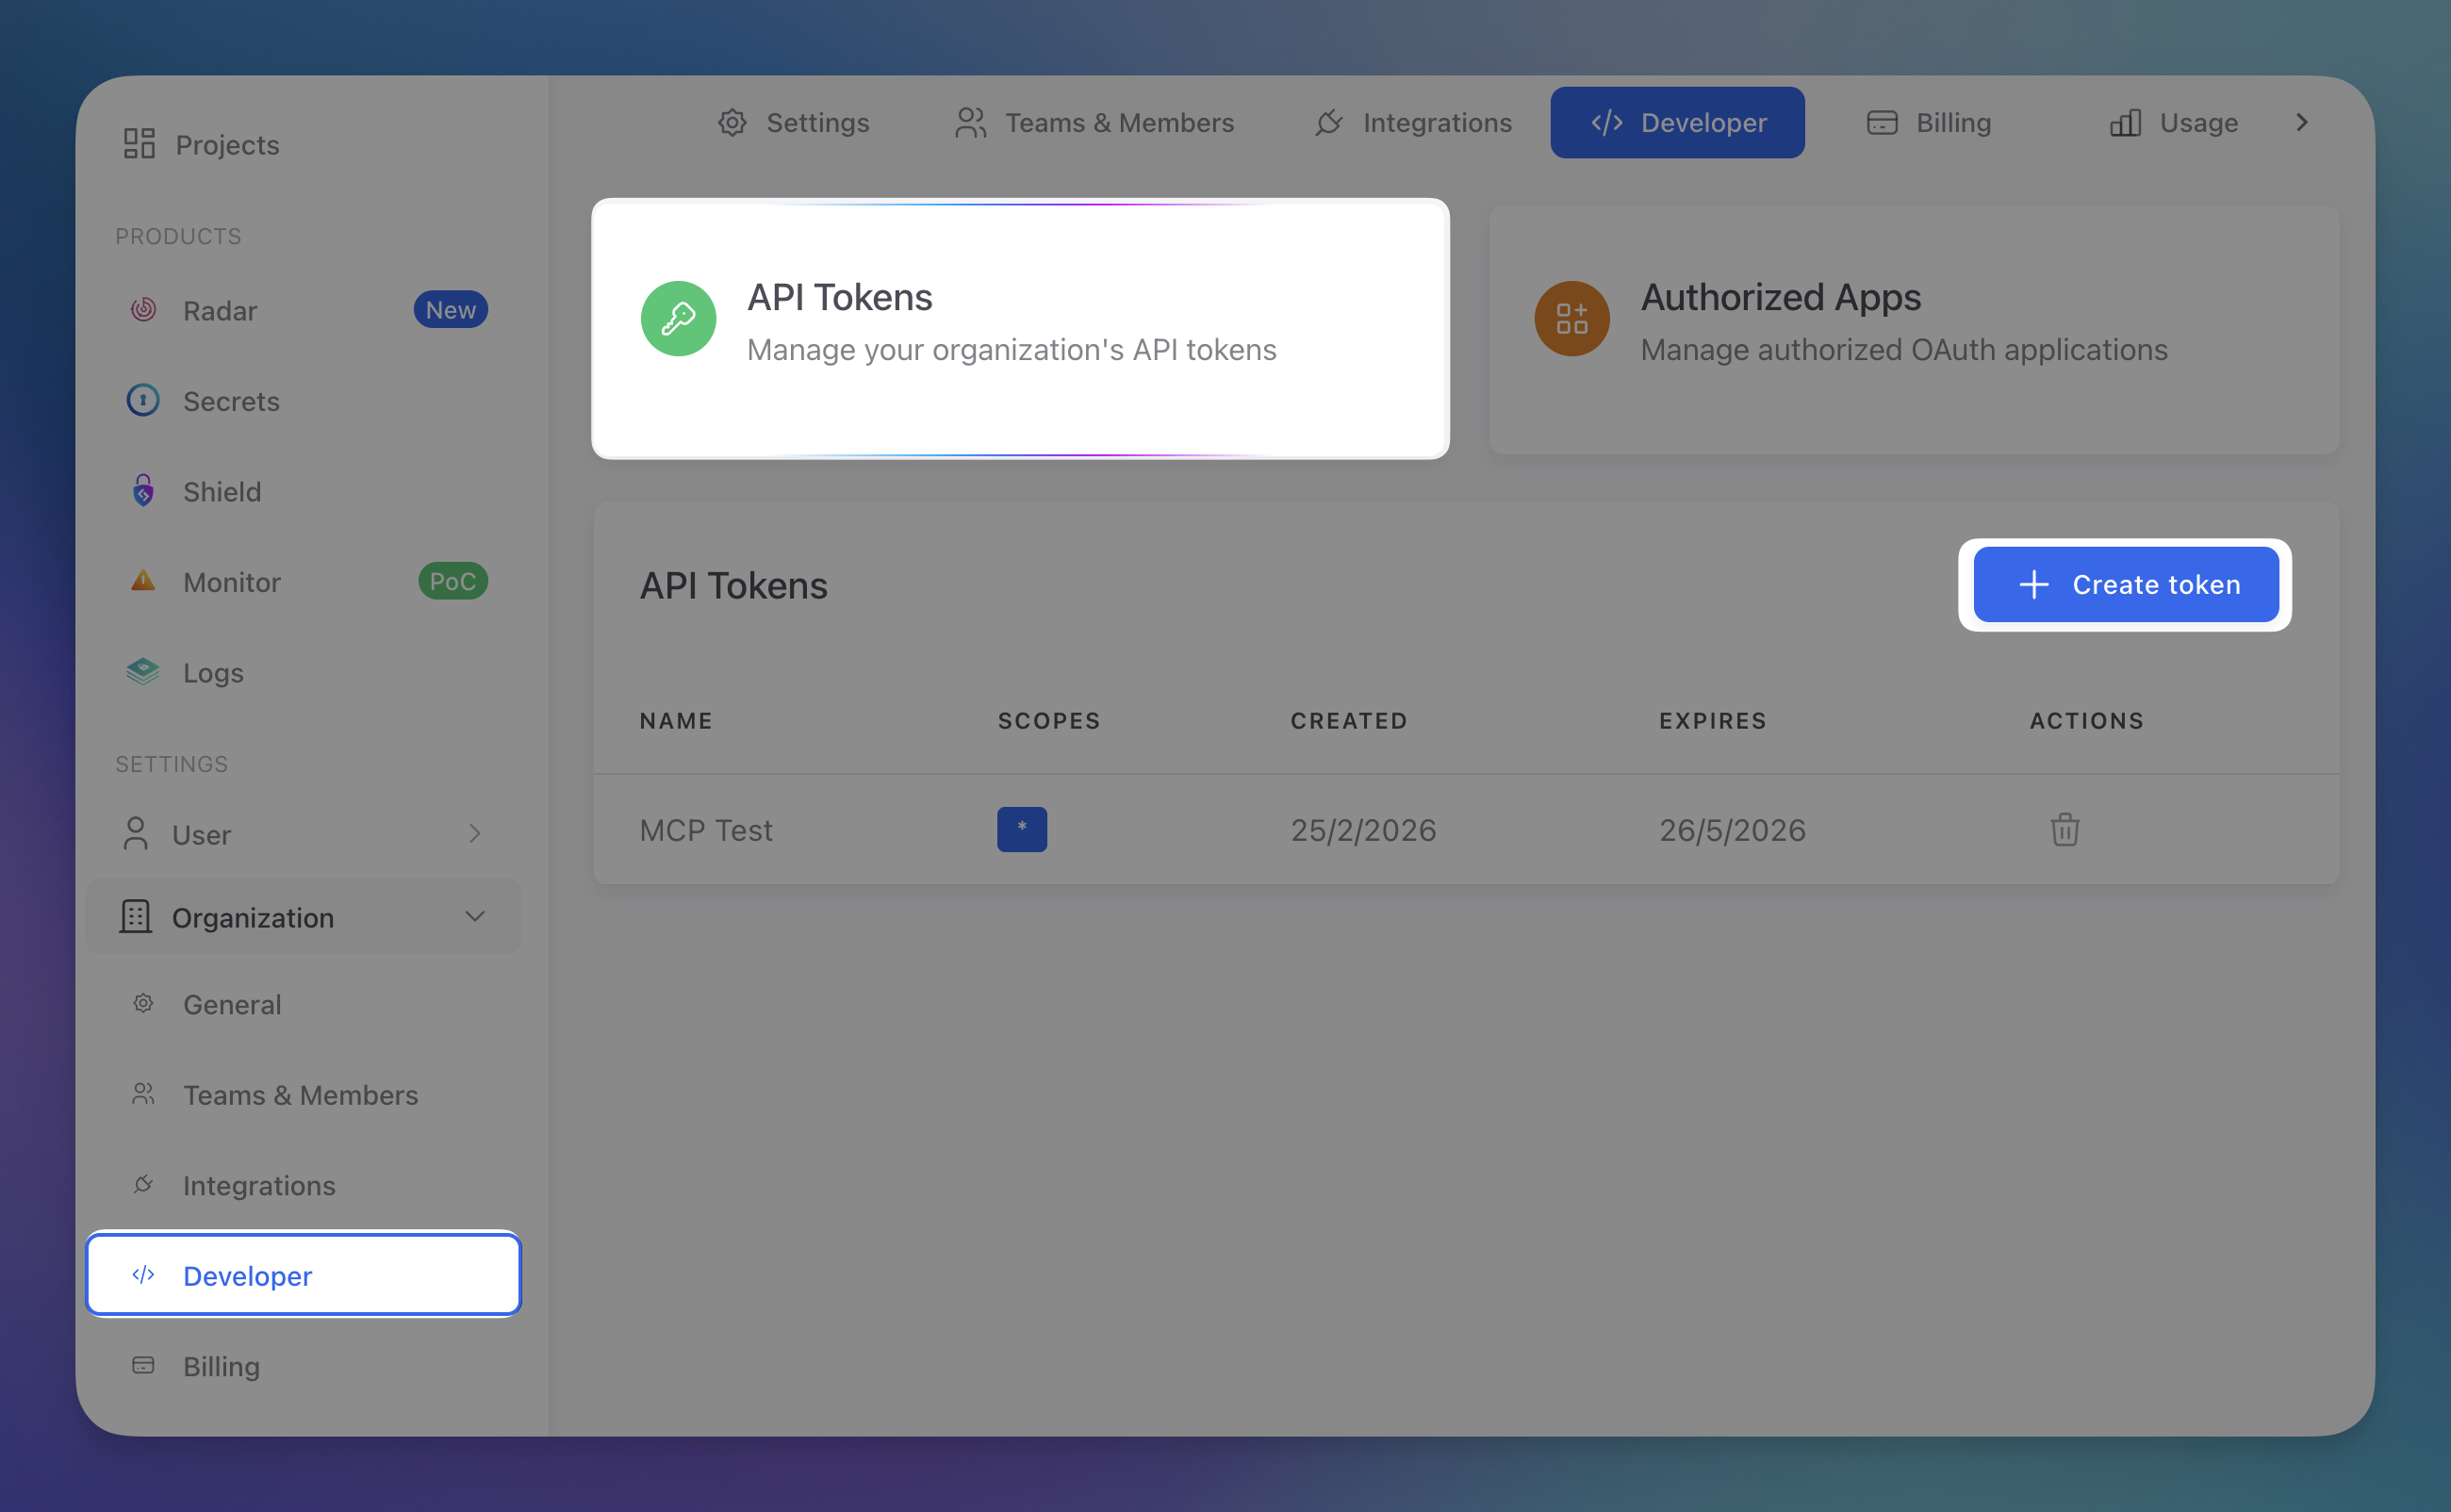
- Go to Organization > Developer > API Tokens
 Click to expand
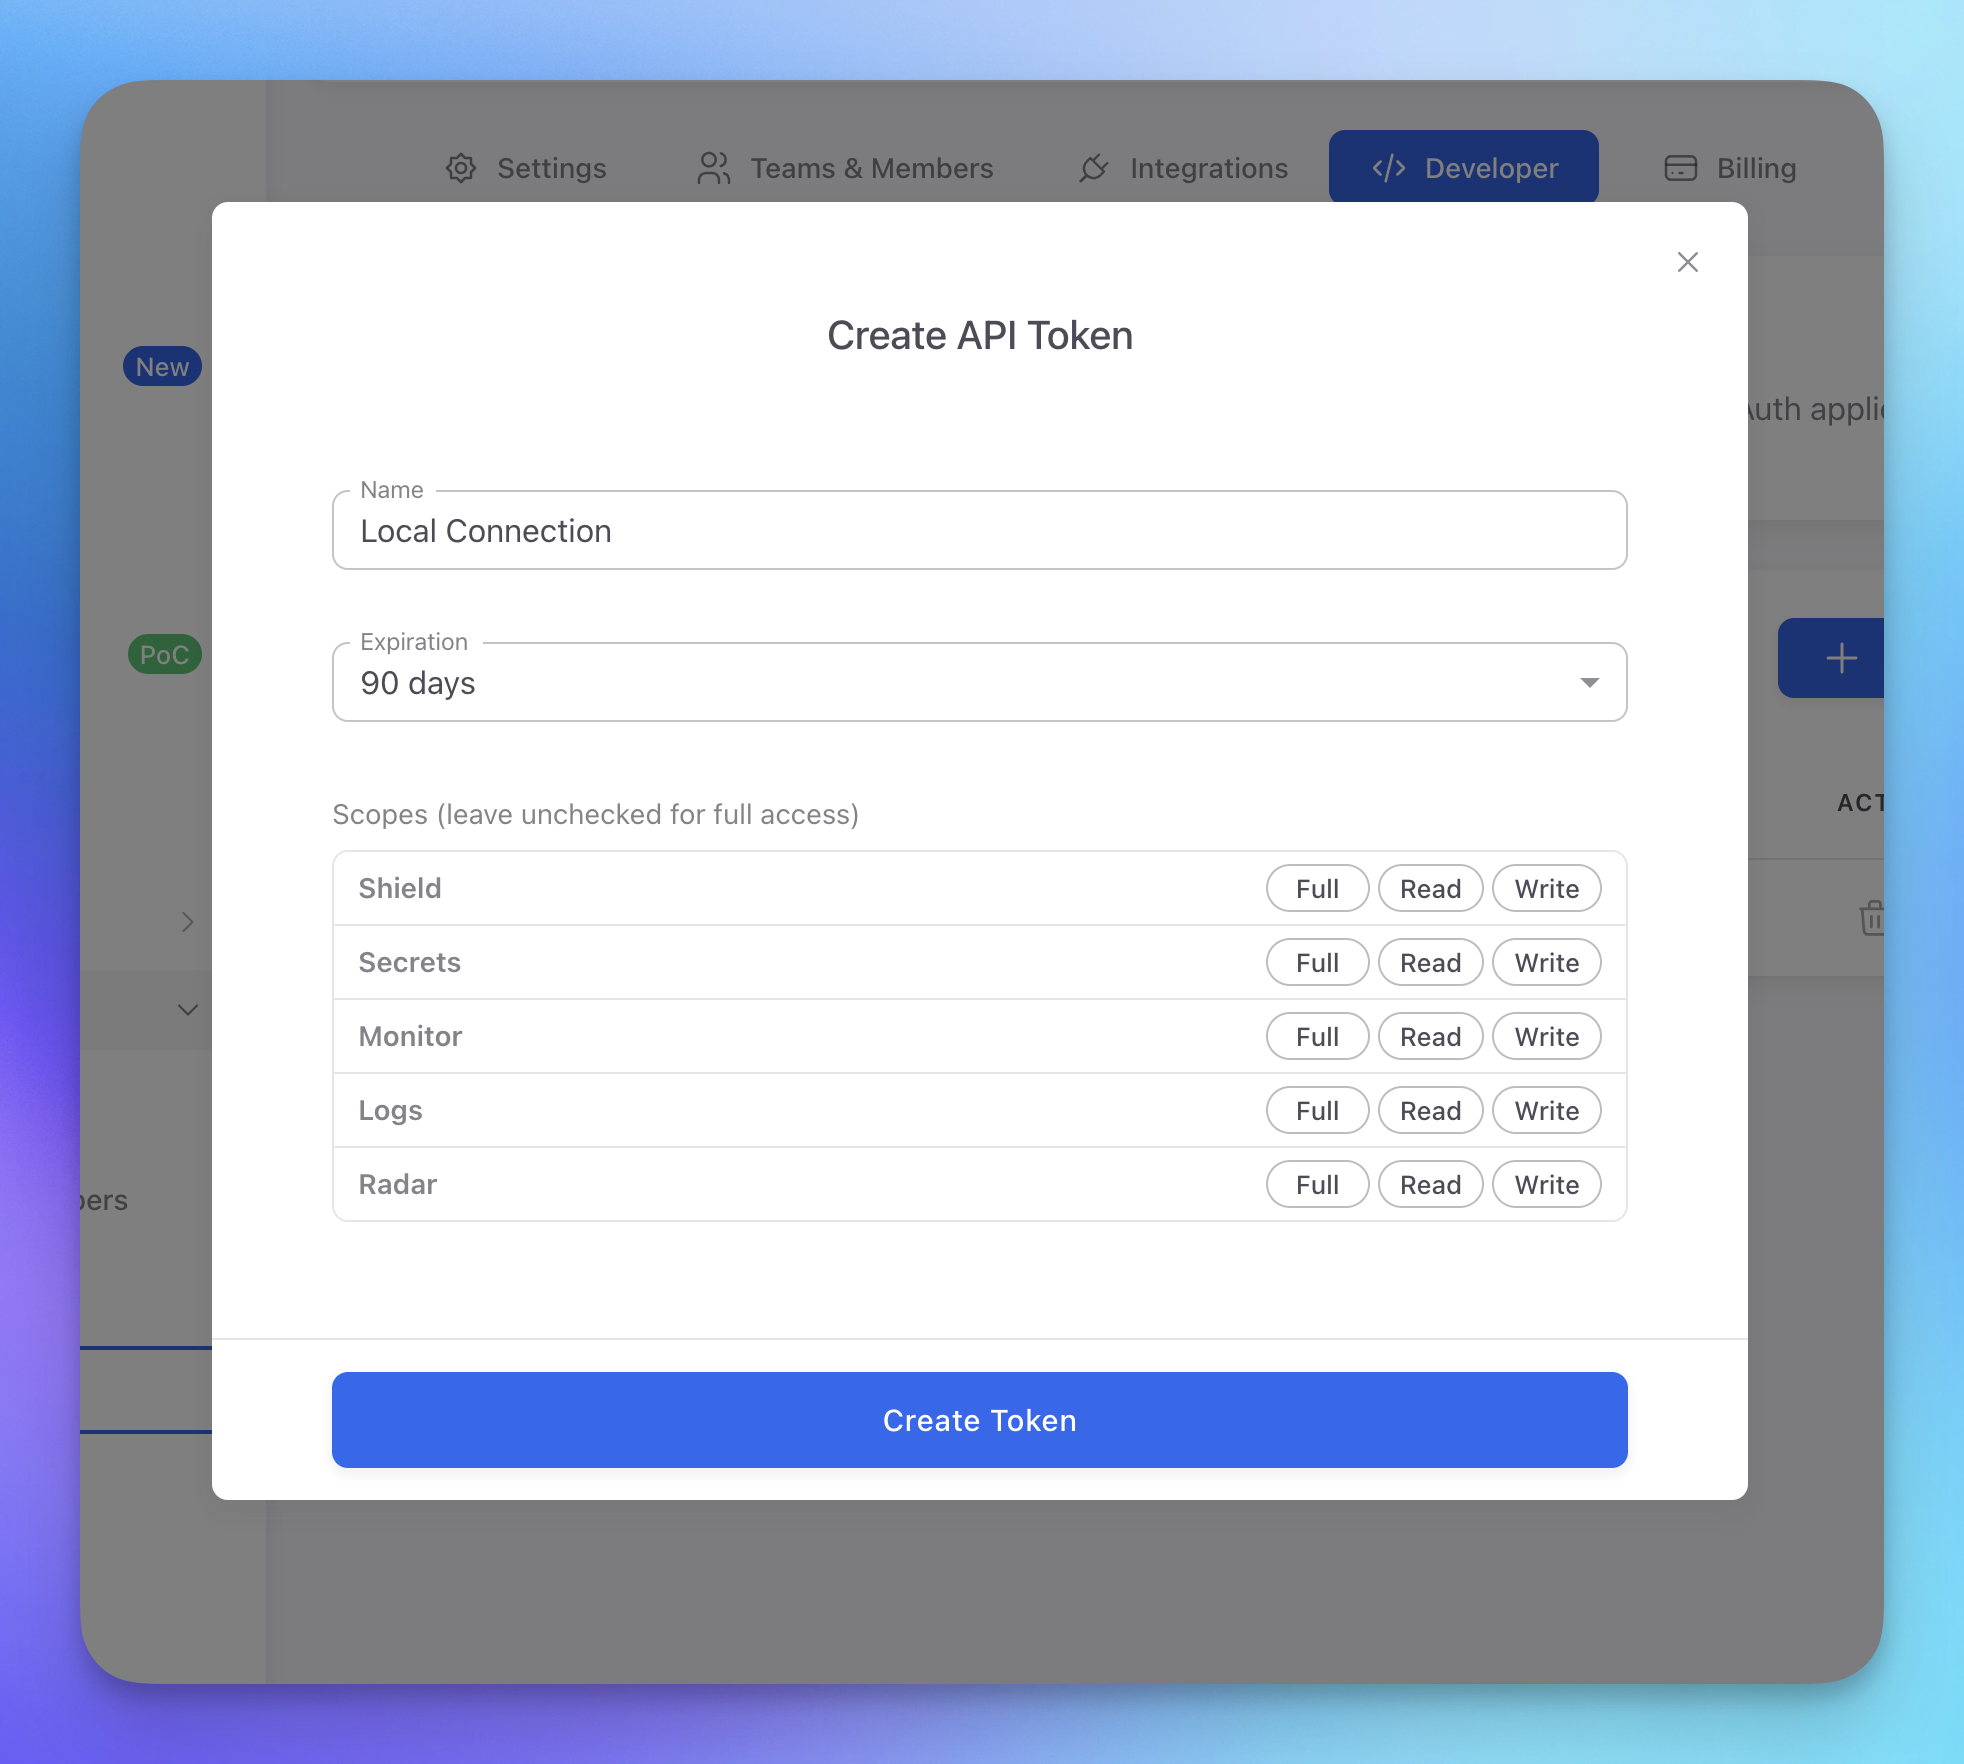
- Click Create token and configure the name, expiration, and scopes for each product
 Click to expand
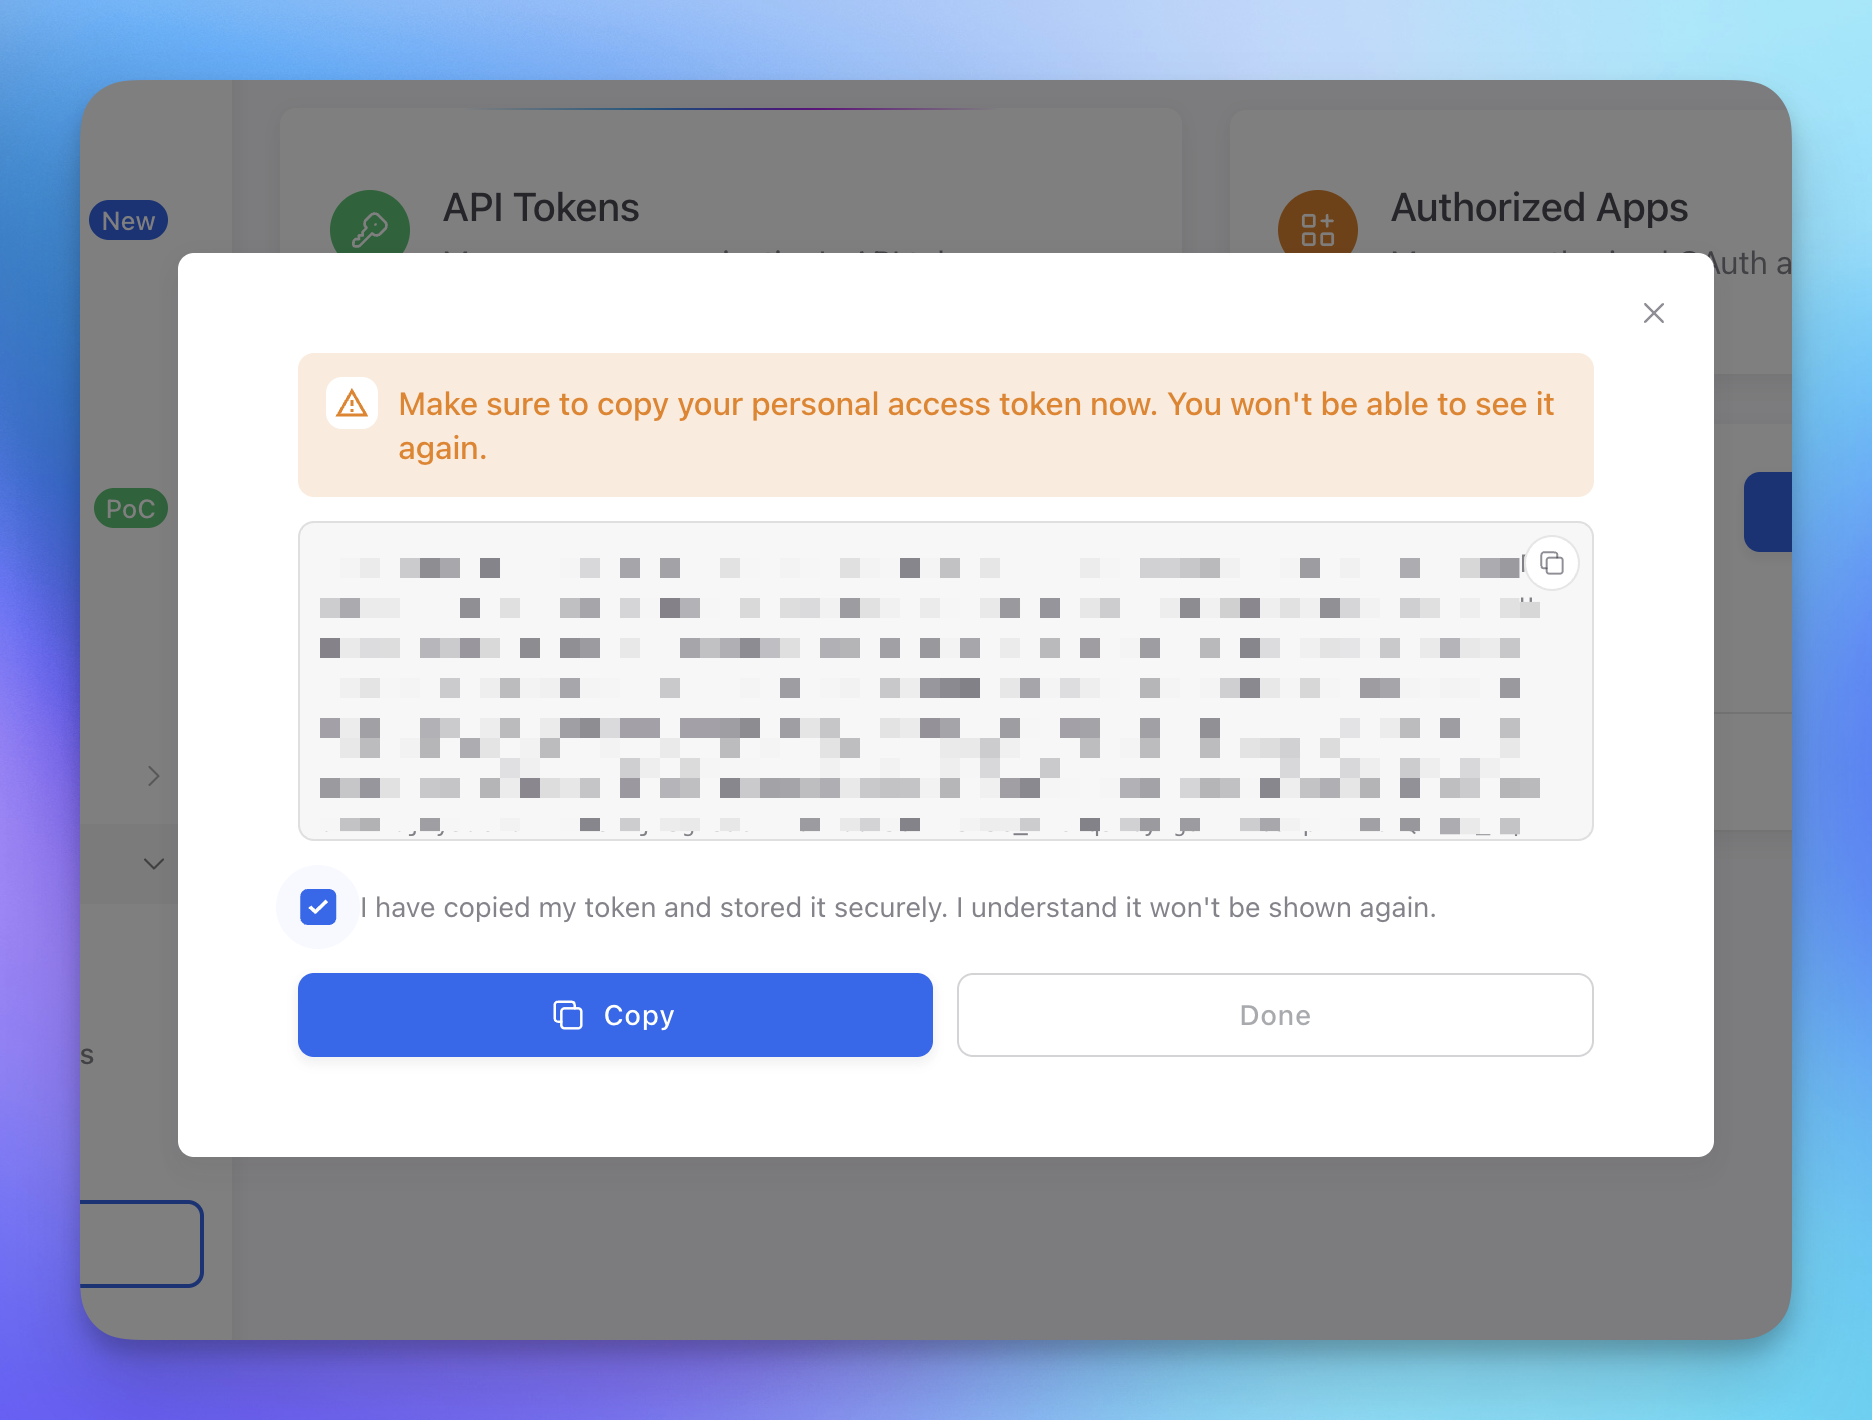
- Copy the token immediately — it won't be shown again
 Click to expand
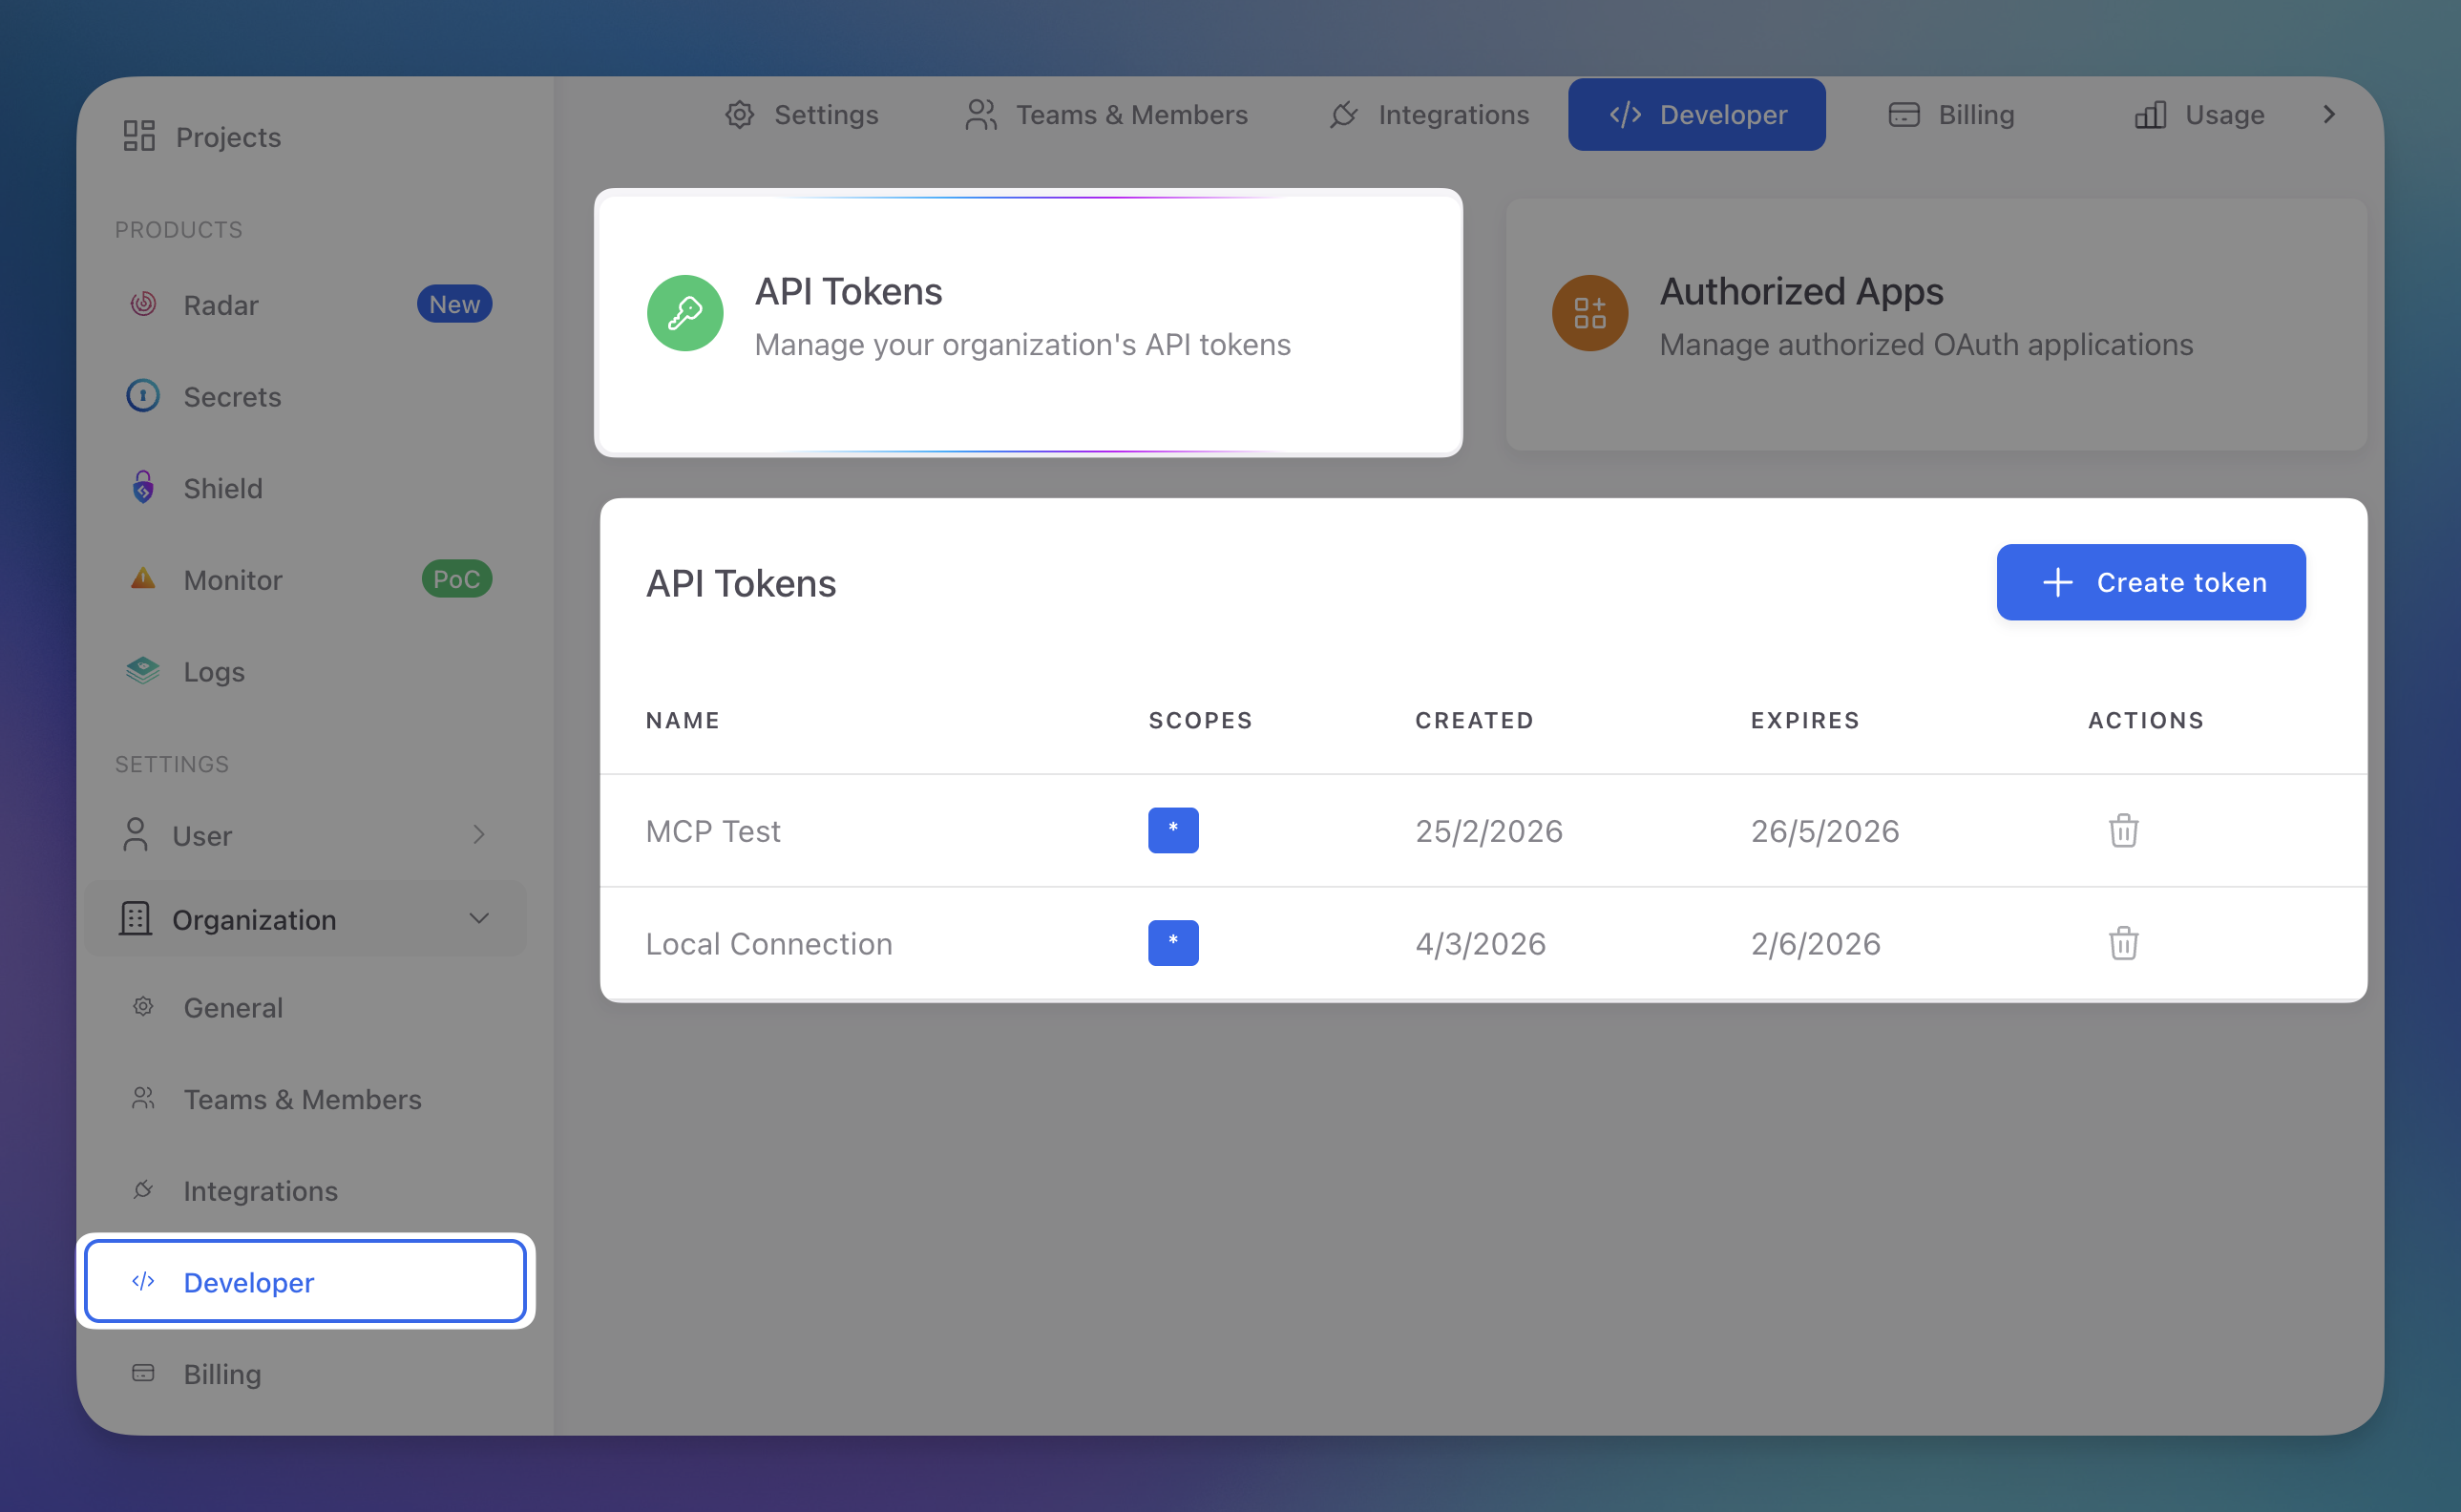
- Your new token appears in the tokens list alongside any existing ones
 Click to expand
Store Tokens Securely
API tokens grant access to your ByteHide organization. Store them securely and never commit them to version control. Use environment variables or a secrets manager.
Verifying the Connection
After setup, test that everything works by asking your AI agent:
- "List my ByteHide projects" — should return your organization's projects
- "Check if express@4.17.1 is safe" — should check the package against known CVEs
- "Scan this file for vulnerabilities" — should run a SAST scan on the current file
If any of these fail, check that:
- You completed the OAuth authentication in your browser
- Your ByteHide account has access to at least one organization
- Your MCP client is configured with the correct URL (
https://mcp.bytehide.com/mcp)
Troubleshooting
"Authentication required" on every request
Your MCP client may not be storing the OAuth token correctly. Try removing and re-adding the server:
# Claude Code
claude mcp remove bytehide
claude mcp add bytehide --transport streamable-http https://mcp.bytehide.com/mcp
# Claude Code
claude mcp remove bytehide
claude mcp add bytehide --transport streamable-http https://mcp.bytehide.com/mcpFor other clients, remove the ByteHide entry from your MCP configuration, restart the client, and add it again.
"Unauthorized" or "Invalid token"
Your token may have expired. Trigger a new authentication by invoking any ByteHide tool — your MCP client should automatically open the login flow again.
You can also revoke and re-authorize from the ByteHide dashboard.
Tools not appearing
Make sure the server is listed as connected in your MCP client settings. Some clients require a restart after adding a new server.
Next Steps
MCP Overview
Overview of what ByteHide MCP offers, with real usage examples.
Radar MCP Tools
Detailed reference for Radar-specific MCP tools.