Quick Start
This guide walks you through adding Shield to an existing Android project, configuring protections, and verifying the results.
Prerequisites
Before you start, make sure you have:
- An Android project using Gradle (AGP 7.0+ or 8.0+)
- Java 11 or higher
- A ByteHide account with a project token
Step 1: Configure Repositories
Shield is published on Maven Central. Add the standard repositories to your settings.gradle.kts if you don't have them already:
// settings.gradle.kts
pluginManagement {
    repositories {
        google()
        mavenCentral()
        gradlePluginPortal()
    }
}
// settings.gradle.kts
pluginManagement {
repositories {
google()
mavenCentral()
gradlePluginPortal()
}
}Step 2: Apply the Plugin
Add the Shield plugin to your app-level build.gradle.kts:
// app/build.gradle.kts
plugins {
    id("com.android.application")
    id("org.jetbrains.kotlin.android")
    id("com.bytehide.shield") version "1.1.5"
}
// app/build.gradle.kts
plugins {
id("com.android.application")
id("org.jetbrains.kotlin.android")
id("com.bytehide.shield") version "1.1.5"
}Step 3: Configure Protections
Add the shield block to your build.gradle.kts. The fastest way to start is using the mobile preset:
shield {
    projectToken = "your-project-token"
    preset("mobile")
    verbose = true
}
shield {
projectToken = "your-project-token"
preset("mobile")
verbose = true
} Click to expand
The mobile preset enables string encryption, constant mutation, debug removal, and anti-debug — a safe baseline for most Android applications. See Presets for all available presets.
No manual exclusions needed
Shield automatically excludes Android, Kotlin, and other framework packages. You only need to add exclusions for your own packages that use reflection or serialization.
Step 4: Build
Run a release build:
./gradlew assembleRelease./gradlew assembleReleaseWith verbose = true, you will see Shield's output in the build log:
Shield Protection - version: xxxxx
...
Validating with Bytehide Cloud...
Plan: enterprise (enterprise)
...
Shield: Input JARs: x1
Shield: Input directories: 1370 library classes
Shield: Initializing class references...
Shield: String Encryption
Shield: Constant Mutation
Shield: Debug Removal
Shield: Control Flow Obfuscation
Shield: Name Obfuscation
Running annotations...
Shield Protection - version: xxxxx
...
Validating with Bytehide Cloud...
Plan: enterprise (enterprise)
...
Shield: Input JARs: x1
Shield: Input directories: 1370 library classes
Shield: Initializing class references...
Shield: String Encryption
Shield: Constant Mutation
Shield: Debug Removal
Shield: Control Flow Obfuscation
Shield: Name Obfuscation
Running annotations...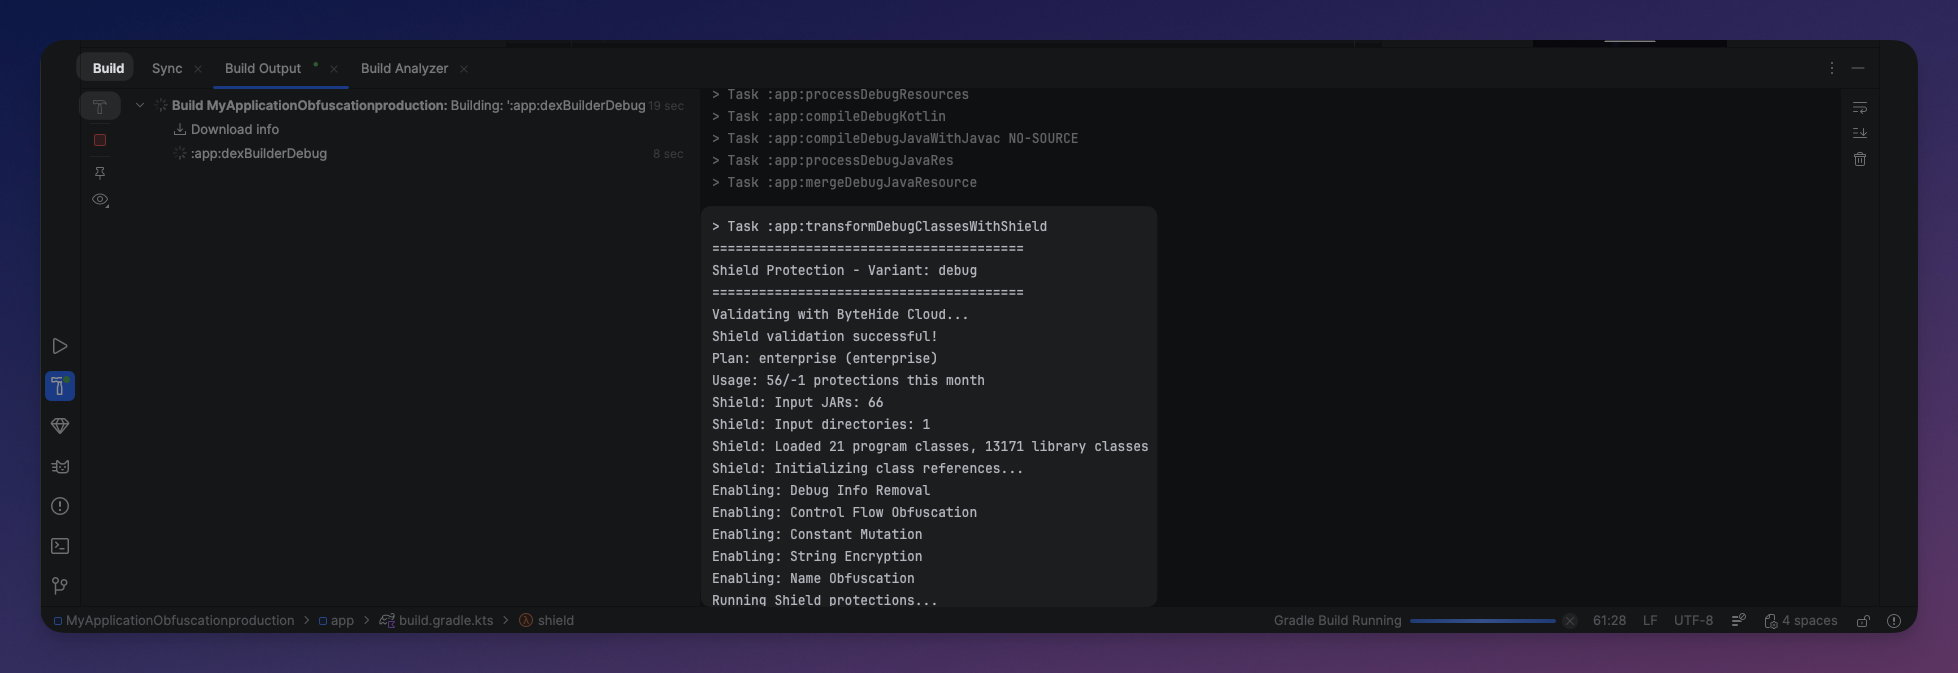 Click to expand
Step 5: Verify
To confirm your APK is protected, decompile it with JADX and compare:
Before Shield:
public class PaymentProcessor {
    private static final String API_KEY = "sk_live_abc123def456";
    private static final String BASE_URL = "https://api.example.com/v2";

    public PaymentResult chargeCustomer(String cardToken, double amount) {
        HttpClient client = new HttpClient(BASE_URL);
        client.setHeader("Authorization", "Bearer " + API_KEY);
        return client.post("/charge", cardToken, amount);
    }
}
public class PaymentProcessor {
private static final String API_KEY = "sk_live_abc123def456";
private static final String BASE_URL = "https://api.example.com/v2";
public PaymentResult chargeCustomer(String cardToken, double amount) {
HttpClient client = new HttpClient(BASE_URL);
client.setHeader("Authorization", "Bearer " + API_KEY);
return client.post("/charge", cardToken, amount);
}
}After Shield:
public class a {
    private static final String b = StringDecryptor.decrypt("\u0012\u0045\u0078...", "xK", 42, true);
    private static final String c = StringDecryptor.decrypt("\u0033\u0067\u0021...", "mQ", 17, false);

    public e a(String str, double d) {
        f f2 = new f(StringDecryptor.decrypt("\u0055\u0012...", "rT", 8, true));
        int i = 1;
        if ((i ^ 1) == 0) {
            f2.a(StringDecryptor.decrypt("\u0077\u0023...", "nP", 3, false),
                 StringDecryptor.decrypt("\u0088\u0034...", "kL", 5, true) + b);
        }
        return f2.b(StringDecryptor.decrypt("\u0099\u0045...", "jM", 2, false), str, d);
    }
}
public class a {
private static final String b = StringDecryptor.decrypt("\u0012\u0045\u0078...", "xK", 42, true);
private static final String c = StringDecryptor.decrypt("\u0033\u0067\u0021...", "mQ", 17, false);
public e a(String str, double d) {
f f2 = new f(StringDecryptor.decrypt("\u0055\u0012...", "rT", 8, true));
int i = 1;
if ((i ^ 1) == 0) {
f2.a(StringDecryptor.decrypt("\u0077\u0023...", "nP", 3, false),
StringDecryptor.decrypt("\u0088\u0034...", "kL", 5, true) + b);
}
return f2.b(StringDecryptor.decrypt("\u0099\u0045...", "jM", 2, false), str, d);
}
}Strings are encrypted, class and method names are obfuscated, constants are transformed, and control flow is restructured with opaque predicates.
Next Steps
Once your base configuration works:
- Try stronger presets — Use
preset("aggressive")for maximum protection including name obfuscation, control flow, and anti-tamper. See Gradle DSL Reference. - Configure per variant — Use different protection levels for debug and release builds. See Variant Configuration.
- Fine-tune exclusions — Use annotations or per-protection exclusions to exclude specific classes if you encounter issues with reflection or serialization.
- Set up CI/CD — Automate protected builds in your pipeline. See CI/CD Integration.