Get Project Token
A project token is required to use Shield. It links your builds to your ByteHide account, validates your license, and enables cloud features like mapping file storage and stack trace deobfuscation.
Create Your Project
To get your project token, you first need to create a Shield project:
- Sign in to ByteHide Cloud
- Go to the Projects section
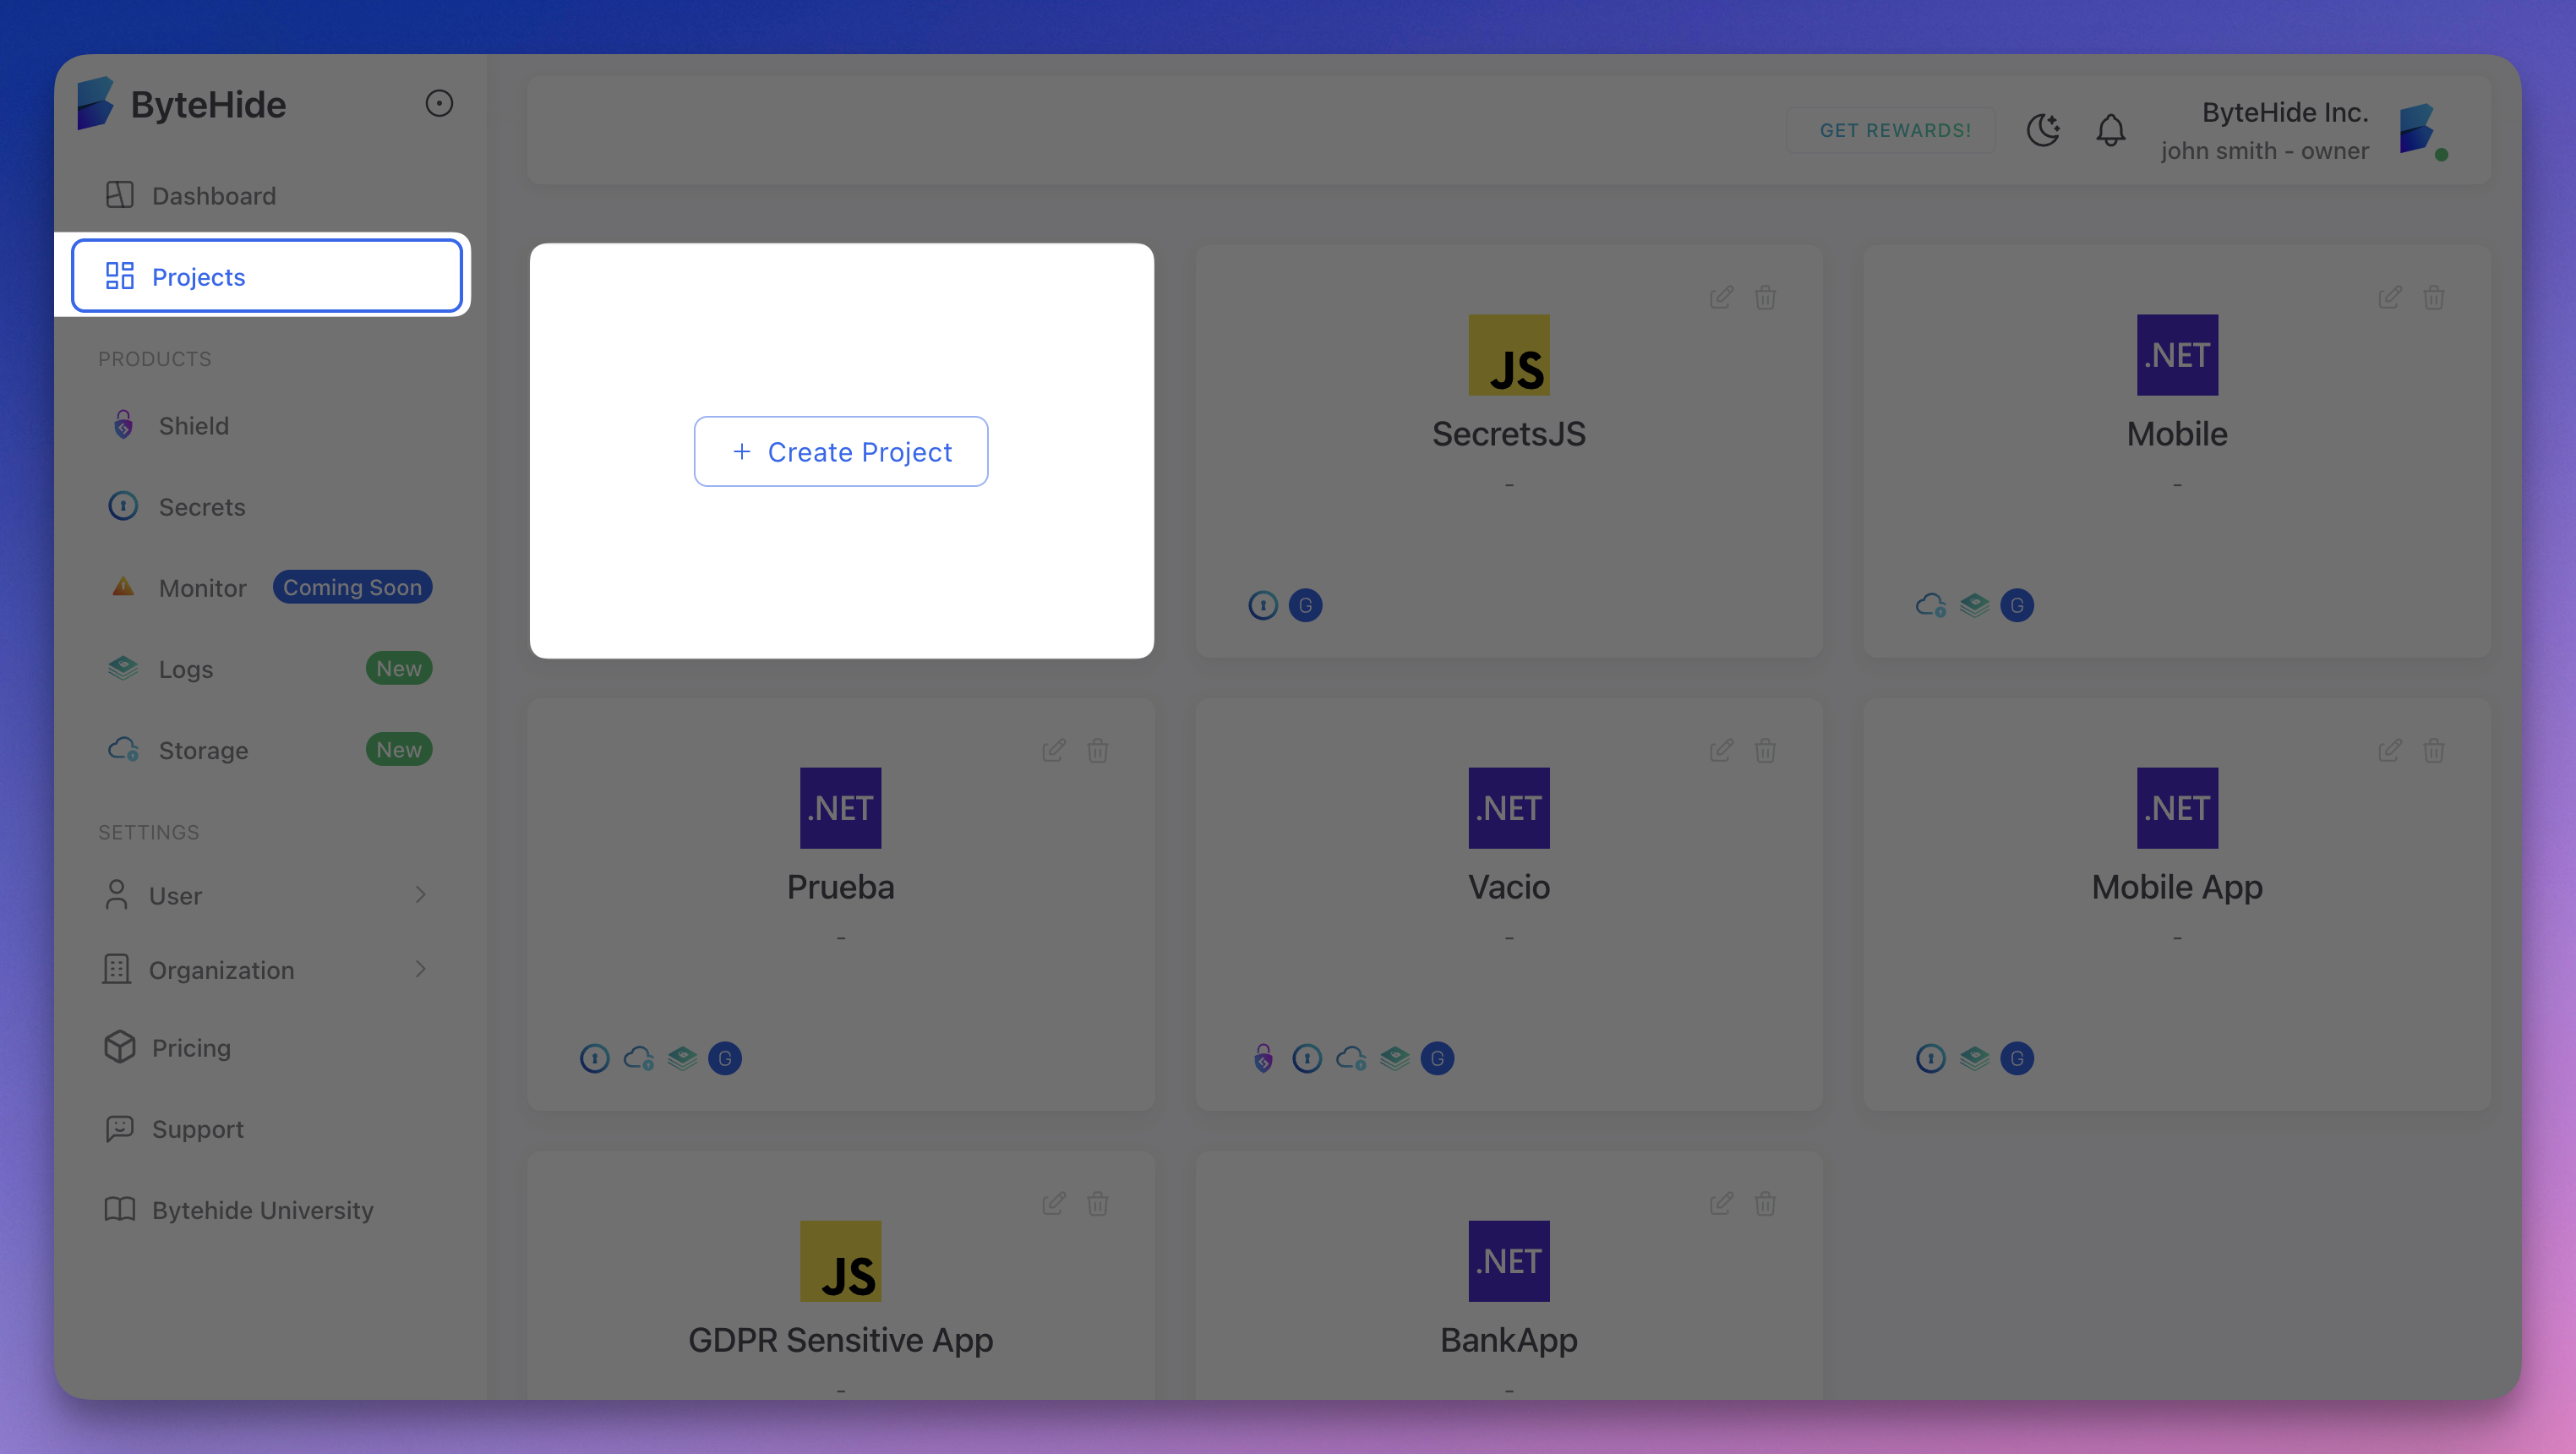 Click to expand
 - Click Create Project in the dashboard
 Click to expand
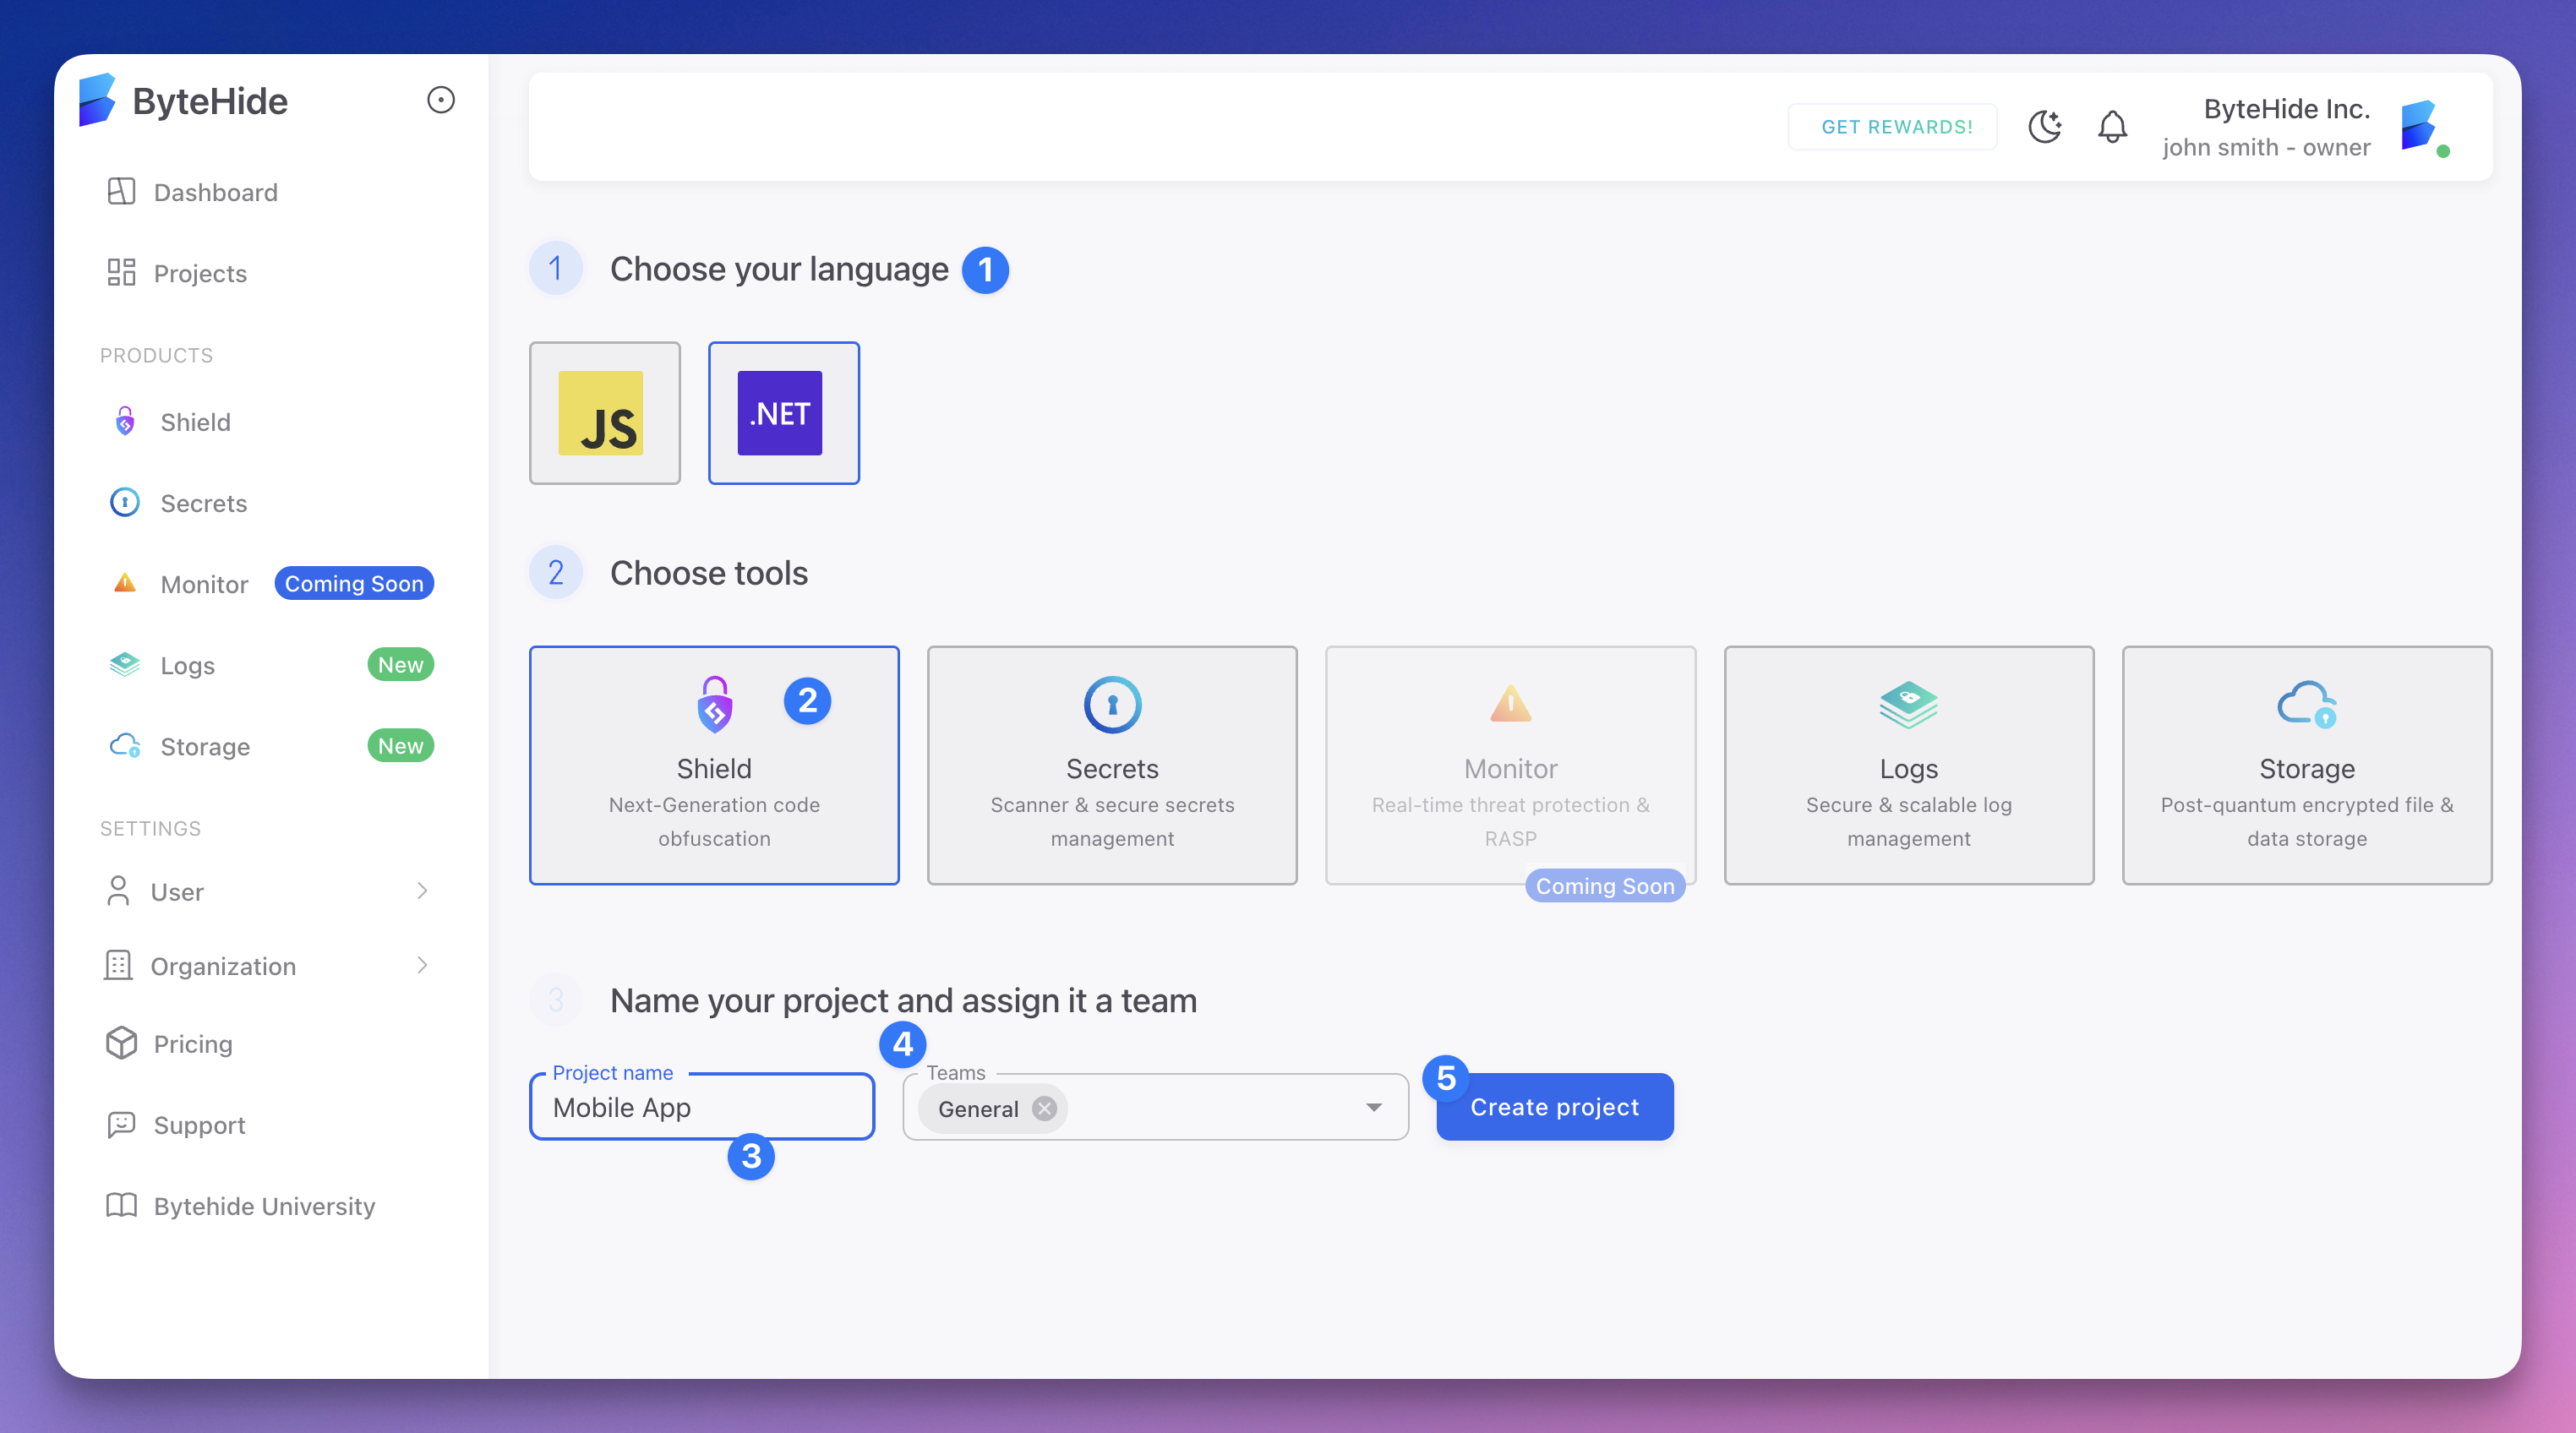
 - Choose android as your language
- Choose Shield in tools
- Type the name of your project
- Select the groups that will have access to your project
Get Your Token
After creating your project:
- Go to your Shield project
- In the main view you will see the Project Token box
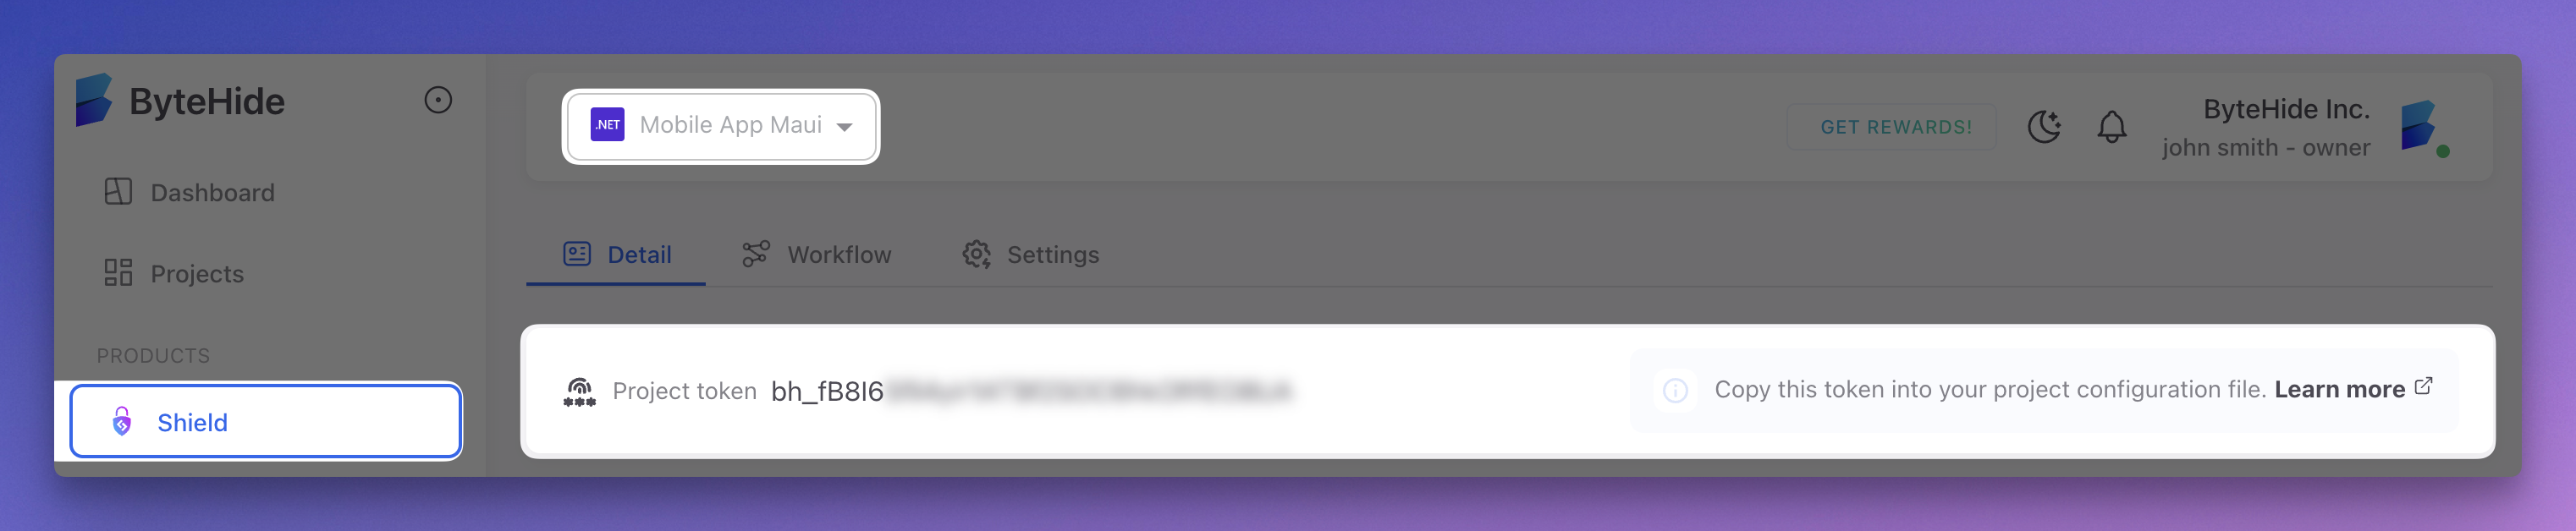 Click to expand
 - Copy your project token
Configure the Token
Option 1: In build.gradle (Development)
shield {
    projectToken = "your-project-token"
}
shield {
projectToken = "your-project-token"
}This is the simplest approach for local development. Do not commit tokens to version control.
Option 2: Environment Variable (Recommended for CI/CD)
Set the BYTEHIDE_PROJECT_TOKEN environment variable and reference it in your build:
shield {
    projectToken = System.getenv("BYTEHIDE_PROJECT_TOKEN")
}
shield {
projectToken = System.getenv("BYTEHIDE_PROJECT_TOKEN")
}In your CI environment:
export BYTEHIDE_PROJECT_TOKEN="your-project-token"
./gradlew assembleRelease
export BYTEHIDE_PROJECT_TOKEN="your-project-token"
./gradlew assembleReleaseOption 3: gradle.properties (Team Development)
Add the token to your gradle.properties file:
# gradle.properties (add to .gitignore)
bytehide.shield.token=your-project-token
# gradle.properties (add to .gitignore)
bytehide.shield.token=your-project-tokenReference it in your build.gradle:
shield {
    projectToken = project.property('bytehide.shield.token')
}
shield {
projectToken = project.property('bytehide.shield.token')
}Add gradle.properties to your .gitignore to keep the token out of version control. Each team member sets their own token locally.
Token Security
- Never commit project tokens to public repositories
- Use environment variables in CI/CD pipelines
- Each project in the Cloud Panel has its own unique token
- Tokens can be rotated from the Cloud Panel if compromised
What the Token Enables
During each build, Shield uses the token to:
- Validate your license — Confirms your account has an active plan with available protection quota
- Register the build — Records build metadata and protection analytics in your Cloud Panel
- Upload mapping files — Stores the ProGuard-format mapping file for stack trace deobfuscation from the Cloud Panel
Without a valid token, the build will fail with an authentication error.