Automatic Setup (Recommended)
The fastest way to get started. A single command installs Shield iOS, creates a configuration file, and configures your Xcode project — all automatically.
Usage
Run this from your Xcode project directory:
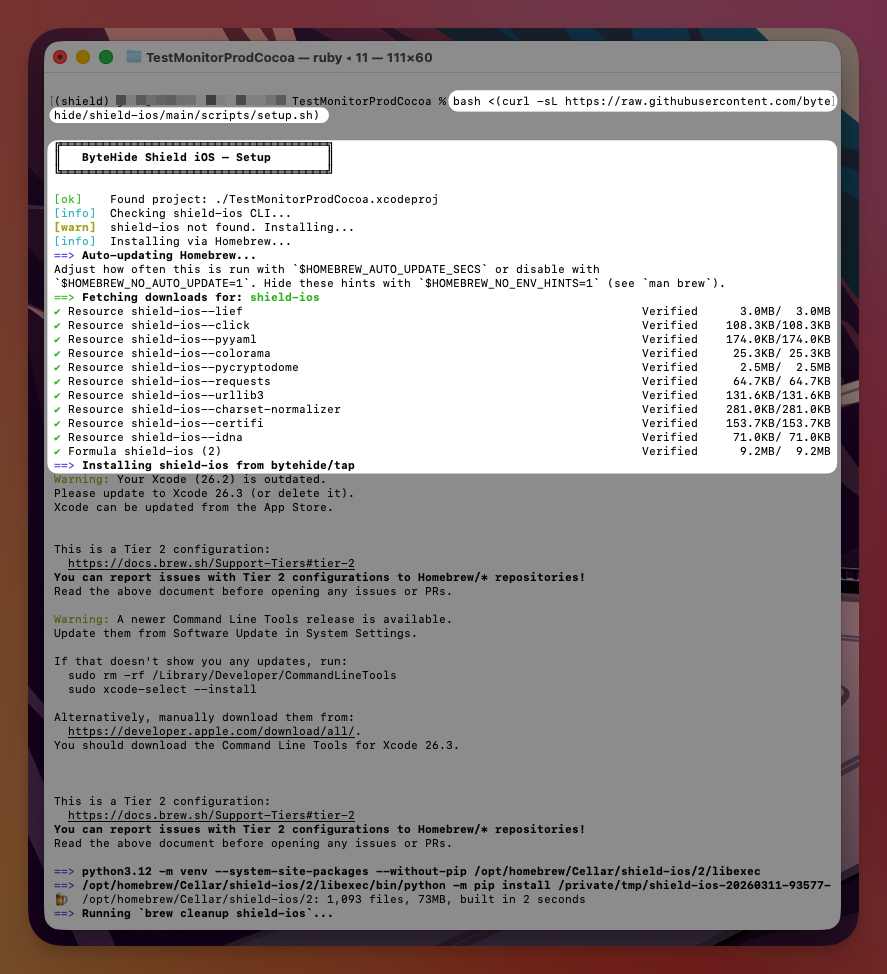
bash <(curl -sL https://raw.githubusercontent.com/bytehide/shield-ios/main/scripts/setup.sh)bash <(curl -sL https://raw.githubusercontent.com/bytehide/shield-ios/main/scripts/setup.sh)That's it. The script handles everything.
 Click to expand
What It Does
- Installs the
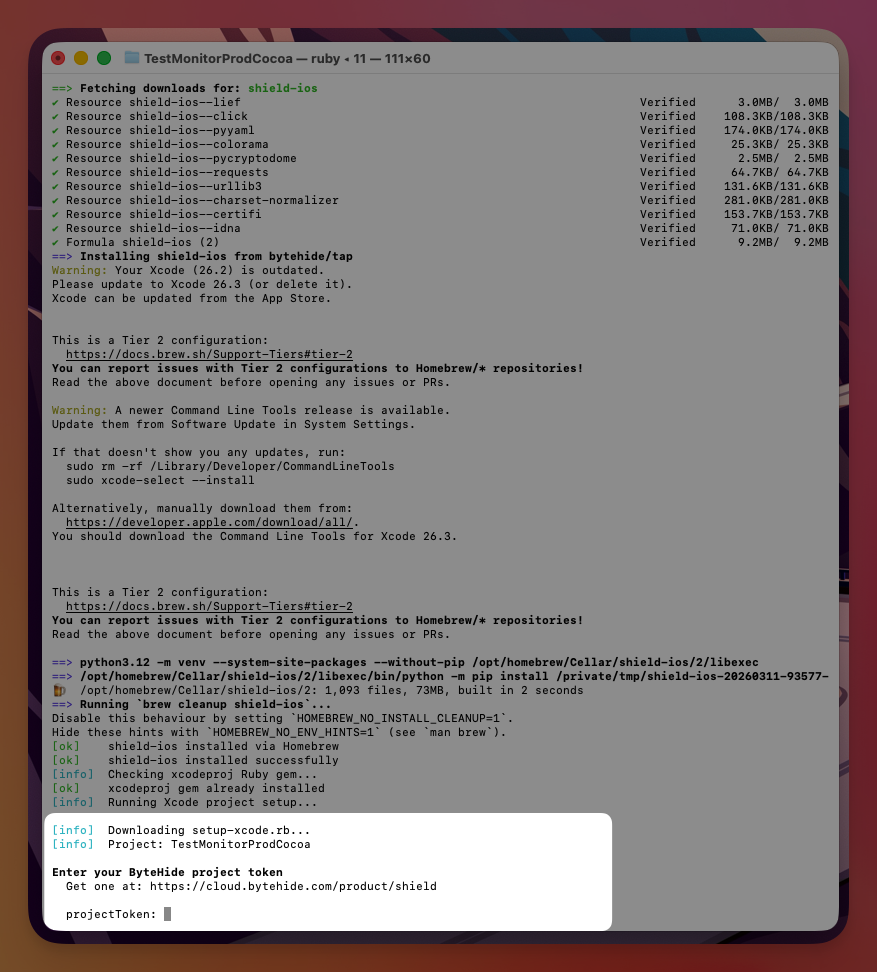
shield-iosCLI — via Homebrew (brew install bytehide/tap/shield-ios) or pip as fallback - Installs the
xcodeprojRuby gem — needed to modify the Xcode project file - Asks for your project token — get one from the ByteHide Cloud Panel
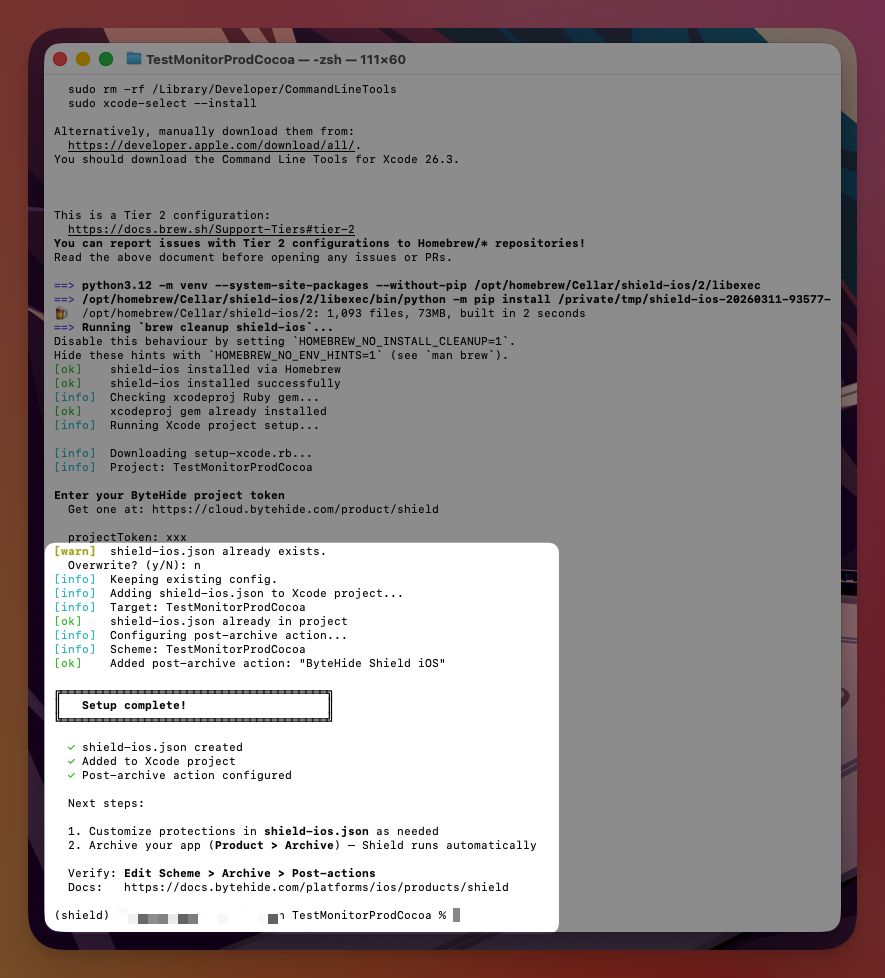
- Creates
shield-ios.json— default configuration with all protections enabled - Adds
shield-ios.jsonto your Xcode project — file reference + Copy Bundle Resources - Adds a post-archive action — so Shield runs automatically every time you Archive
 Click to expand
 Click to expand
After Running
If Xcode was open during setup, close and reopen it to see the changes.
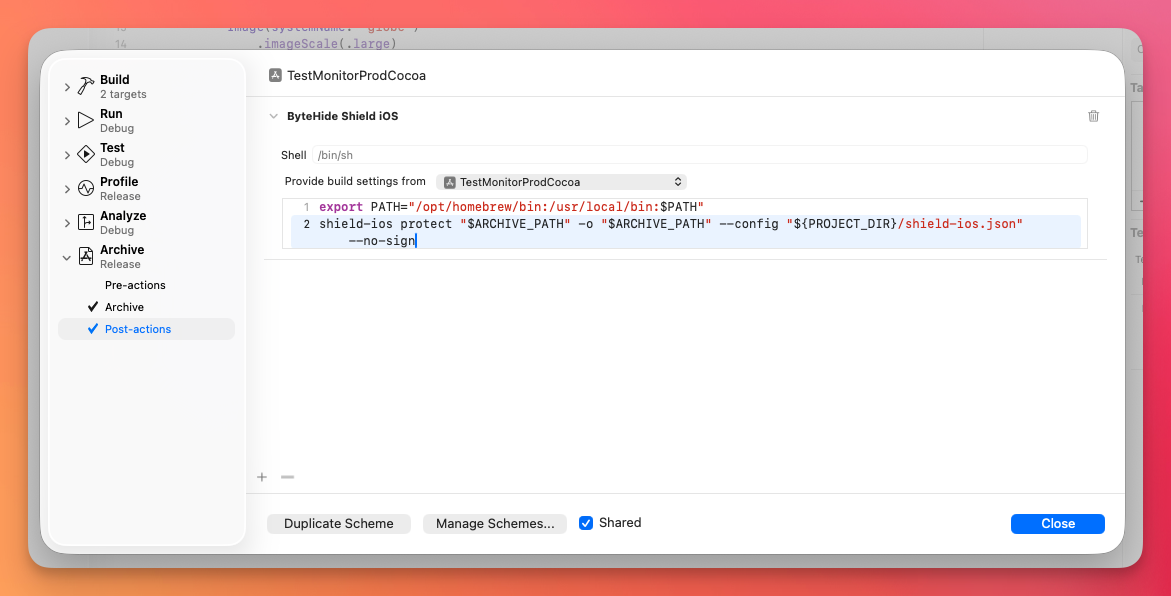
To verify: Edit Scheme > Archive > Post-actions — you should see "ByteHide Shield iOS".
 Click to expand
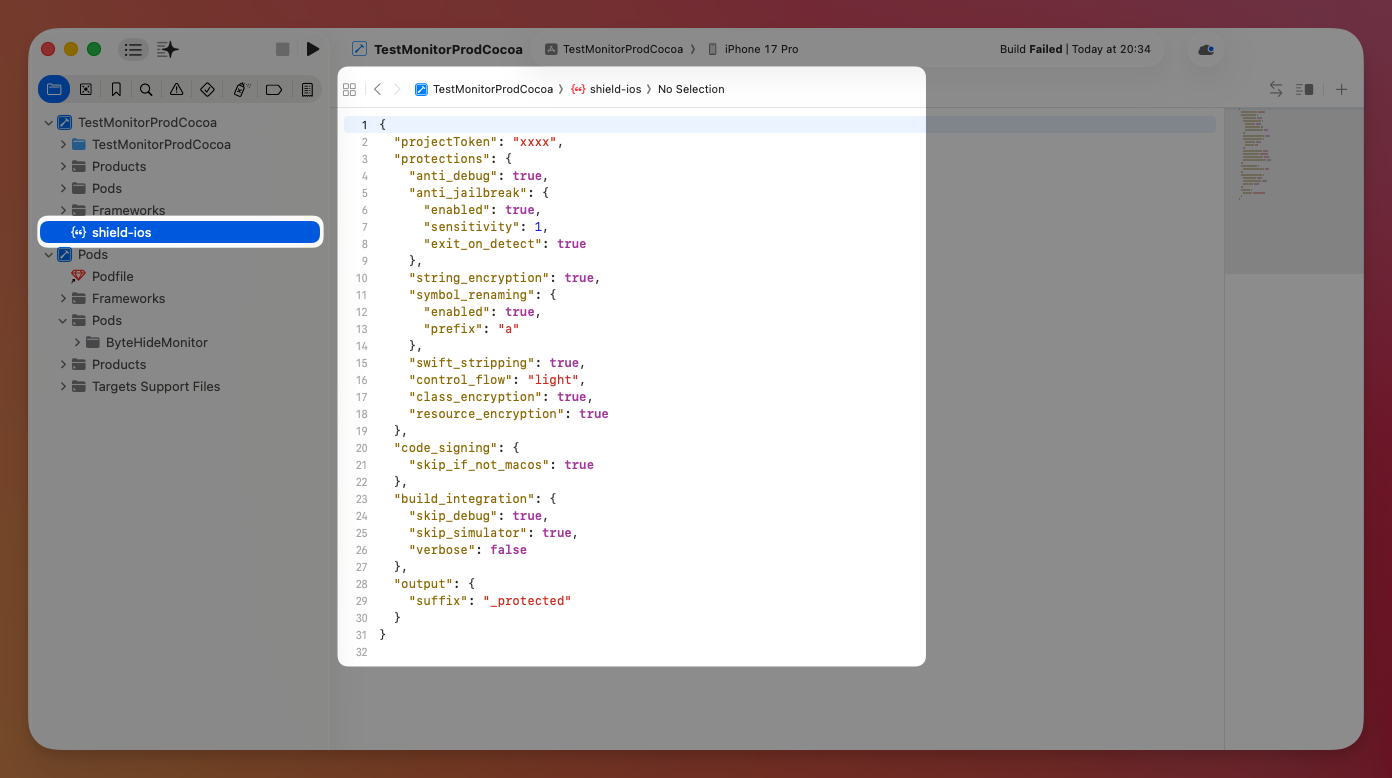
You should also see shield-ios.json in your project navigator:
 Click to expand
What Gets Modified
YourProject/
├── YourProject.xcodeproj/
│   └── xcshareddata/xcschemes/YourProject.xcscheme  (post-archive action added)
└── shield-ios.json                                   (created)
YourProject/
├── YourProject.xcodeproj/
│ └── xcshareddata/xcschemes/YourProject.xcscheme (post-archive action added)
└── shield-ios.json (created)The script is idempotent — running it again won't create duplicates.
Configuration
The generated shield-ios.json has sensible defaults:
{
  "projectToken": "YOUR_PROJECT_TOKEN",
  "protections": {
    "anti_debug": true,
    "anti_jailbreak": {
      "enabled": true,
      "sensitivity": 1,
      "exit_on_detect": true
    },
    "string_encryption": true,
    "symbol_renaming": {
      "enabled": true,
      "prefix": "a"
    },
    "swift_stripping": true,
    "control_flow": "light",
    "class_encryption": true,
    "resource_encryption": true
  }
}
{
"projectToken": "YOUR_PROJECT_TOKEN",
"protections": {
"anti_debug": true,
"anti_jailbreak": {
"enabled": true,
"sensitivity": 1,
"exit_on_detect": true
},
"string_encryption": true,
"symbol_renaming": {
"enabled": true,
"prefix": "a"
},
"swift_stripping": true,
"control_flow": "light",
"class_encryption": true,
"resource_encryption": true
}
}Edit shield-ios.json to customize protections. See Configuration Reference for all available options.
Requirements
- macOS with Xcode installed
- An Xcode project (
.xcodeproj) in the current directory - A scheme already generated (open the project in Xcode at least once before running)
Troubleshooting
"No .xcodeproj found in current directory"
Run the command from your Xcode project root — the directory that contains the .xcodeproj file.
"shield-ios: command not found" after install
The script adds Shield iOS via Homebrew or pip. If the command isn't found, ensure /opt/homebrew/bin or your pip bin directory is in your PATH:
export PATH="/opt/homebrew/bin:/usr/local/bin:$HOME/.local/bin:$PATH"export PATH="/opt/homebrew/bin:/usr/local/bin:$HOME/.local/bin:$PATH"Post-archive action doesn't appear in Xcode
Close and reopen Xcode. It caches schemes in memory and won't pick up external changes to .xcscheme files while open.
"xcodeproj gem not available"
The script will warn but continue. You can install it manually and re-run:
gem install xcodeprojgem install xcodeprojNext Steps
Configuration Reference
Full configuration options for shield-ios.json
Xcode Integration
Manual Xcode setup and CI/CD with xcodebuild
CLI Reference
Full CLI reference and protection options