Get Project Token
What is a Project Token?
A project token is a unique identifier that authenticates your application with ByteHide Shield services. It allows you to:
- Secure your JavaScript code with ByteHide Shield protections
- Manage protection configurations across different environments
- Track protection attempts and view detailed reports
- Control access for team members with different permission levels
- Integrate with CI/CD pipelines for automated protection
Each project has its own unique token that should be kept secure and not shared publicly.
Create Your Project
To get your project token, you first need to create a Shield project:
- Sign in to ByteHide Cloud
- Go to Projects section
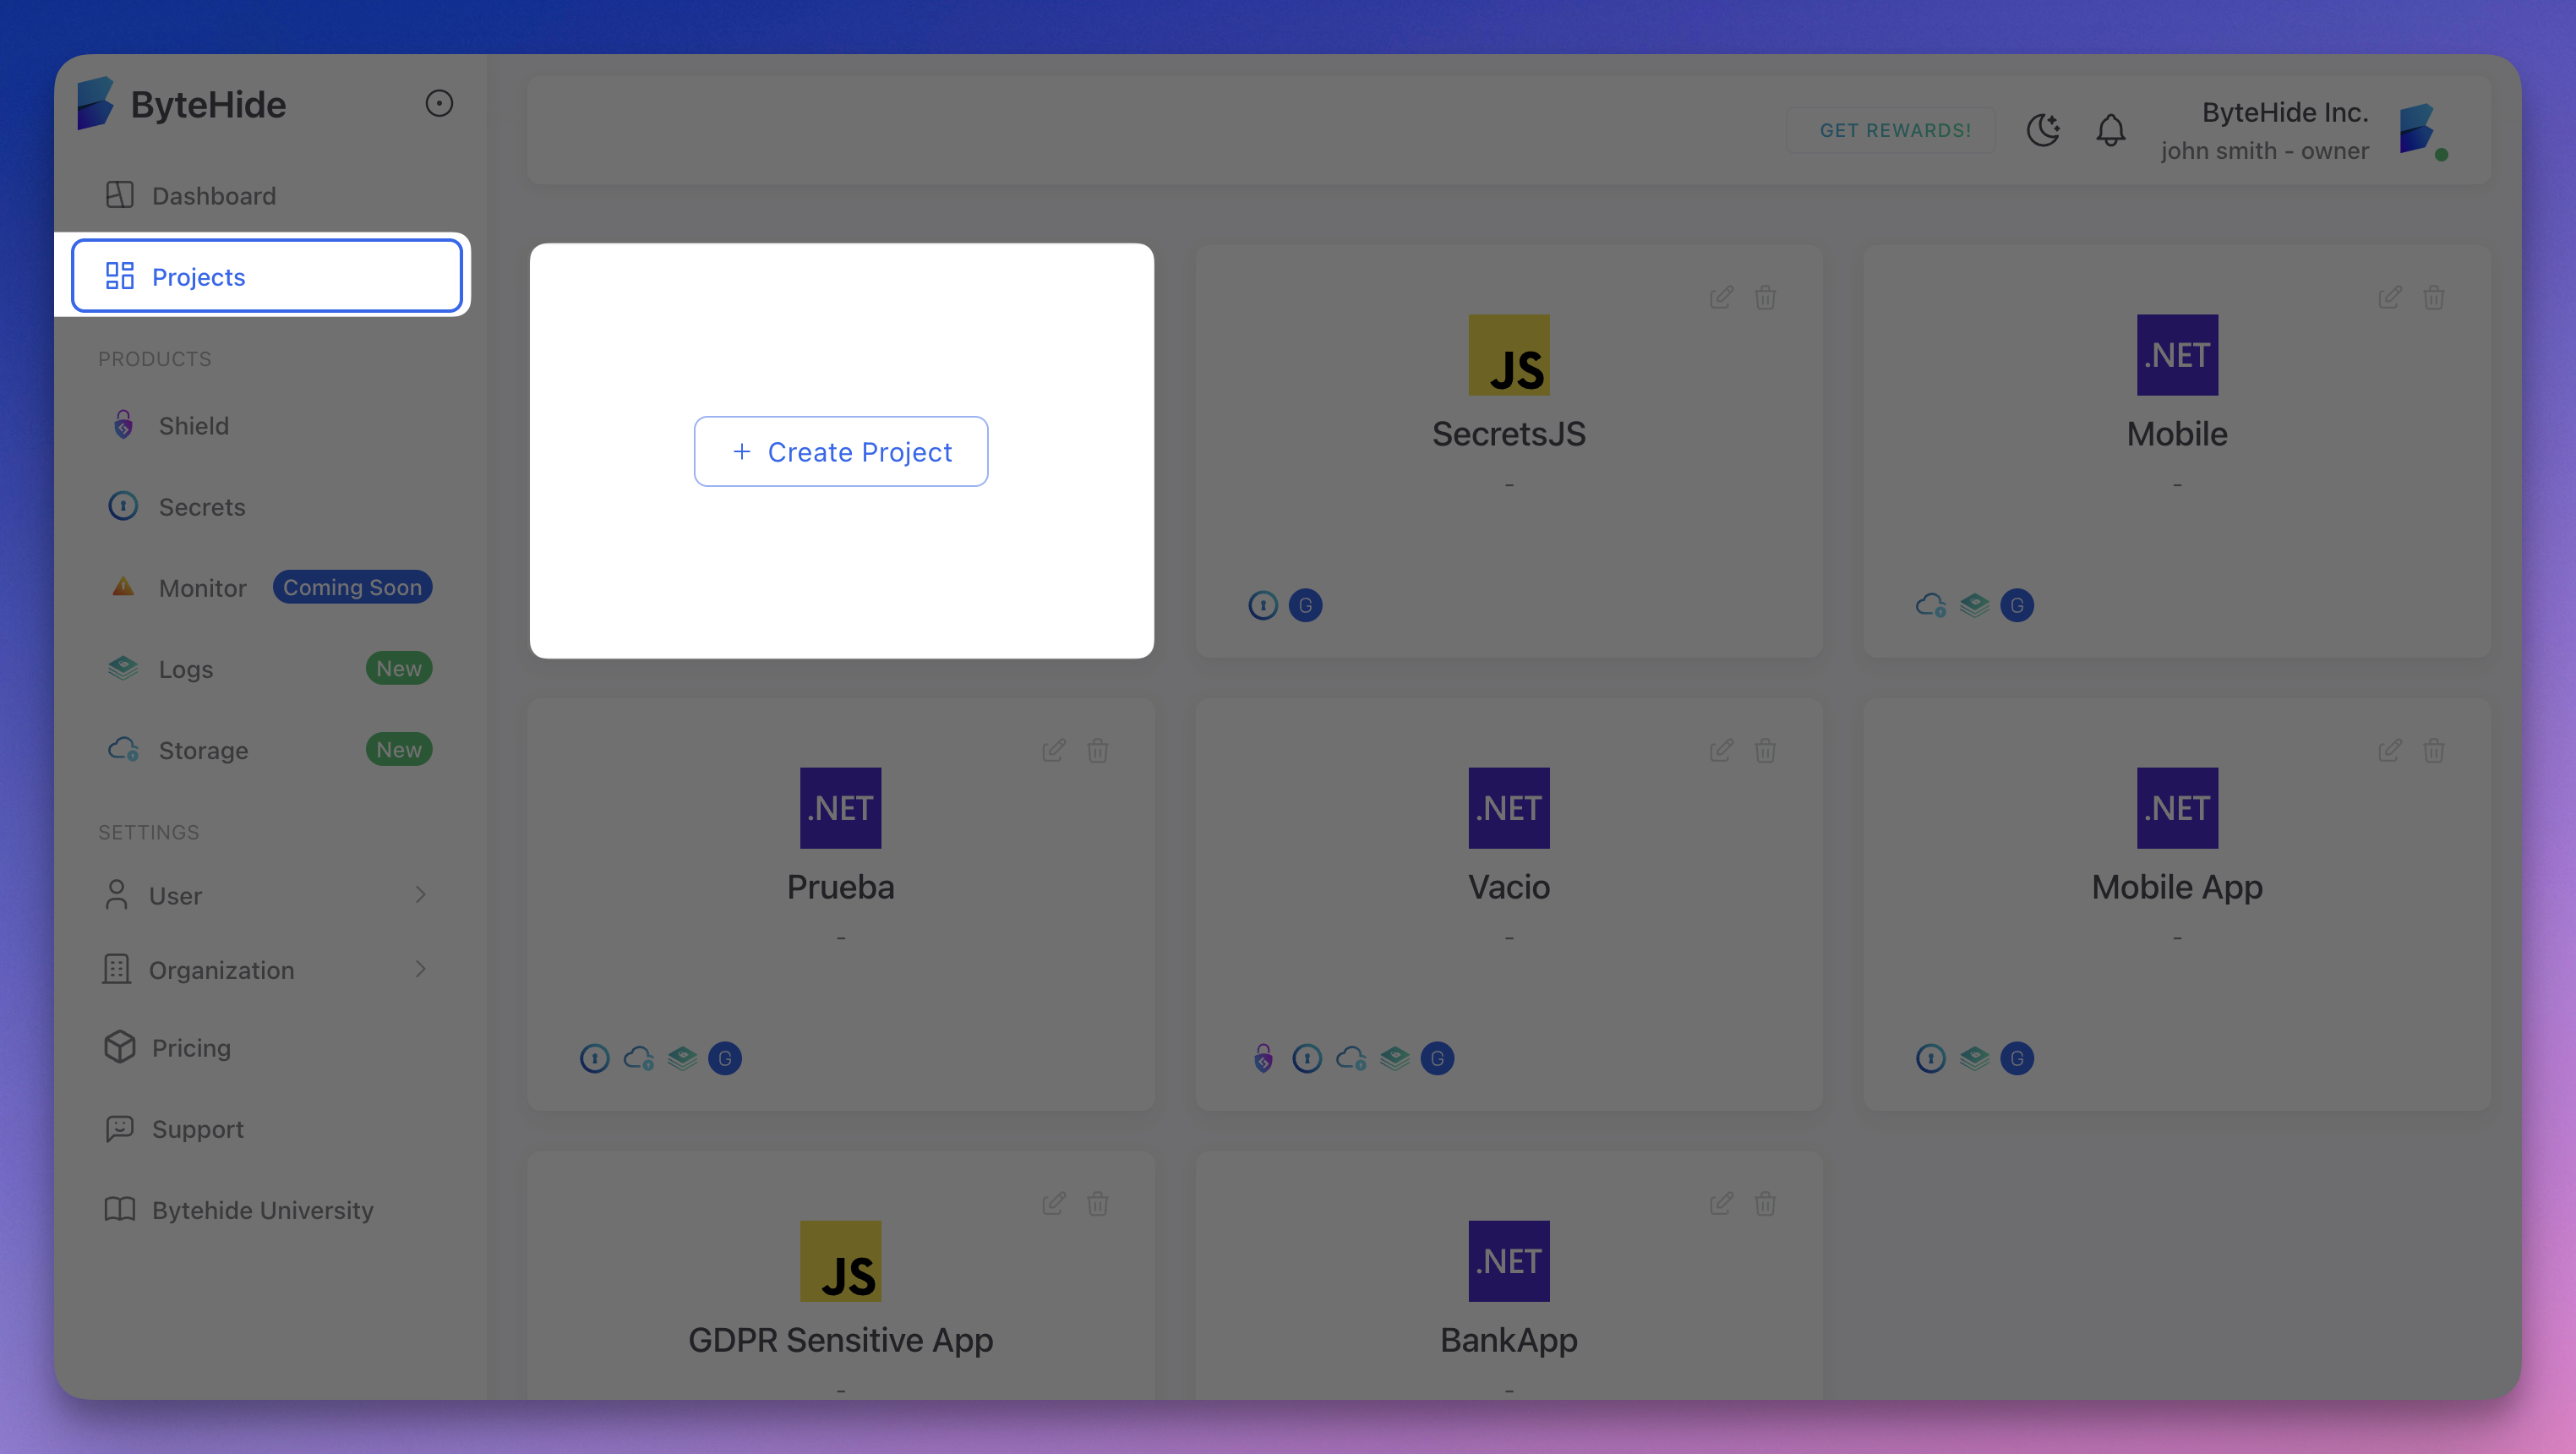 Click to expand
 - Click Create Project in the dashboard
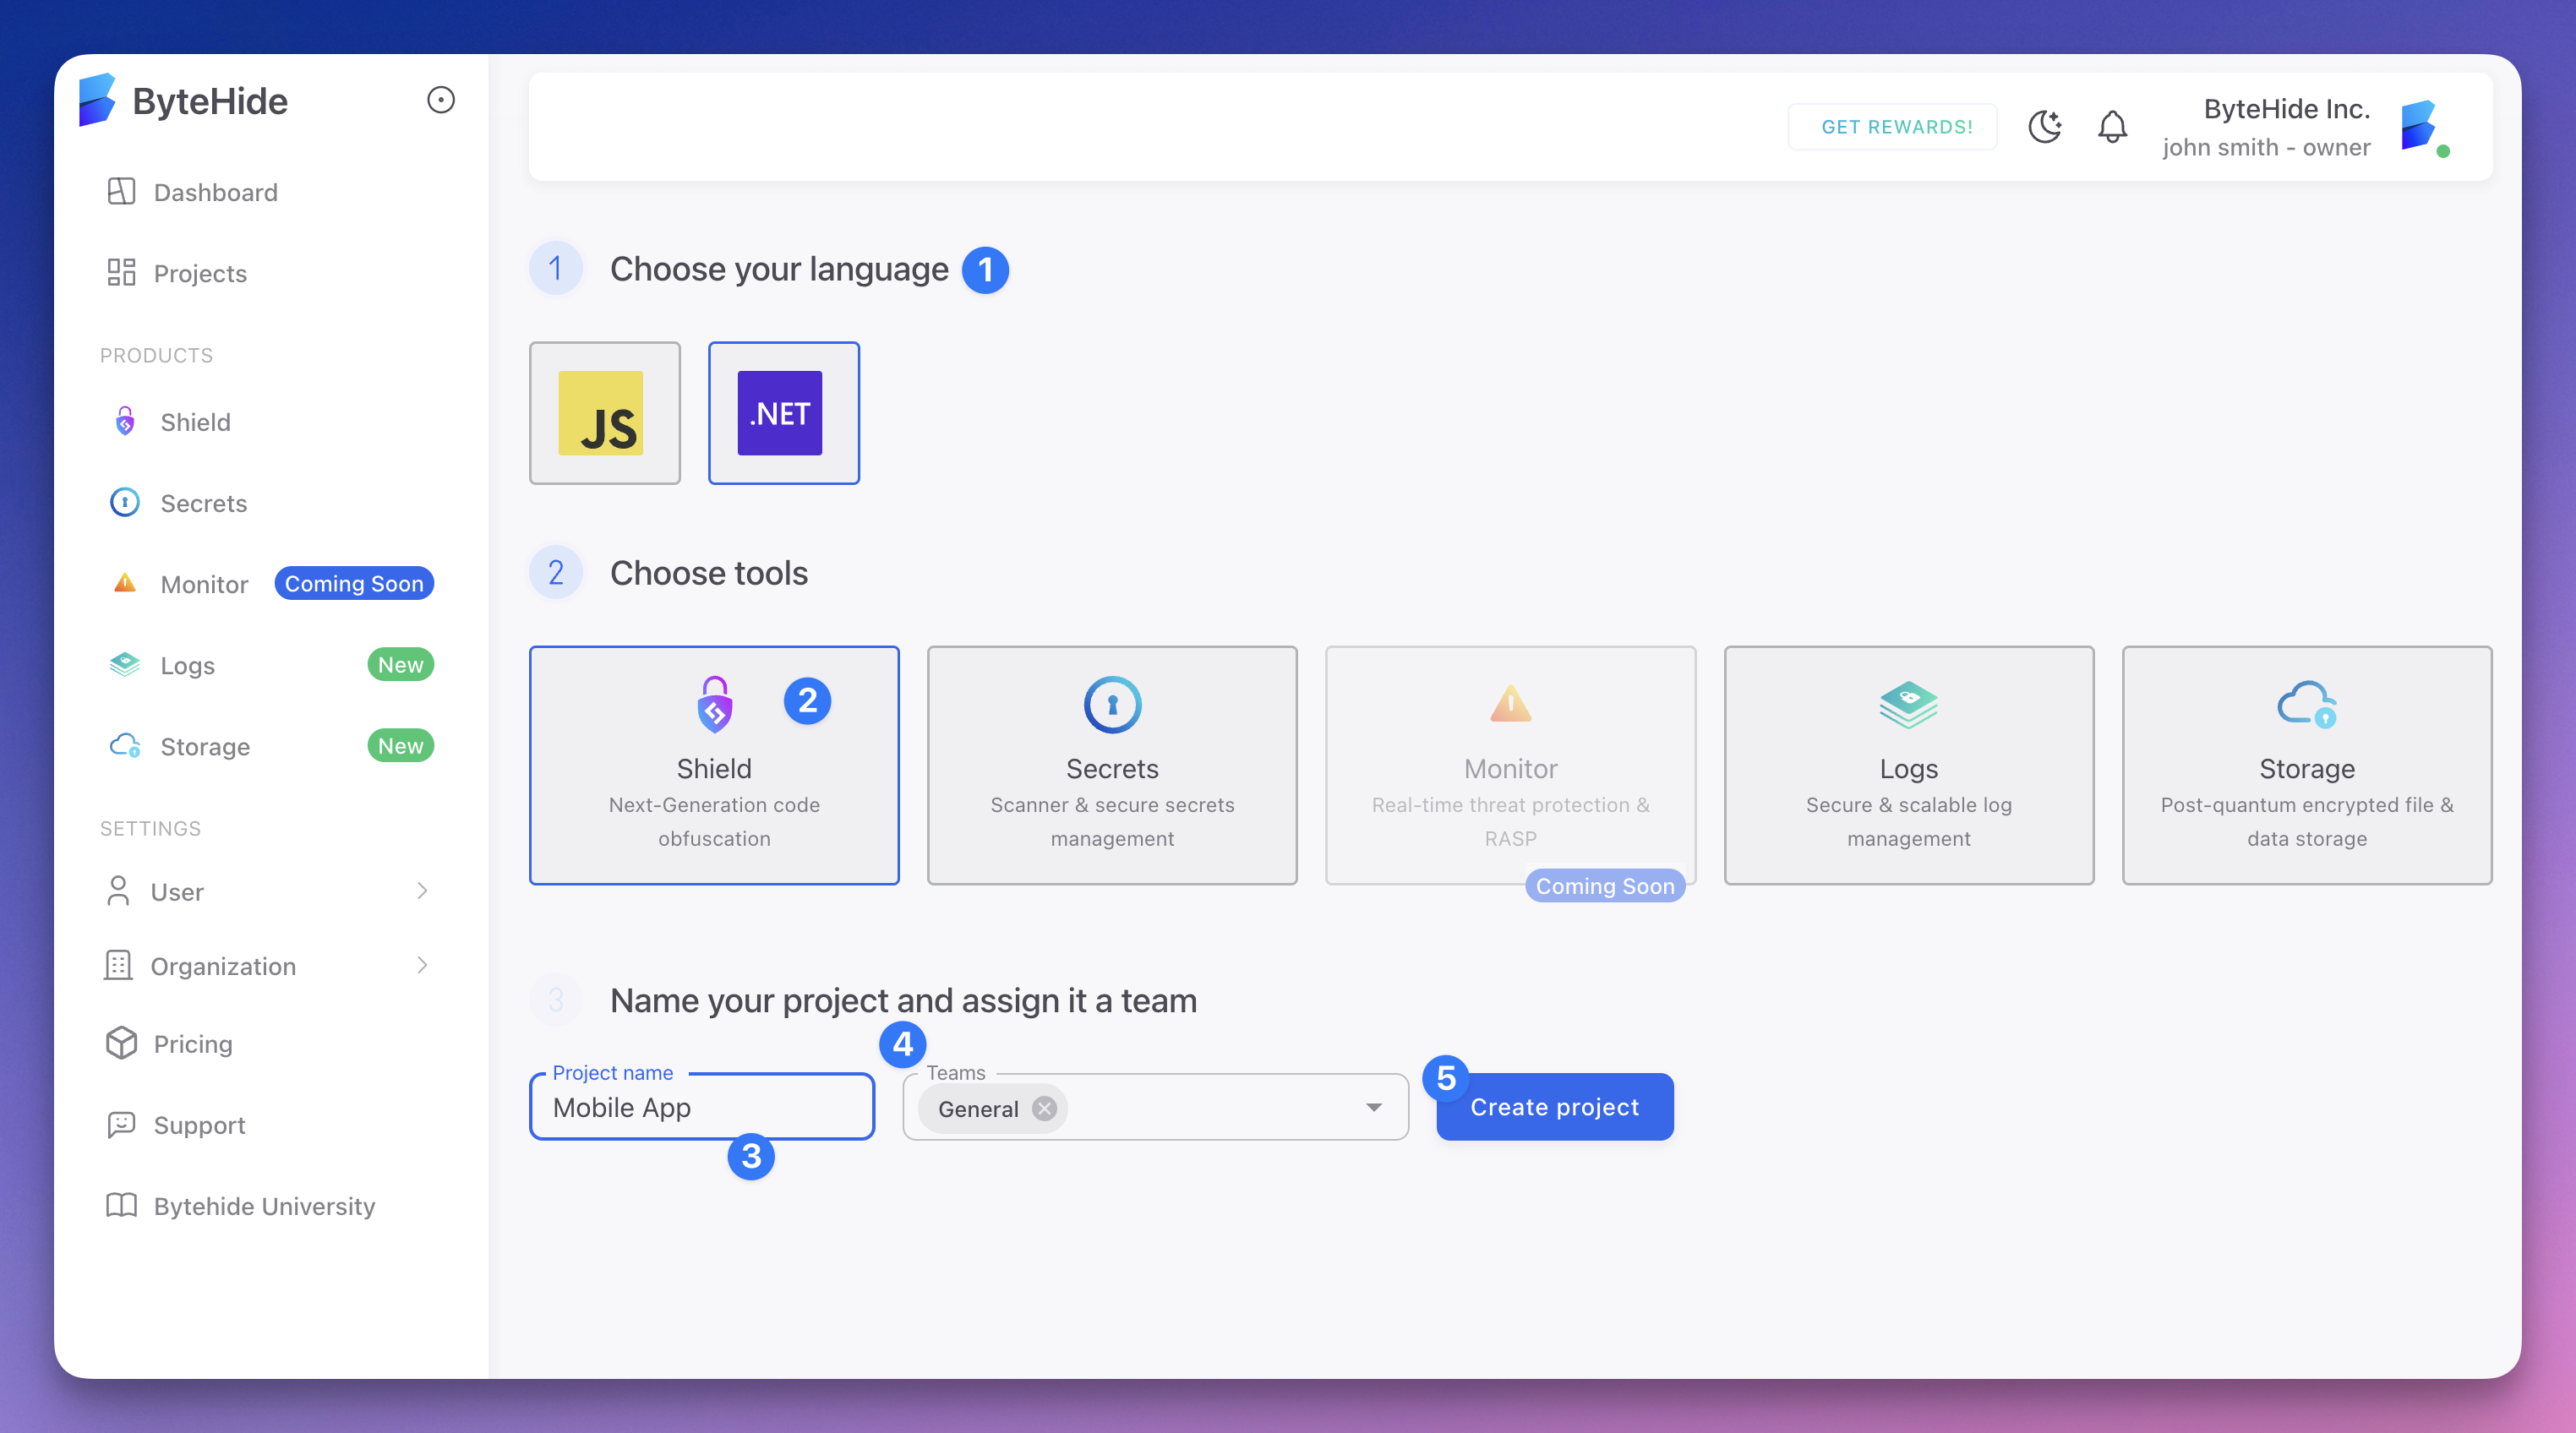 Click to expand
 - Choose javascript as your language
- Choose Shield in tools
- Type the name of your project
- Select the groups that will have access to your project
🎉 your project is set!
Get Your Project Token
After creating your project, you'll need the project token to protect your applications:
- Go to your Shield project
- In the main view you will see the Project token box
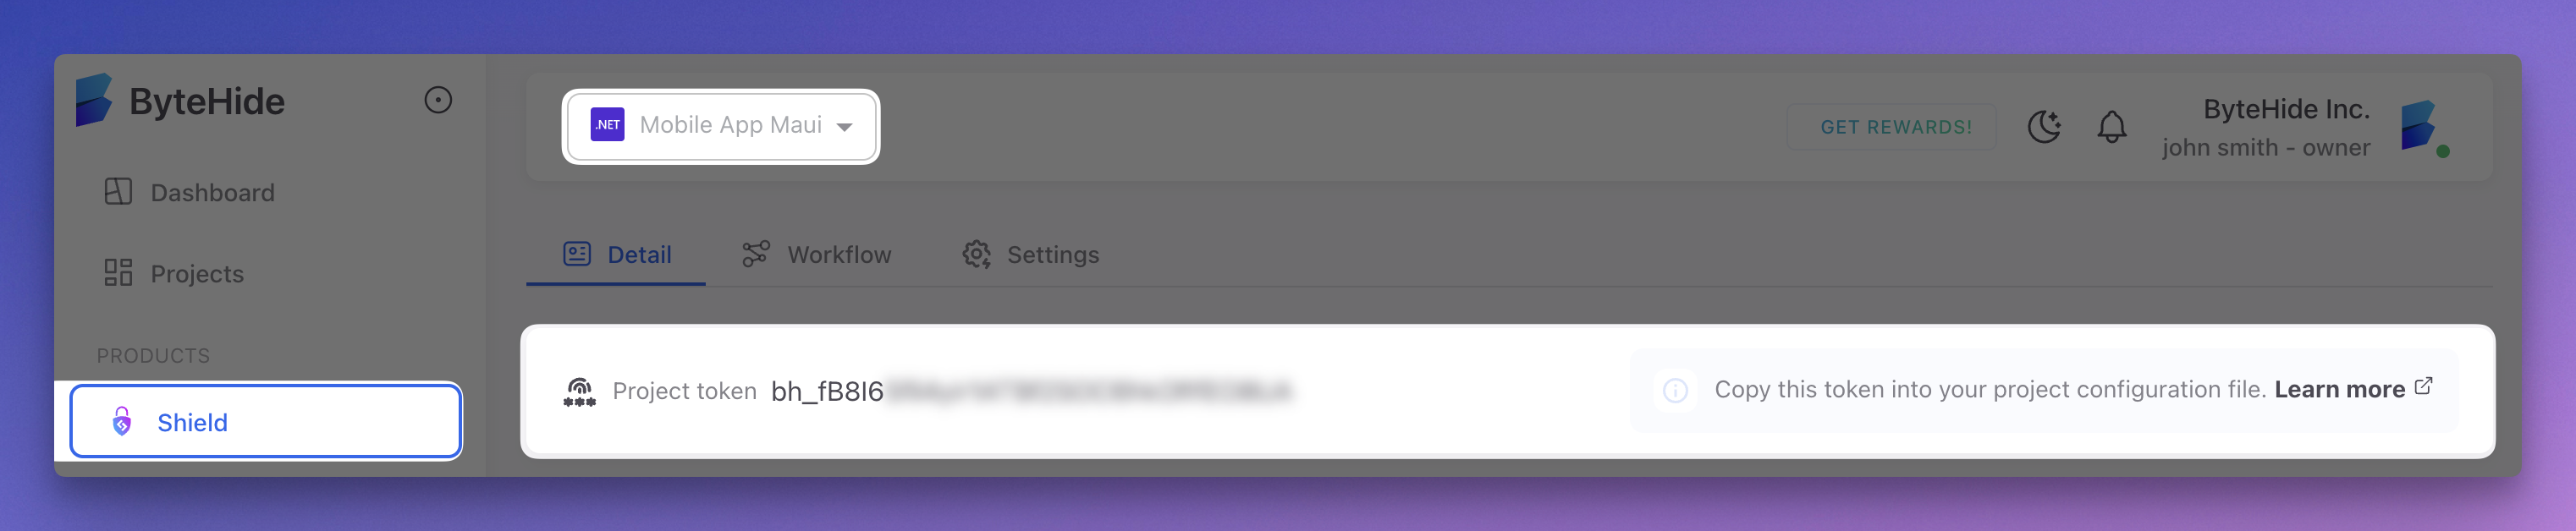 Click to expand
 - Copy your project token
Using Your Project Token
Your project token is used in all Shield integrations:
With Next.js
JavaScript
// next.config.js
const { createShield } = require('@bytehide/next-shield');

const nextConfig = {
  // Your Next.js configuration
};

module.exports = createShield({
  projectToken: 'your-project-token', // Add your token here
  // Other Shield options
}, nextConfig);
// next.config.js
const { createShield } = require('@bytehide/next-shield');
const nextConfig = {
// Your Next.js configuration
};
module.exports = createShield({
projectToken: 'your-project-token', // Add your token here
// Other Shield options
}, nextConfig);With Webpack
JavaScript
// webpack.config.js
const ByteHideShieldPlugin = require('@bytehide/webpack-shield');

module.exports = {
  // ...other webpack configuration
  plugins: [
    new ByteHideShieldPlugin({
      projectToken: 'your-project-token', // Add your token here
      // Other Shield options
    })
  ]
};
// webpack.config.js
const ByteHideShieldPlugin = require('@bytehide/webpack-shield');
module.exports = {
// ...other webpack configuration
plugins: [
new ByteHideShieldPlugin({
projectToken: 'your-project-token', // Add your token here
// Other Shield options
})
]
};With Rollup
JavaScript
// rollup.config.js
import bytehideShield from '@bytehide/rollup-shield';

export default {
  // ...your rollup config
  plugins: [
    bytehideShield({
      projectToken: 'your-project-token', // Add your token here
      // Other Shield options
    })
  ]
};
// rollup.config.js
import bytehideShield from '@bytehide/rollup-shield';
export default {
// ...your rollup config
plugins: [
bytehideShield({
projectToken: 'your-project-token', // Add your token here
// Other Shield options
})
]
};With CLI
Bash
shield protect --project-token your-project-token input.js -o output.jsshield protect --project-token your-project-token input.js -o output.jsSecurity Notice
Your project token is sensitive data. We recommend using environment variables or a secret manager like ByteHide Secrets to store it securely and never commit it to source control.
Project Settings
In the ByteHide Cloud panel, you can configure:
- Protection Profiles: Set up different protection configurations
- Access Control: Manage team access and permissions
- Analytics: View protection attempts and success rates
- Integrations: Set up CI/CD and webhook integrations
Next Steps
Choose your integration method: