Scanner Configuration
Configuration File
The Secret Scanner is configured using a JSON file named bytehide.secrets.json in your project root. This file controls all aspects of the scanner's behavior.
{
  "token": "<your-project-token>",
  "appName": "My JavaScript Project",
  "environment": "production",
  "sync": true,
  "report": "security/scan-results.json",
  "reportFormat": "json",
  "anonymize": false,
  "fix": true
}
{
"token": "<your-project-token>",
"appName": "My JavaScript Project",
"environment": "production",
"sync": true,
"report": "security/scan-results.json",
"reportFormat": "json",
"anonymize": false,
"fix": true
}Required Settings
Security Best Practice
It's recommended to use environment variables for sensitive settings rather than storing them in your configuration file. This helps prevent accidental secret exposure.
| Setting | Description |
|---|---|
token | Your ByteHide project token. For better security, use the BYTEHIDE_SECRETS_TOKEN environment variable instead. |
environment | The environment context (e.g., "development", "staging", "production"). Can be set with BYTEHIDE_SECRETS_ENVIRONMENT (defaults to "production" if missing). |
Optional Settings
| Setting | Default | Description |
|---|---|---|
appName | "MyApp" | A custom name for this scanner configuration. |
sync | true | Export detected secrets to ByteHide Secrets Manager. |
report | "" | Path to export a local report file (empty for no report). |
reportFormat | "json" | Format for local reports ("json" or "yaml"). |
anonymize | false | Mask actual secret values in logs and reports. |
fix | false | Automatically replace detected secrets with secure calls (makes changes to your local code). |
Actions Configuration
Fix Action
Code Modification
When the fix option is enabled, the scanner will modify your code files locally with the changes, which you can review and commit to your repository.
The fix action automatically:
- Detects hardcoded secrets in your code
- Exports them to the ByteHide Secrets Manager
- Replaces the original code with a secure call using the secret's key
{
  "fix": true
}
{
"fix": true
}How Code Transformation Works
For example, if your original code contains a hardcoded secret:
// Original code with hardcoded secret
const stripeKey = "sk_live_51HJ8D9GQcJJcDNgmRpZ...";
const apiKey = "AIzaSyDKl9jK23dT...";

function processPayment() {
  // Using the hardcoded key
  const stripe = new Stripe(stripeKey);
  // ...
}
// Original code with hardcoded secret
const stripeKey = "sk_live_51HJ8D9GQcJJcDNgmRpZ...";
const apiKey = "AIzaSyDKl9jK23dT...";
function processPayment() {
// Using the hardcoded key
const stripe = new Stripe(stripeKey);
// ...
}When the fix action is enabled, the scanner will:
- Detect these secrets
- Export them to your ByteHide Secrets Manager with auto-generated keys
- Modify your code as follows:
// Modified code after scanner fix action
import { SecretsManager } from "@bytehide/secrets";

// Secrets are now retrieved securely
const stripeKey = await SecretsManager.get("auto_stripe_live_key");
const apiKey = await SecretsManager.get("auto_google_api_key");

function processPayment() {
  // Using the secure reference
  const stripe = new Stripe(stripeKey);
  // ...
}
// Modified code after scanner fix action
import { SecretsManager } from "@bytehide/secrets";
// Secrets are now retrieved securely
const stripeKey = await SecretsManager.get("auto_stripe_live_key");
const apiKey = await SecretsManager.get("auto_google_api_key");
function processPayment() {
// Using the secure reference
const stripe = new Stripe(stripeKey);
// ...
}The scanner detects the context in which the secret is used and creates appropriate replacement code, handling both synchronous and asynchronous contexts correctly.
CLI Commands
Configure the scanner behavior using command-line arguments that override the JSON configuration:
Initialization
npx bytehide-secrets initnpx bytehide-secrets initThis interactive wizard helps you set up your scanner configuration.
Manual Scanning
npx bytehide-secrets scan [options]npx bytehide-secrets scan [options]| Option | Description |
|---|---|
--path | Path to scan (defaults to current directory) |
--token | ByteHide project token |
--appName | Application name for identification |
--environment | Environment name |
--sync | Export to ByteHide Secrets Manager (true/false) |
--report | Path for local report file |
--reportFormat | Report format (json/yaml) |
--anonymize | Mask secret values (true/false) |
--fix | Replace secrets with secure calls (true/false) |
Example:
npx bytehide-secrets scan --path ./src --report ./reports/secrets.json --fix truenpx bytehide-secrets scan --path ./src --report ./reports/secrets.json --fix trueReport Option
The report option creates a local report file with details about detected secrets in your local repository or directory. The report is saved in JSON format and includes comprehensive information about each detected secret:
{
  "scan": {
    "path": "/path/to/your/project",
    "appName": "your-project-name",
    "secretsFound": 5,
    "time": "2025-03-28T16:25:14.828Z"
  },
  "leaks": [
    {
      "line": 5,
      "file": "/path/to/your/project/src/app.js",
      "secret": "sk_test_51Hxxxx...",
      "key": "auto-stripe-secret-key-873190",
      "rule": "Stripe Secret Key",
      "confidence": "high",
      "snippet": "const stripeApiKey = \"sk_test_51Hxxxx...\";\nconsole.log(stripeApiKey);",
      "discoveredBy": "pattern"
    }
    // Additional detected secrets...
  ]
}
{
"scan": {
"path": "/path/to/your/project",
"appName": "your-project-name",
"secretsFound": 5,
"time": "2025-03-28T16:25:14.828Z"
},
"leaks": [
{
"line": 5,
"file": "/path/to/your/project/src/app.js",
"secret": "sk_test_51Hxxxx...",
"key": "auto-stripe-secret-key-873190",
"rule": "Stripe Secret Key",
"confidence": "high",
"snippet": "const stripeApiKey = \"sk_test_51Hxxxx...\";\nconsole.log(stripeApiKey);",
"discoveredBy": "pattern"
}
// Additional detected secrets...
]
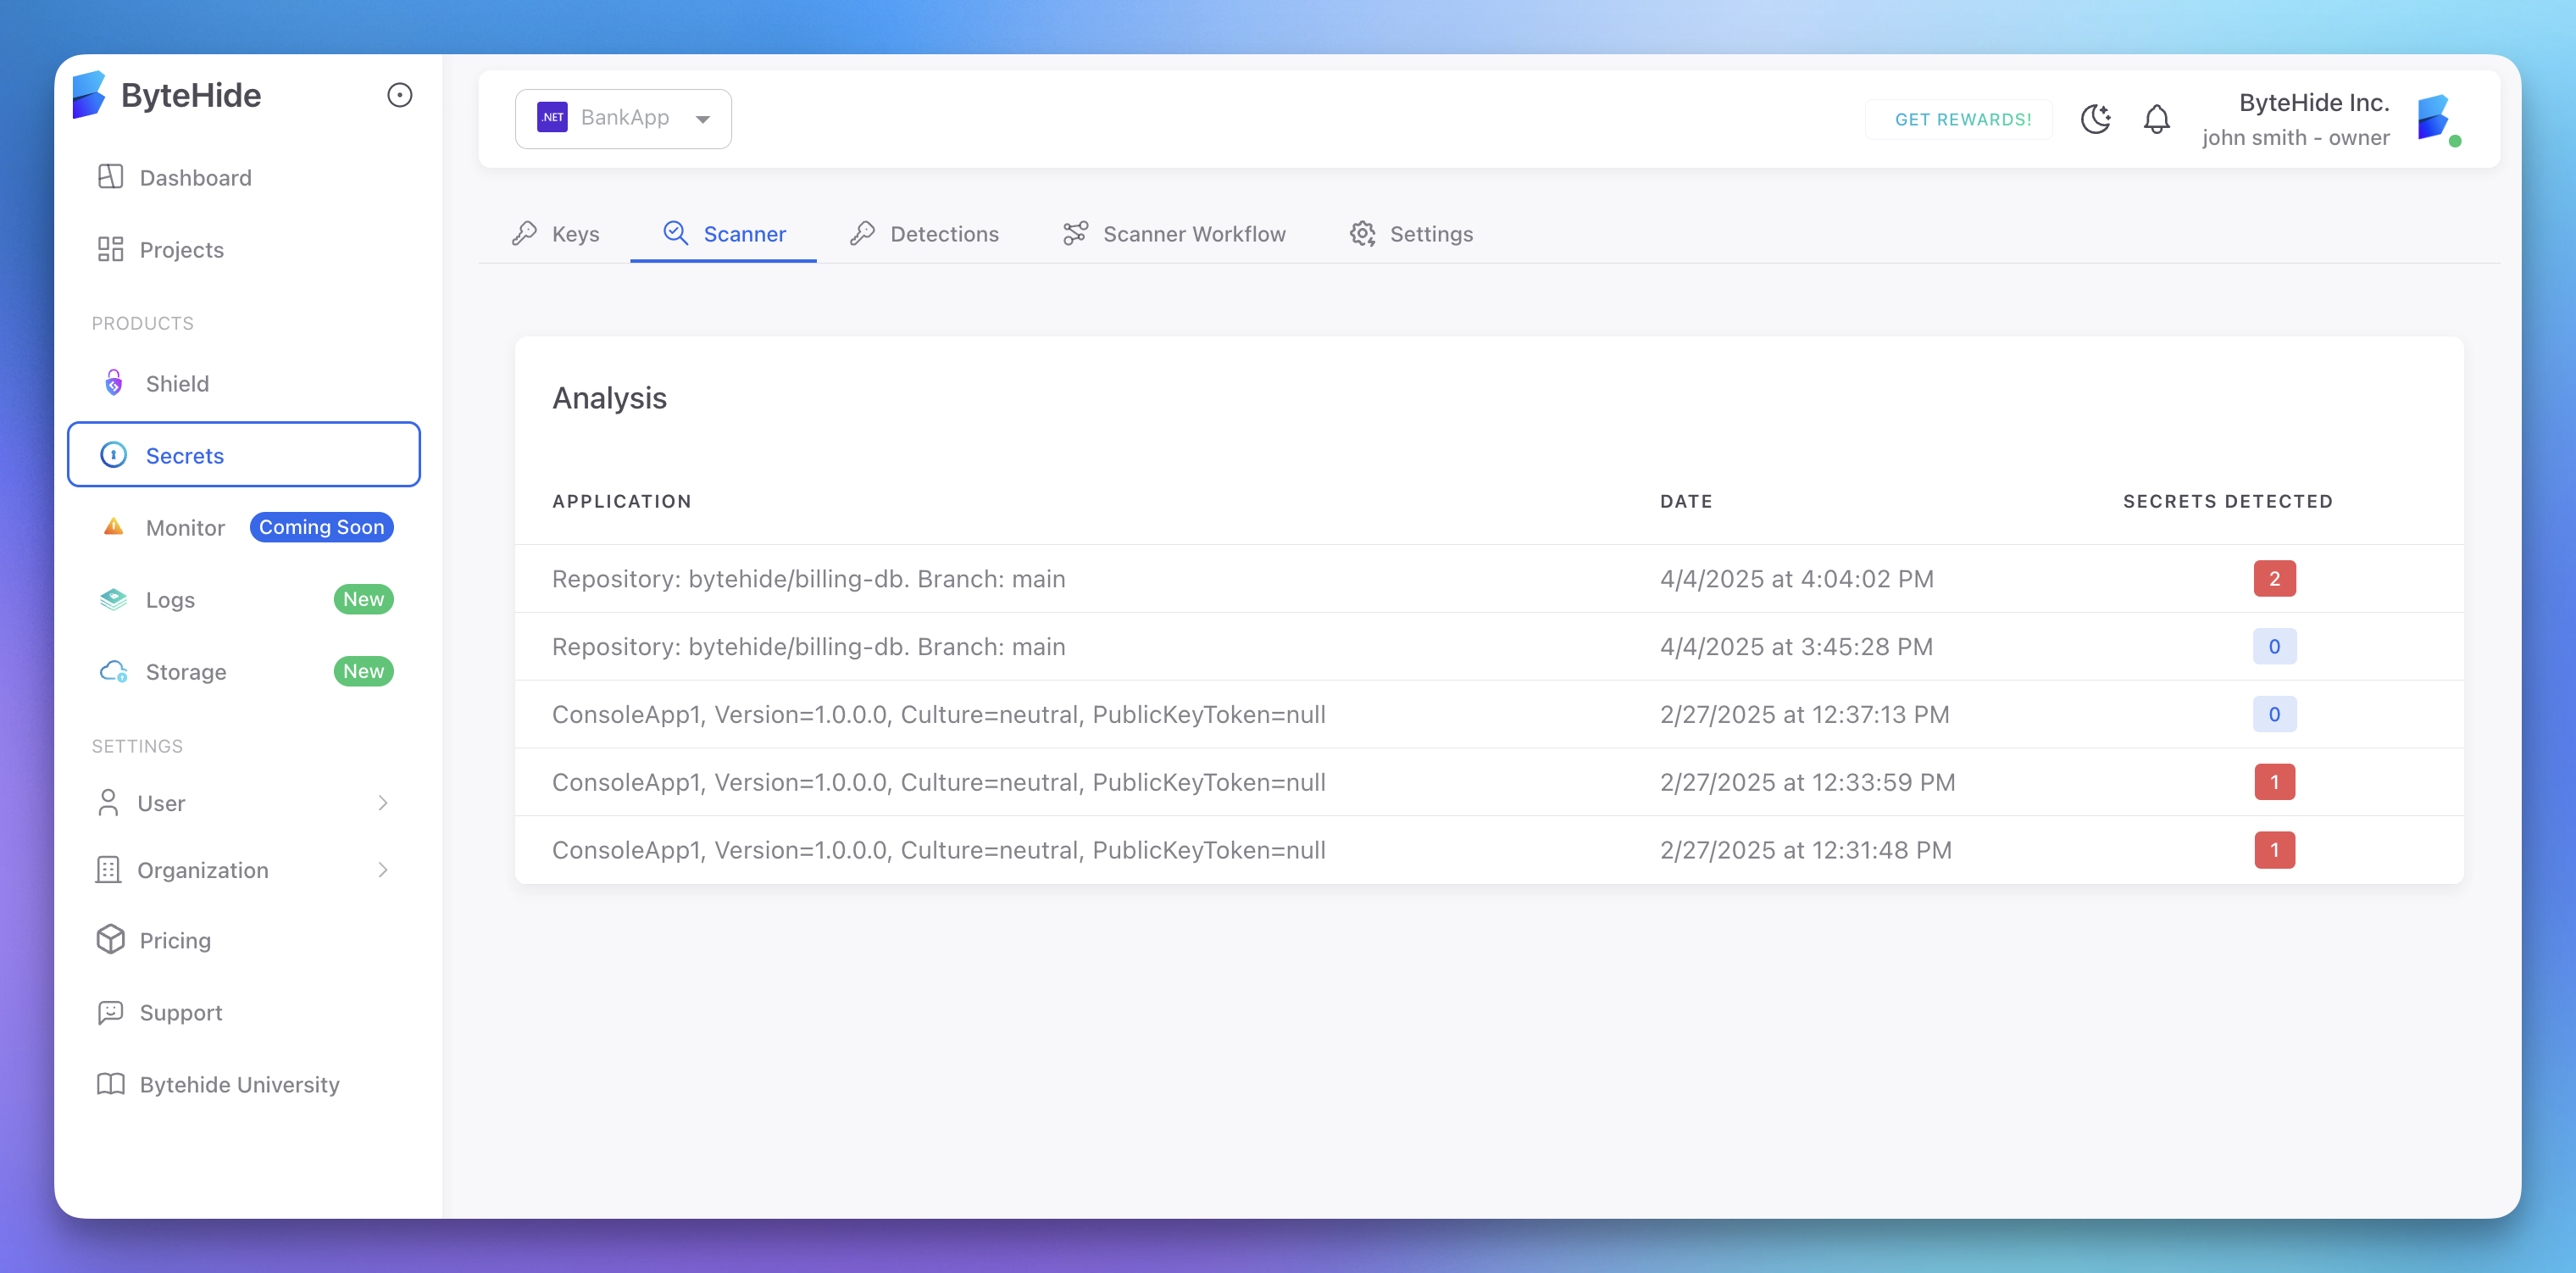
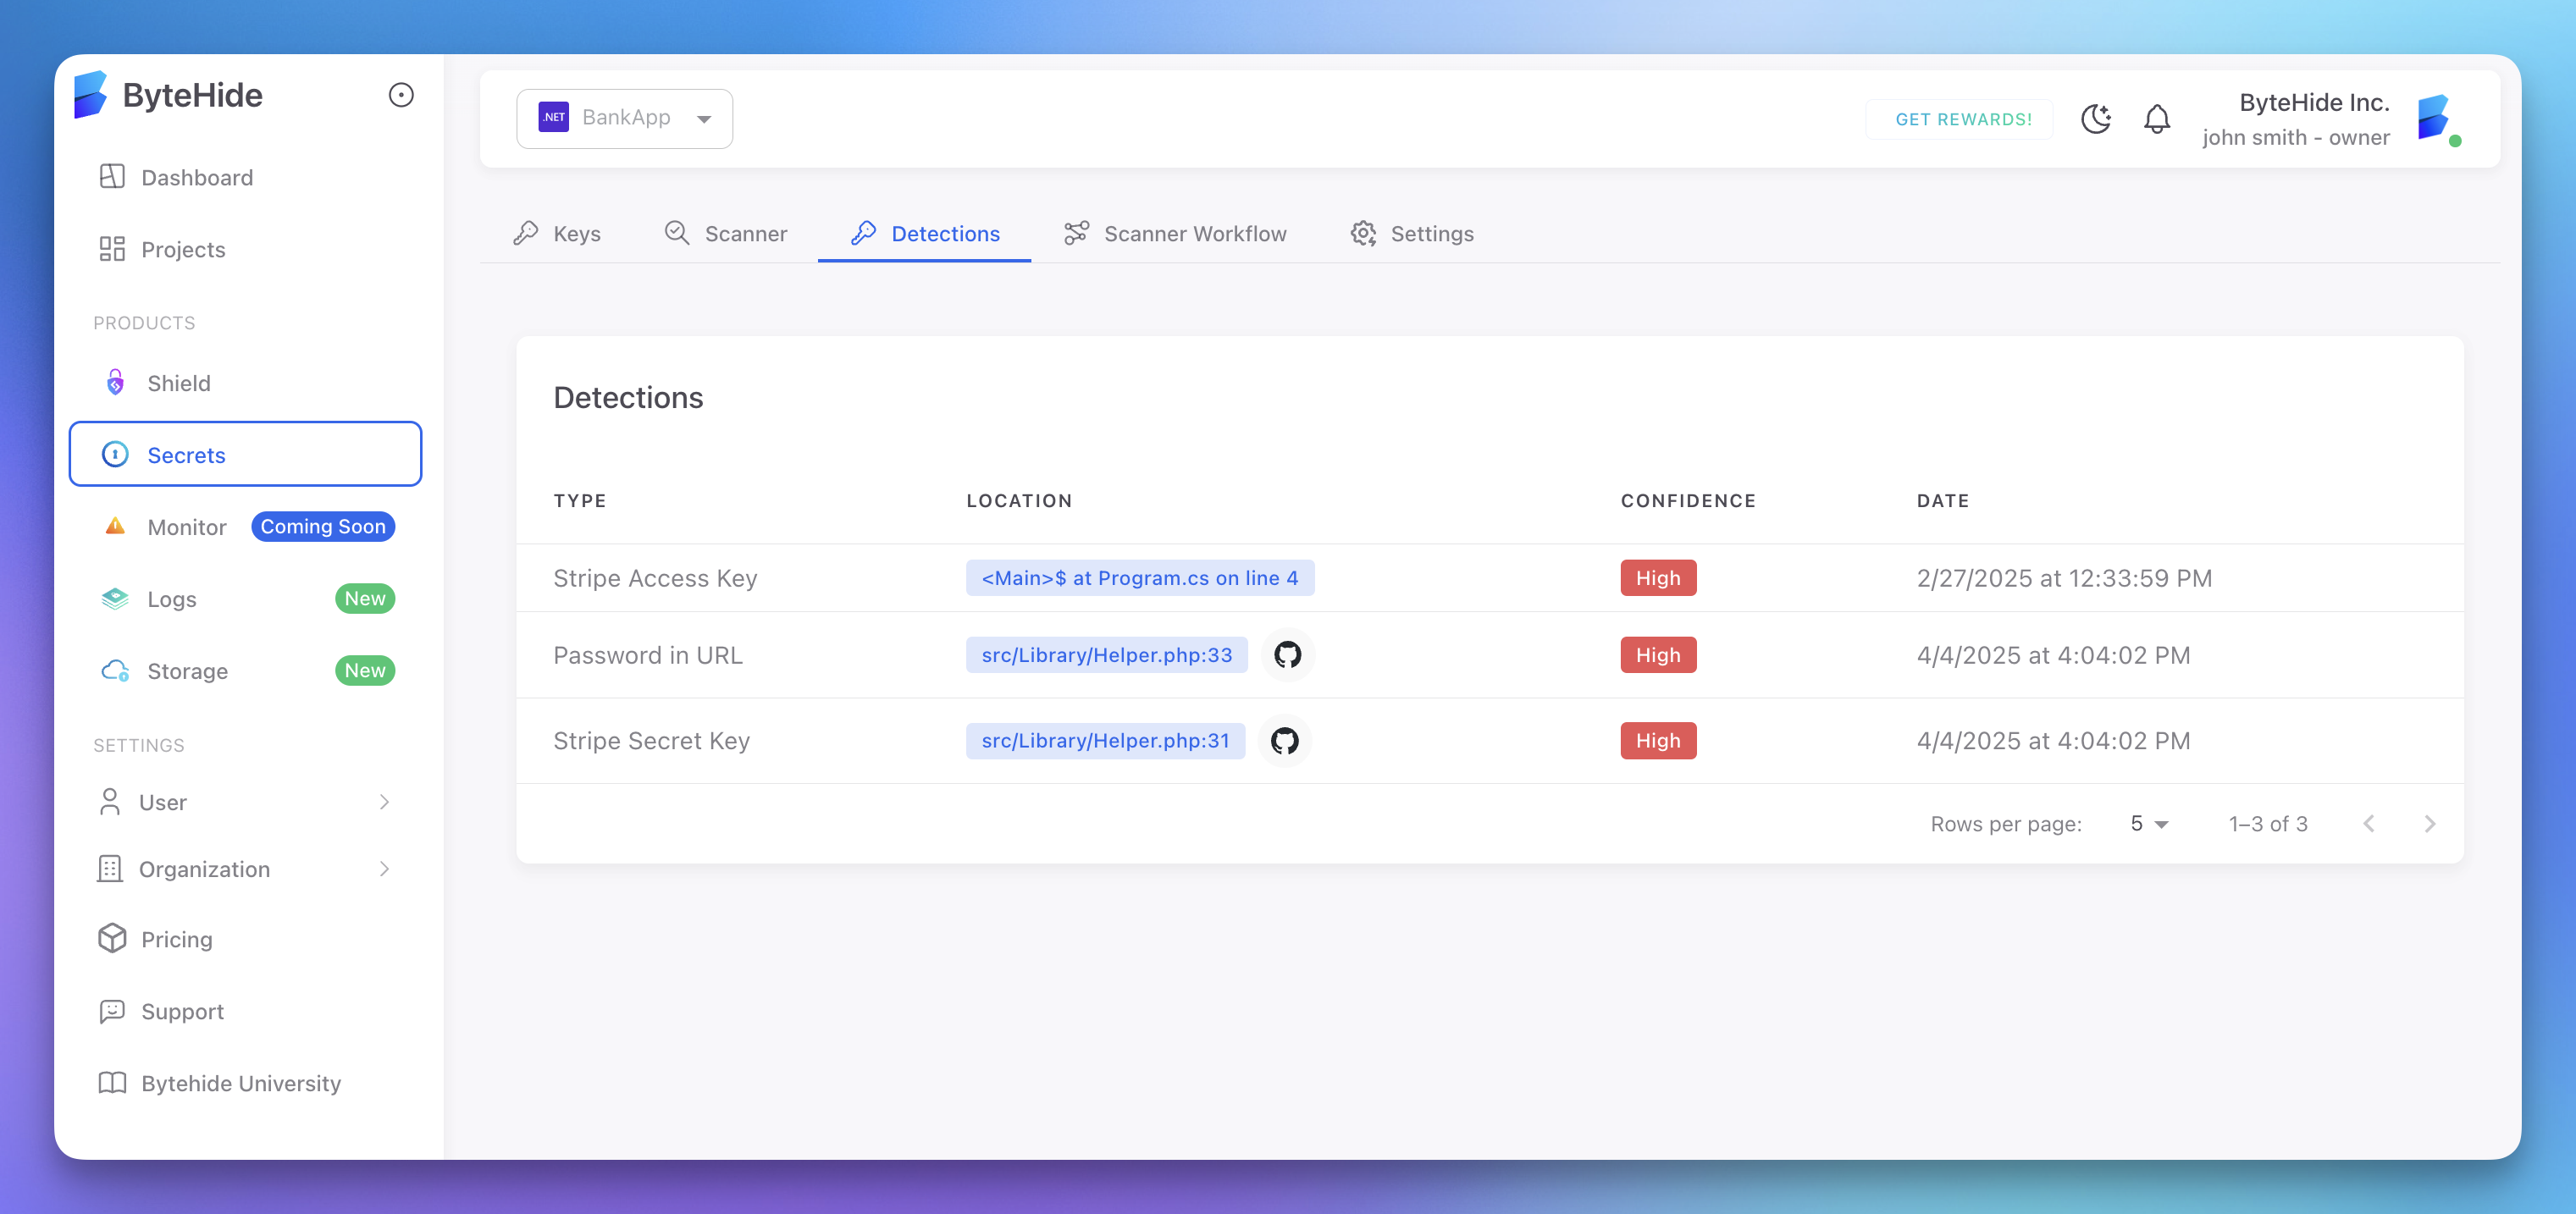
}When using your ByteHide token, all detected secrets and analysis results are also automatically available in your ByteHide dashboard, providing a centralized view regardless of where the scanner is run. The cloud dashboard offers additional features:
- Detailed view of each detected secret with metadata
- History of all scans across your projects
- Trend analysis and security insights
- Integration with your development workflow
 Click to expand
 Click to expand
Detection Capabilities
The ByteHide Secrets Scanner includes advanced detection methods:
- Pattern Matching: Identifies known secret formats from over 6,000 detection rules
- Entropy Analysis: Detects high-entropy strings that may be secrets
- Contextual Analysis: Understands variable names and surrounding code
- Post-Compilation Scanning: Analyzes built JavaScript files to catch secrets injected during build
- AI-Based Detection: Advanced AI detection capabilities are available in Enterprise versions of the product
The scanner includes specialized detectors for popular services:
- AWS (access keys, secret keys)
- Azure (SAS tokens, connection strings)
- GitHub/GitLab (access tokens)
- Stripe (secret and publishable keys)
- And many more services and platforms
Environment Variables
You can configure key settings using environment variables:
BYTEHIDE_SECRETS_TOKEN=your-project-token
BYTEHIDE_SECRETS_ENVIRONMENT=productionBYTEHIDE_SECRETS_TOKEN=your-project-token
BYTEHIDE_SECRETS_ENVIRONMENT=productionThese environment variables allow you to keep sensitive information out of your configuration files. The fix option must be specified in the JSON configuration or via command line arguments.
Configuration Precedence
Settings are applied in the following order (later overrides earlier):
- Default values
bytehide.secrets.jsonfile- Environment variables
- Command-line arguments