Quick Start with ByteHide Secrets (.NET)
Once you have installed the ByteHide Secrets Integration package, you can quickly start using it to secure your sensitive data in your .NET projects. This guide will help you get started with ByteHide Secrets Integration in Visual Studio.
If you haven't created your Secrets project yet, please do so before proceeding.
Quick Start Guide
- Install ByteHide Secrets Integration in your project.
- Authenticate ByteHide Secrets Integration with your Project Token.
- Build your project.
- ByteHide Secrets will automatically analyze and replace your sensitive data.
- Done! Your project is now protected.
- Manage your sensitive data in the ByteHide panel.
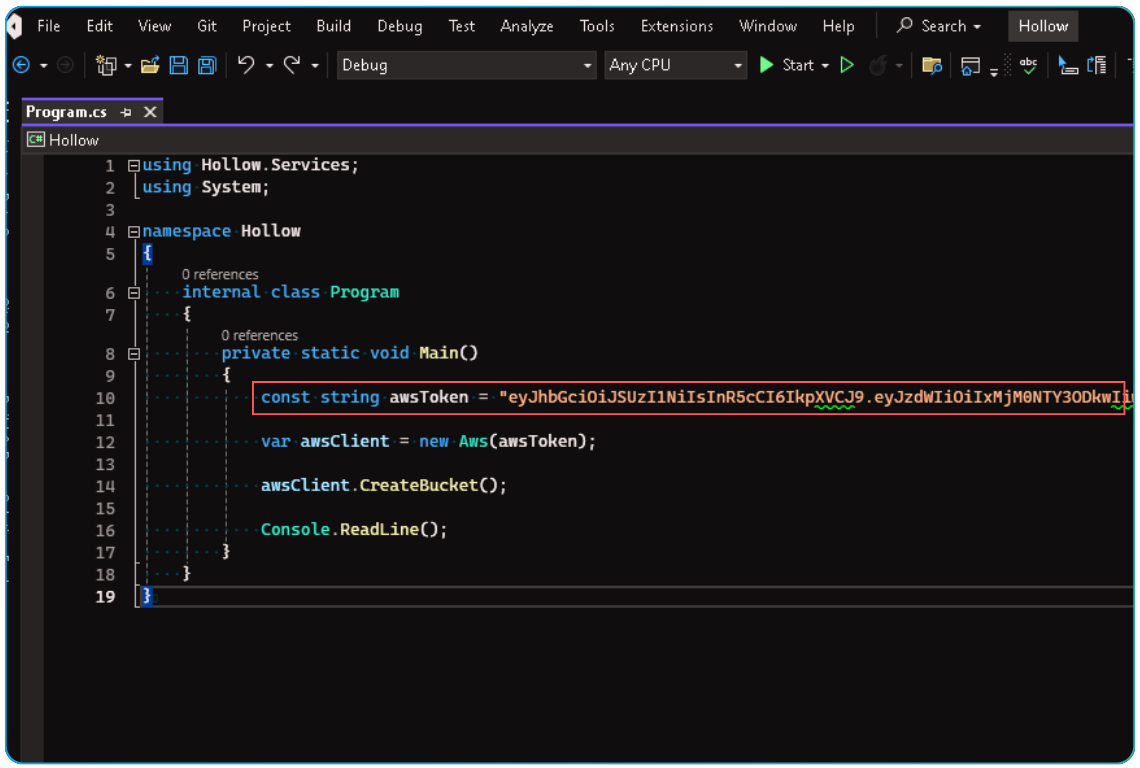
Using ByteHide Secrets Integration in Visual Studio is simple and straightforward. Once installed and authenticated with your Project Token, you only need to Build your project and ByteHide Secrets will automatically analyze and replace your sensitive data.
ByteHide Secrets will try to detect automatically your sensitive data, for example, if you have a JSON token in your code, it will be replaced by a new one.
Output
You can see the output of the ByteHide Secrets Integration process in the Visual Studio Output window.
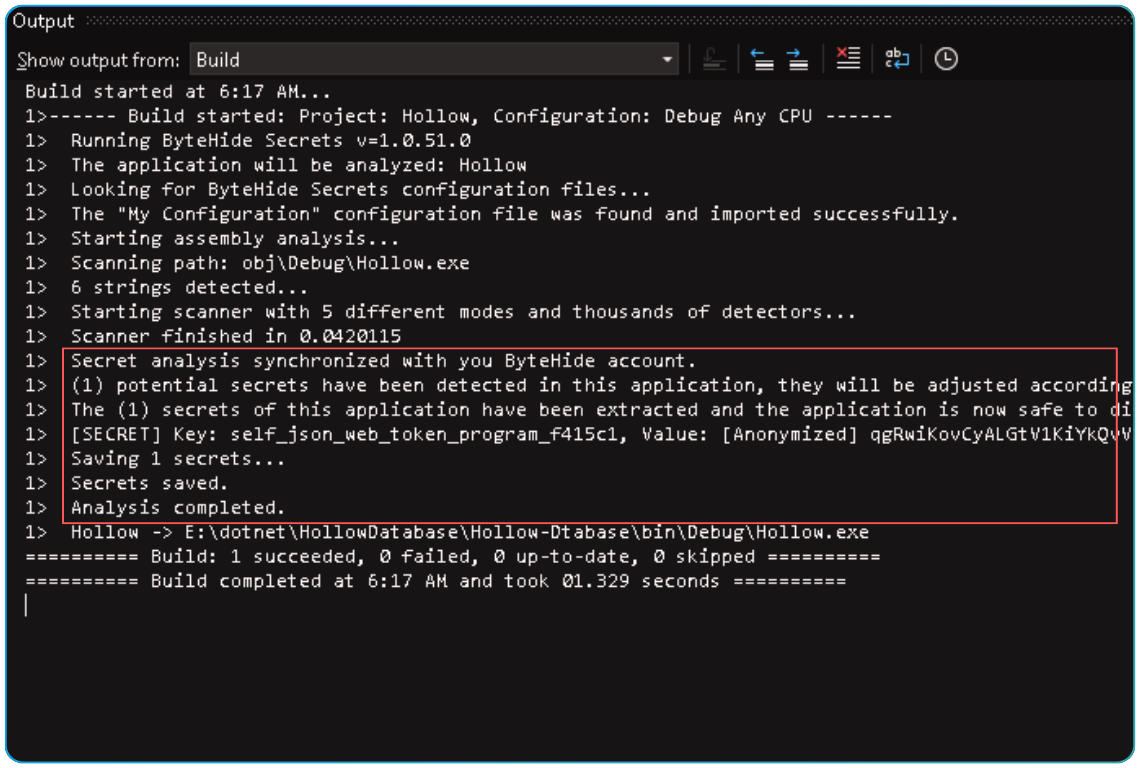
The sensitive data written in the output window or logs will be anonymized, so you can share it with your team or support.
ByteHide Secrets Panel
If you have doubts about how to create a project, please check the Create a project guide.
Go to the ByteHide panel and select your project to manage your sensitive data.
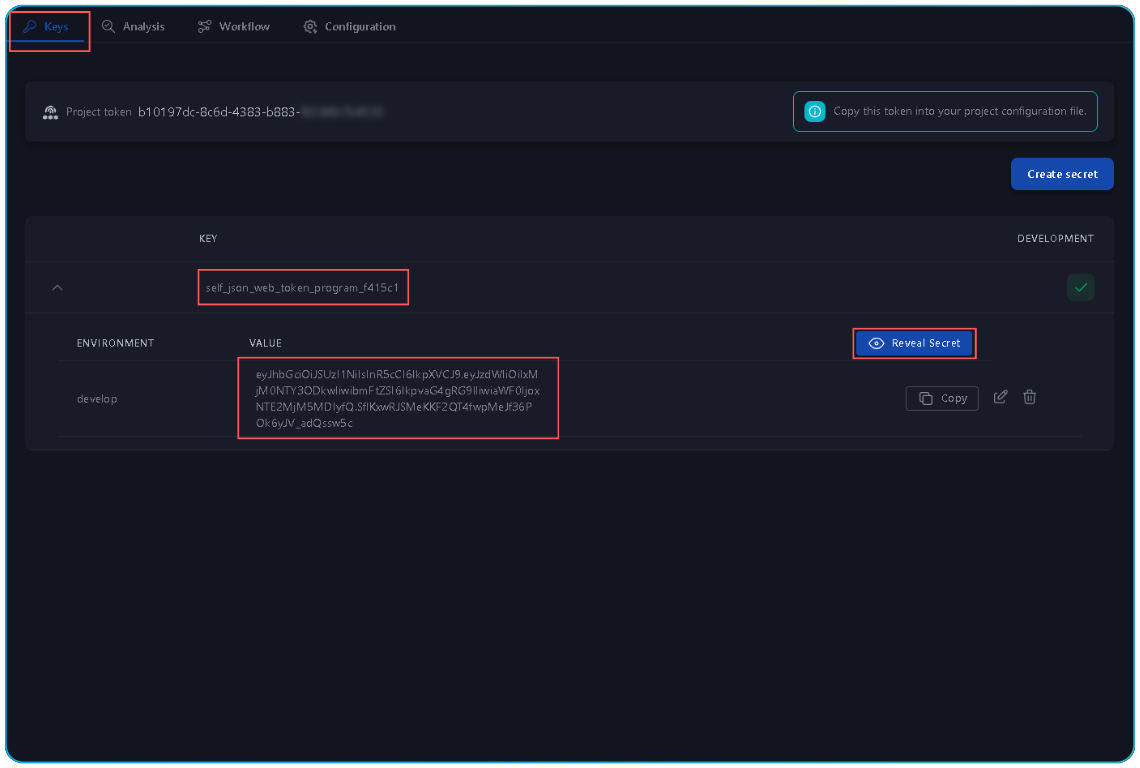
Keys tab:
This tab will show you the keys that have been detected in your code.
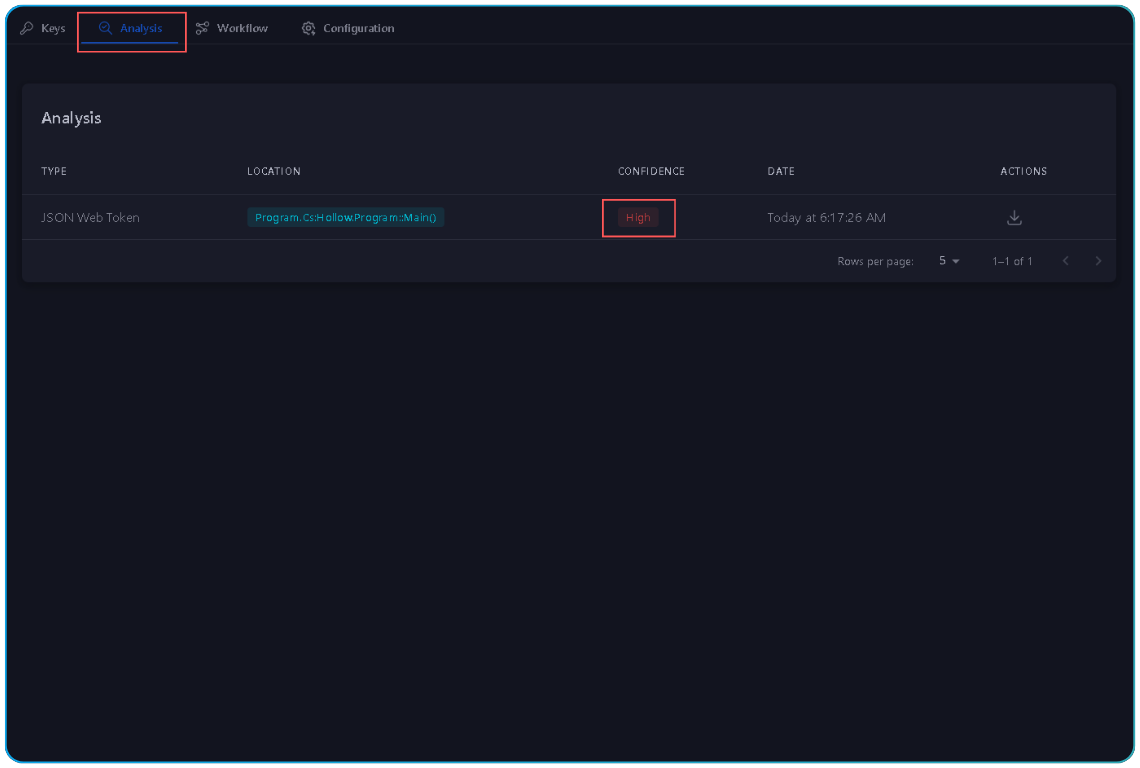
Analysis tab:
This tab will show you the analysis and details of the sensitive data that has been detected in your code.
Checking the protection
Using some tools like dnSpy, you can check the protection applied to your IL code.
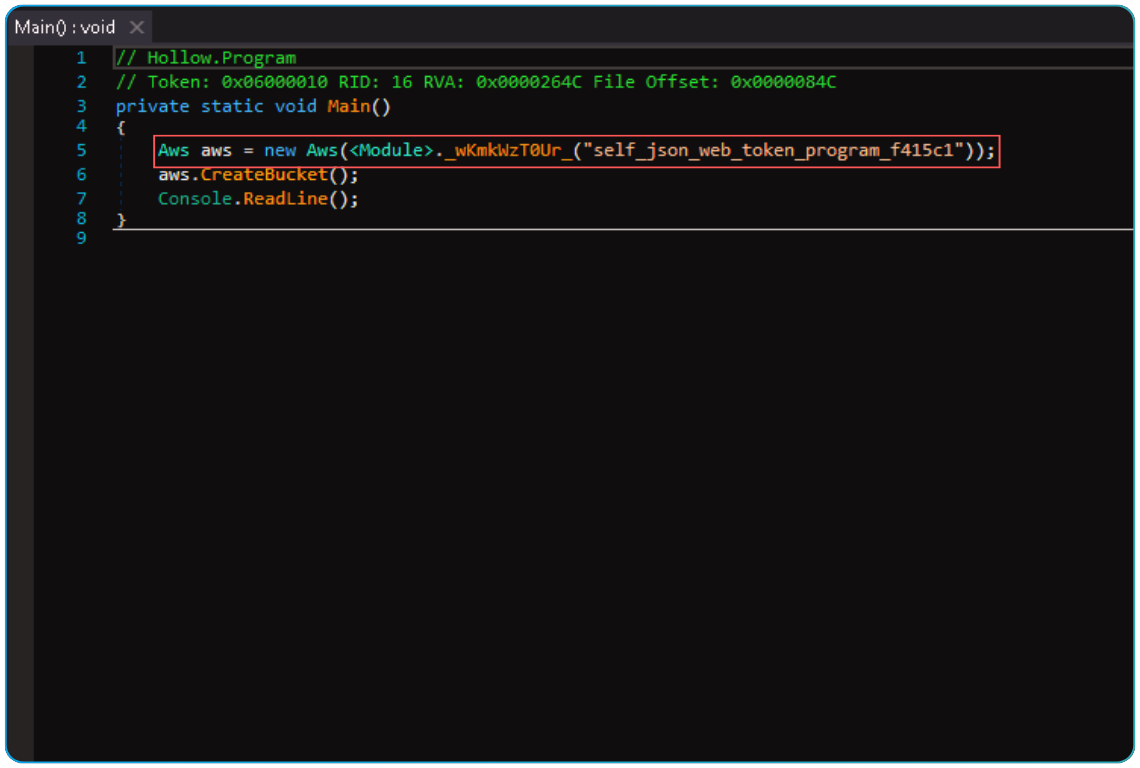
ByteHide Secrets will detect sensitive data such as a JSON token, AWS keys, Azure keys, and more.
Set manually secrets
If you want to protect some data manually, using Bytehide.ToolBox.Secrets.SecretsMarker.ThisIsASecret.
Before using the attribute, you need to install the ByteHide.ToolBox package. You can learn more about it in the ByteHide ToolBox documentation.
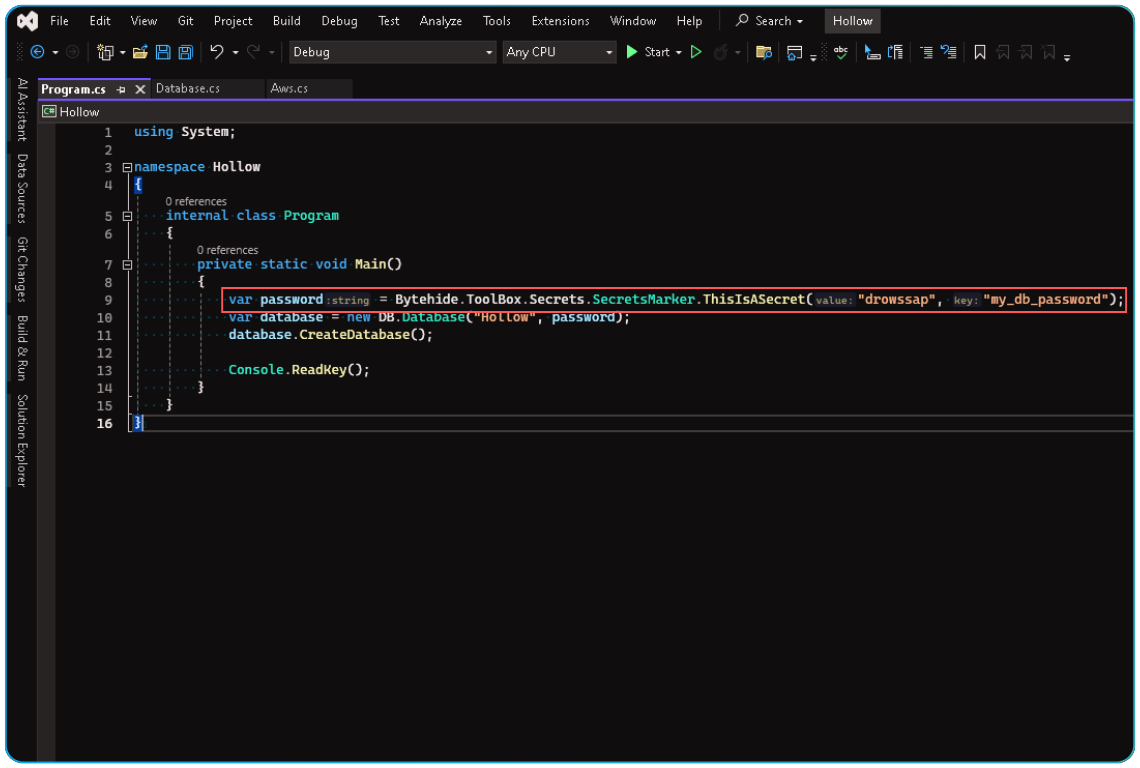
using System;

namespace Hollow
{
    internal class Program
    {
        private static void Main()
        {
            var password = Bytehide.ToolBox.Secrets.SecretsMarker.ThisIsASecret("drowssap", "my_db_password");
            var database = new DB.Database("Hollow", password);
            database.CreateDatabase();

            Console.ReadKey();
        }
    }
}
You can simplify the code by declaring using Bytehide.ToolBox.Secrets;
ThisIsASecret will protect the value of the variable password in the code using the key my_db_password.
You can also omit the key and use a key generated by ByteHide Secrets.
var password = SecretsMarker.ThisIsASecret("drowssap");
Or you can use the IsASecret extension method to protect the value of the variable password in the code using the key my_db_password.
var password = "drowssap".IsASecret("my_db_password");
The Bytehide.ToolBox.Secrets.SecretsMarker.IsASecret extension method will protect the value of the variable password in the code using the key my_db_password.
You can also omit the key and use a key generated by ByteHide Secrets.
var password = "drowssap".IsASecret();
Using attributes
You can also use the Bytehide.ToolBox.Secrets.SecretsMarker.ThisIsASecret attribute to protect the value of a property.
using System;
using Bytehide.ToolBox.Secrets;

namespace Hollow
{
    internal class Program
    {
        [ThisIsASecret("my_db_password")]
        private static readonly string _password = "drowssap";

        public static void Main()
        {
            var database = new DB.Database("Hollow", _password);
            database.CreateDatabase();

            Console.ReadKey();
        }
    }
}
The Bytehide.ToolBox.Secrets.SecretsMarker.ThisIsASecret attribute will protect the value of the property _password in the code using the key my_db_password.
You can also omit the key and use a key generated by ByteHide Secrets.
[ThisIsASecret] private static readonly string _password = "drowssap";